Airfix
1/72
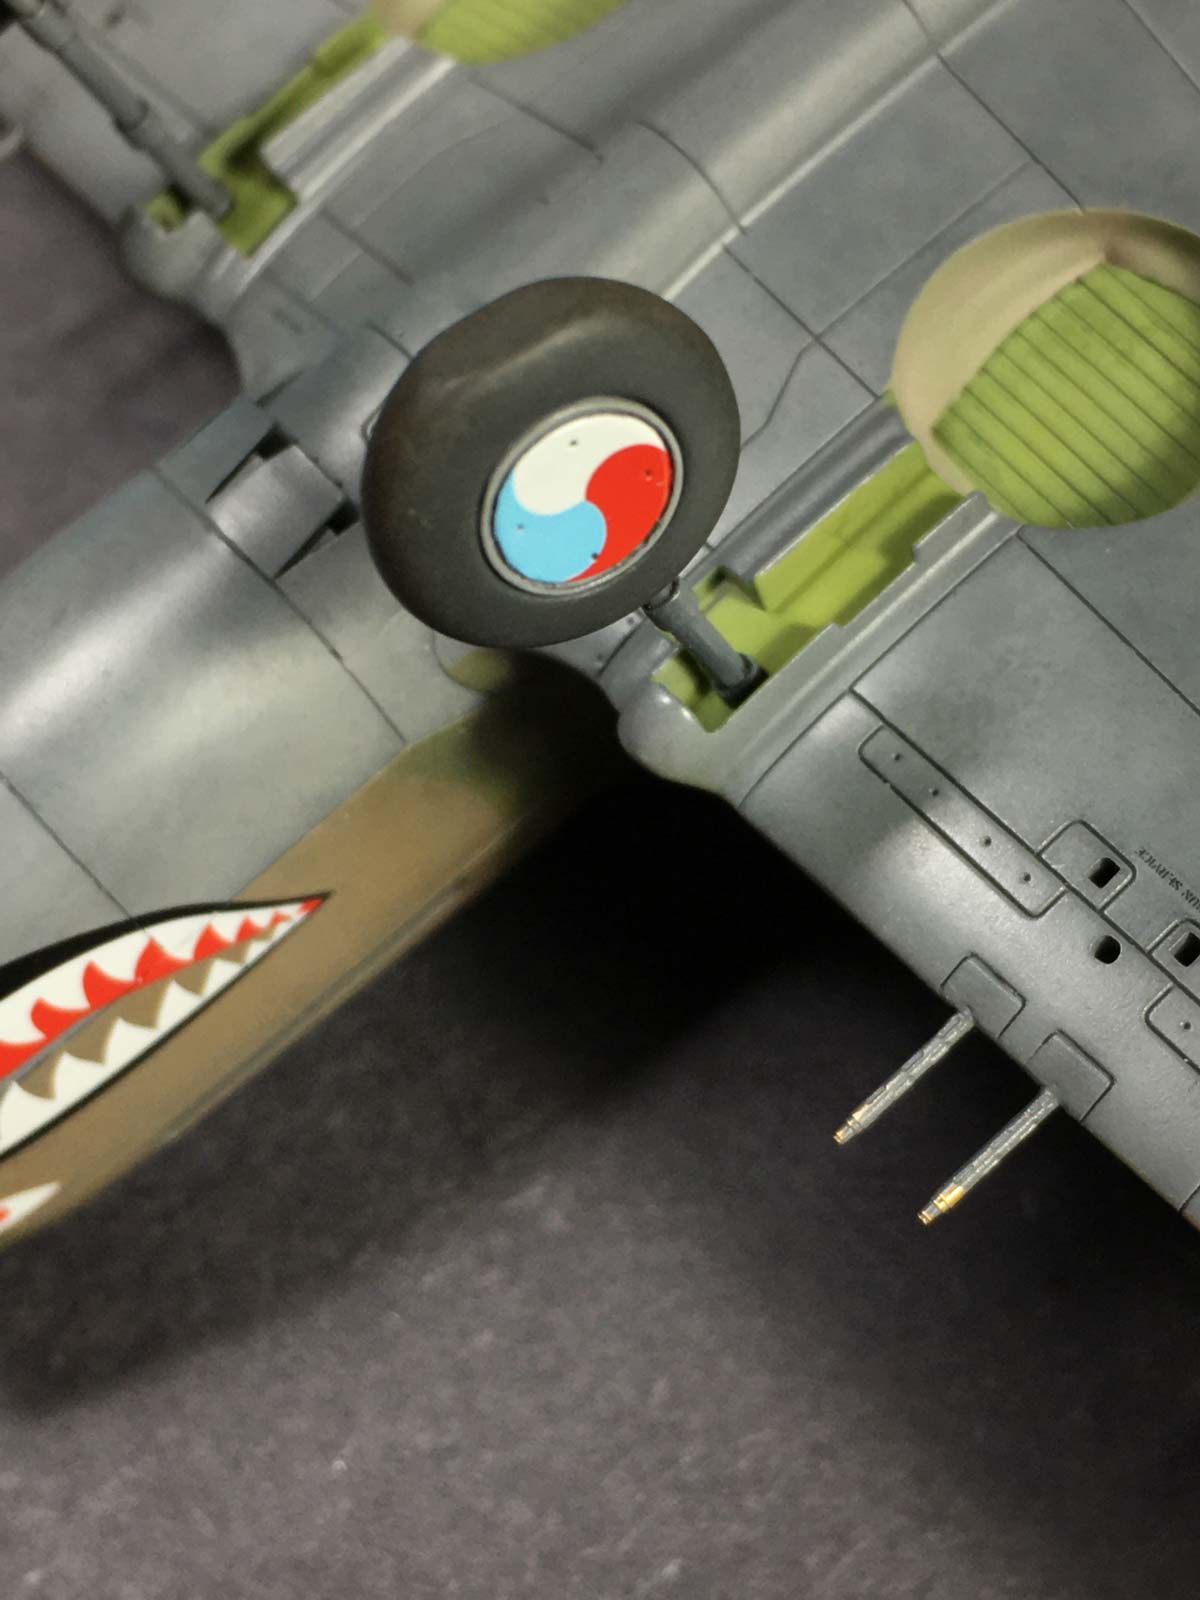
Extras: Master Model brass cannon and pitot tube, Quickboost exhausts
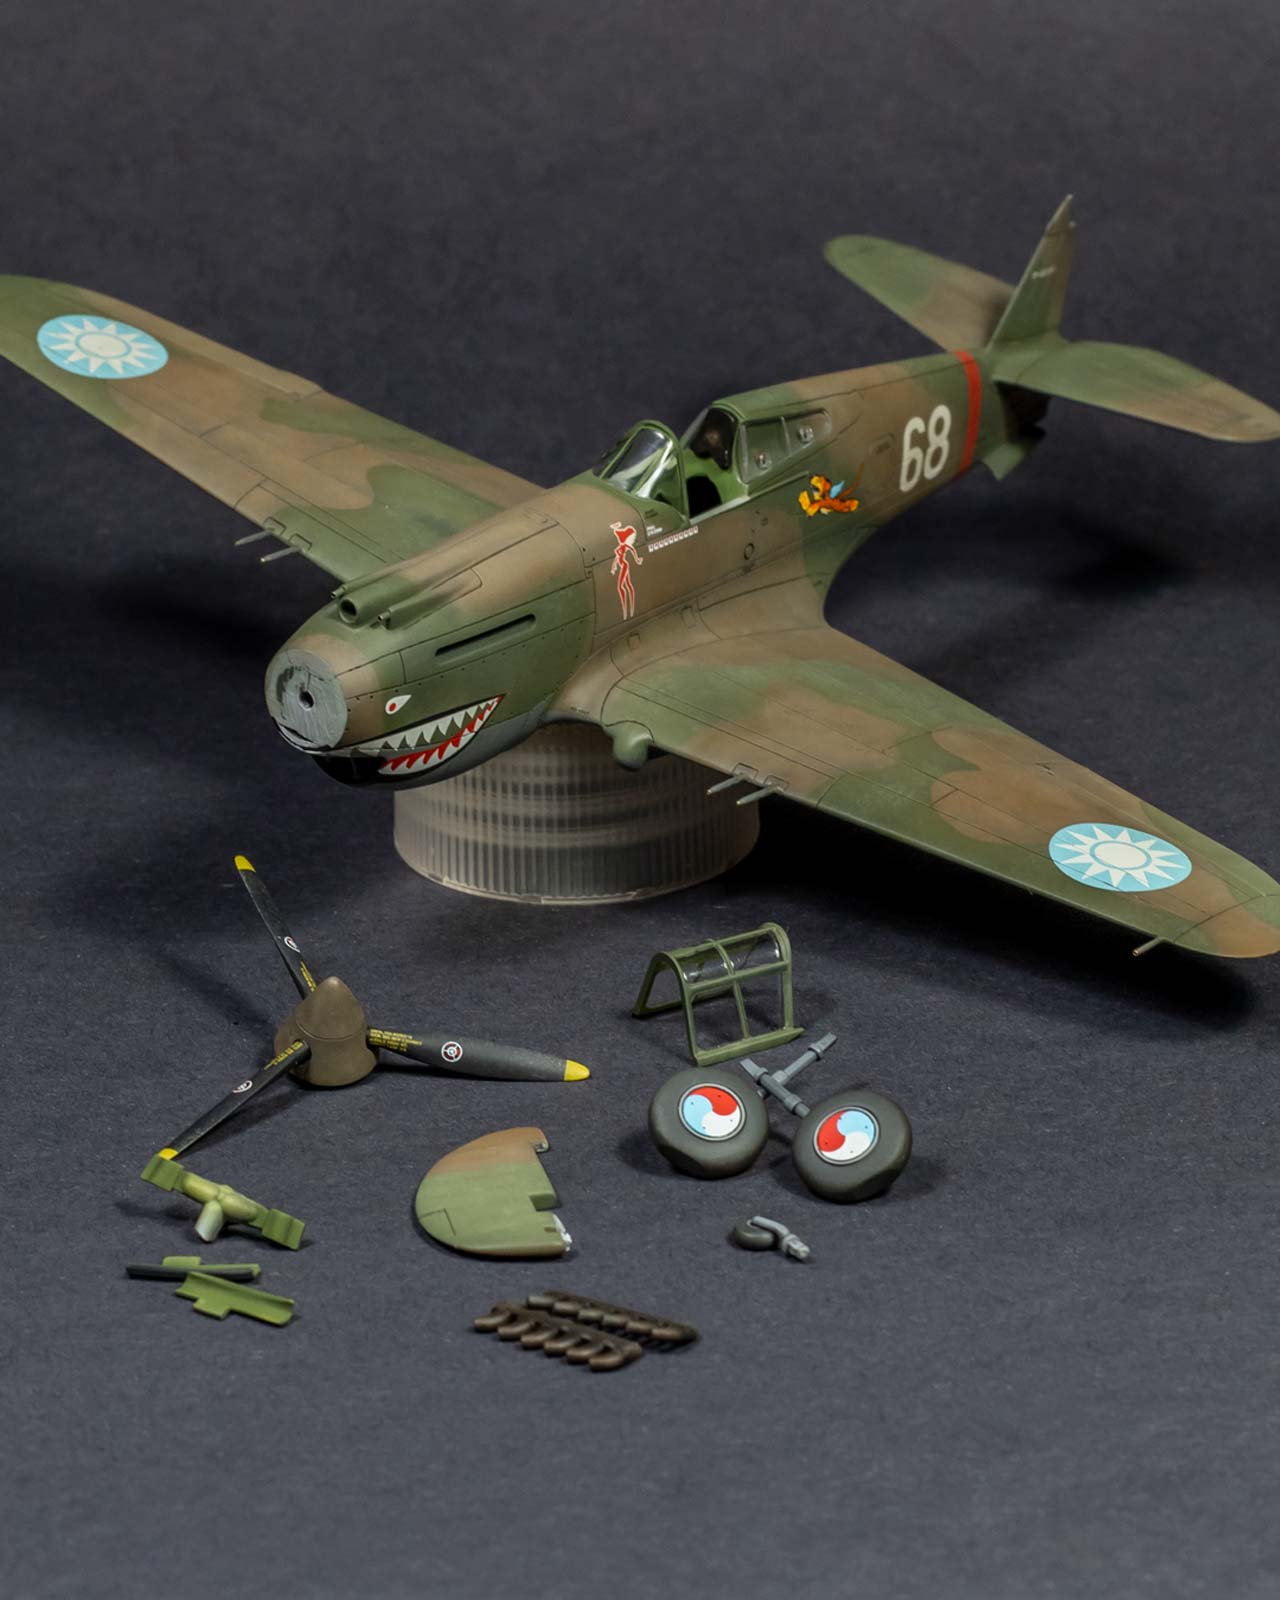
The 2011 new-tool release of Airfix’s Curtiss Hawk 81-A-2 contends as the most suitable kit for those looking to build the defining aircraft of the American Volunteer Group, known better as the Flying Tigers. Oddly, this aircraft appears to have escaped any great attention from manufacturers, despite the history of the AVG. Kits from Academy and Trumpeter are the only other readily available options, and while all 3 have their shortcomings, the Airfix kit is the superior starting point, particularly if you are prepared to consider aftermarket options, the majority of which are designed for this kit.
This was a commission and planned to be a straightforward, box stock build, though as a general rule, I will insist on brass cannons for durability, and aftermarket exhausts for their value compared to drilling kit exhausts.
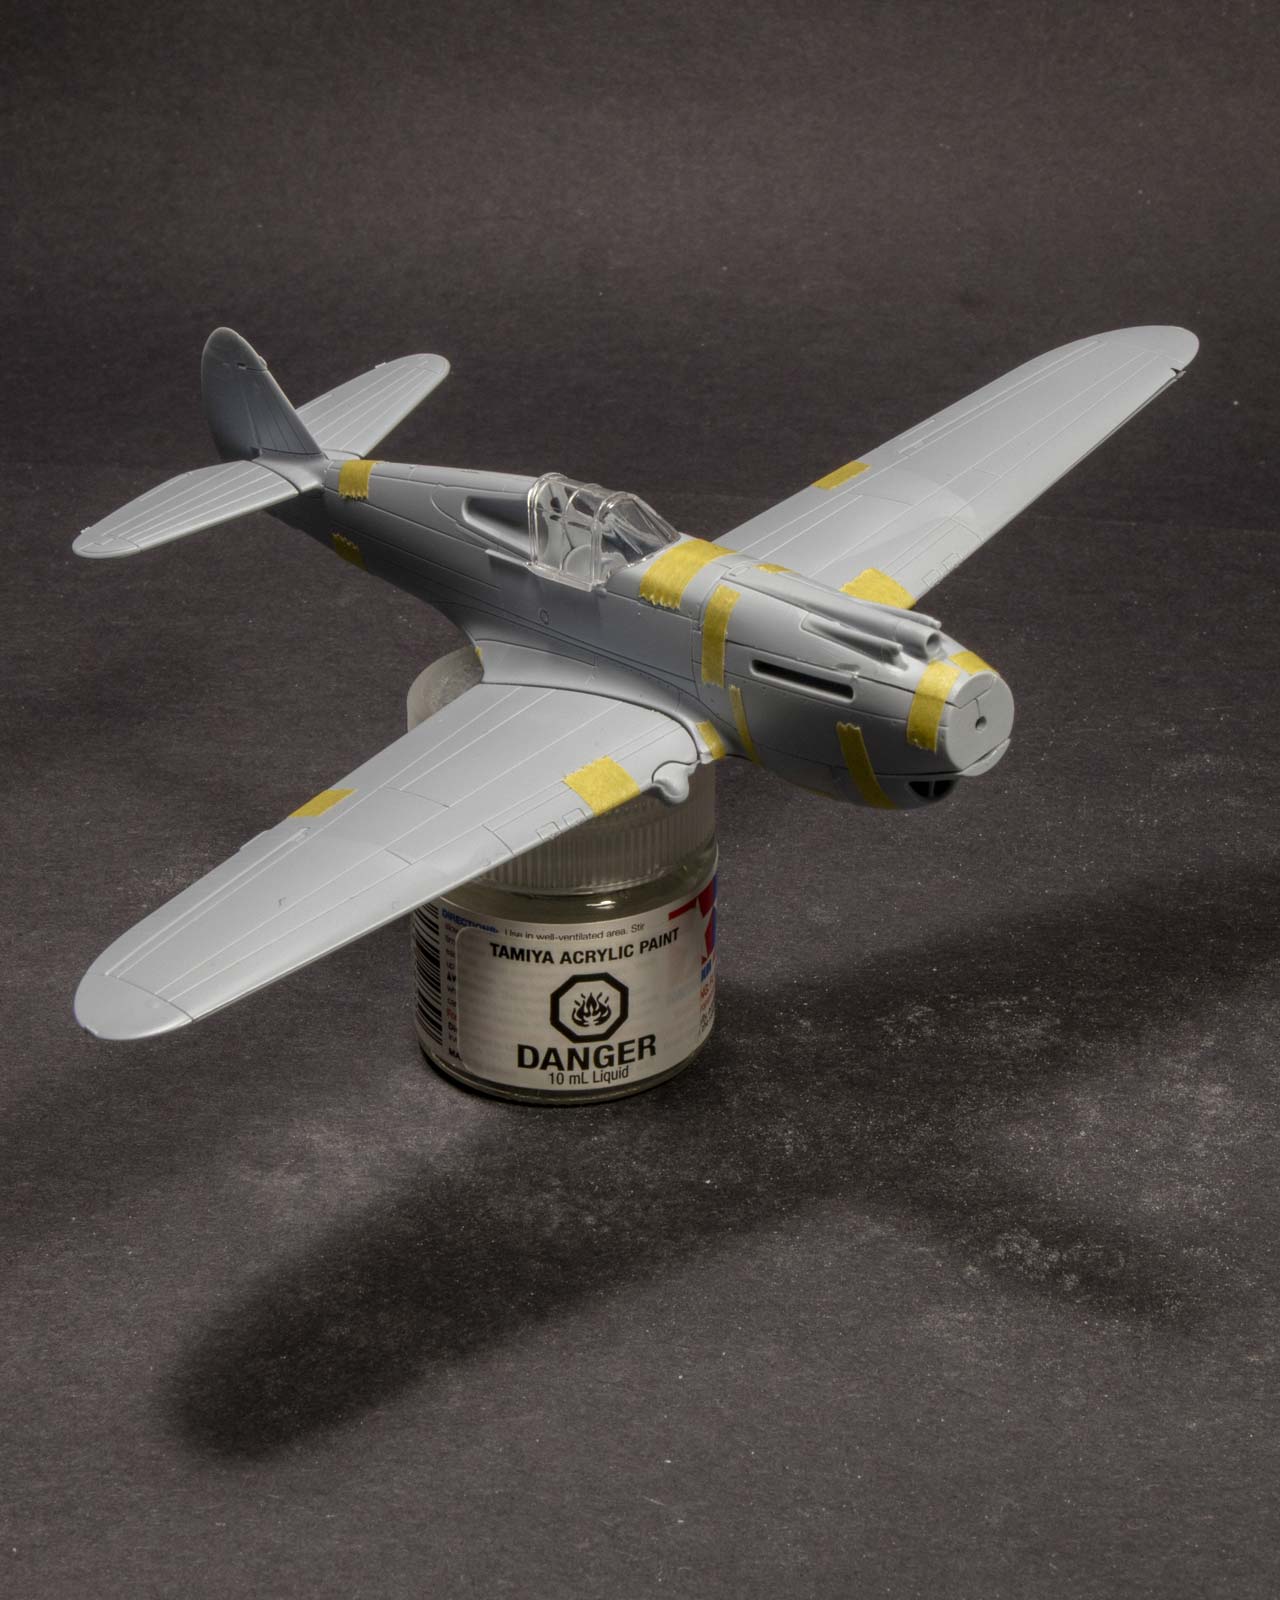
Test Fit
A quick dry-fit of the kit showed that, on the whole, assembly should go smoothly. I had read of others experiencing issues at the wing root which the dry-fit similarly revealed, however, the initial fitting showed that issues others had experienced with the forward fuselage could likely be headed off the the quick removal of material where large mating surfaces were employed. Beyond that, panel lines generally met up where they crossed seams and aside from softer plastic and deeper panel lines than I prefer, all looked on the up-and-up.
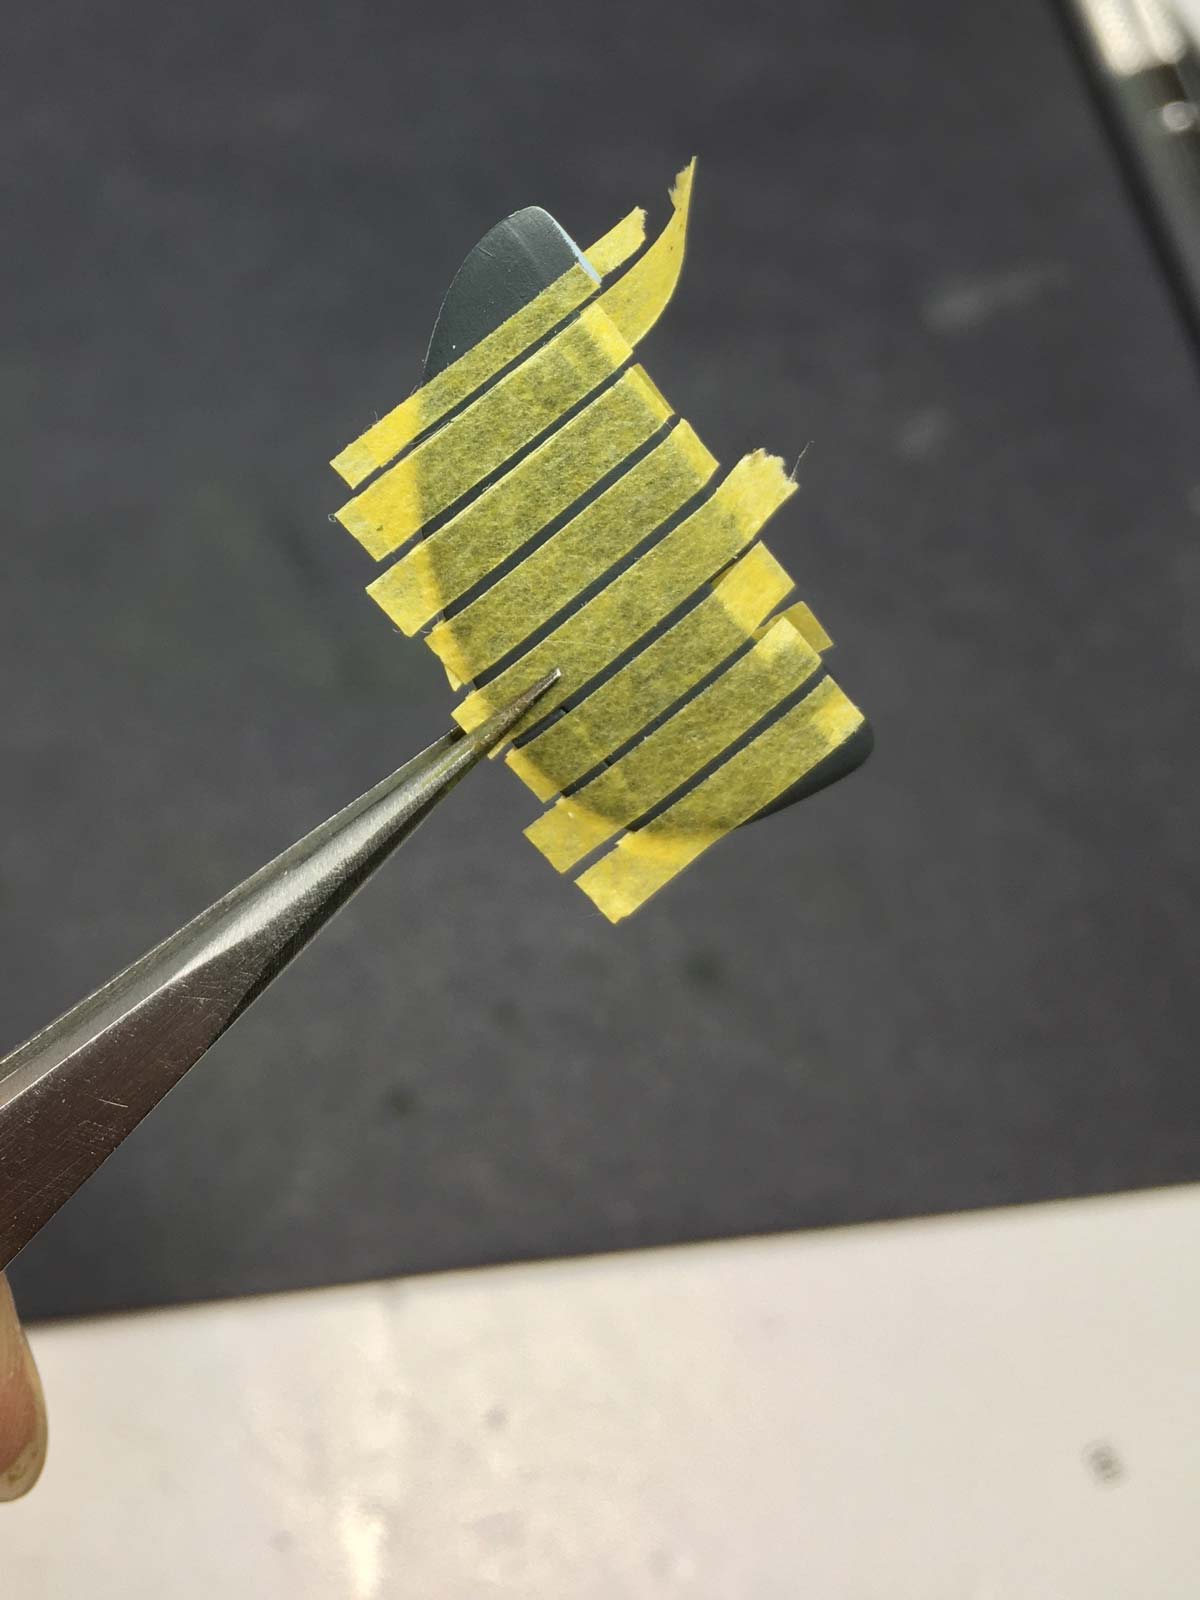
Tale of the tape.
30 minutes and a dozen strips of tape can among the most important resources you devote to a build. Not only does that first dry-fit determine any major fit issues or mis-alignment of panel lines you’ll need to resolve, it’s a great early milestone hold the full aircraft in your hand, albeit briefly.
Cockpit
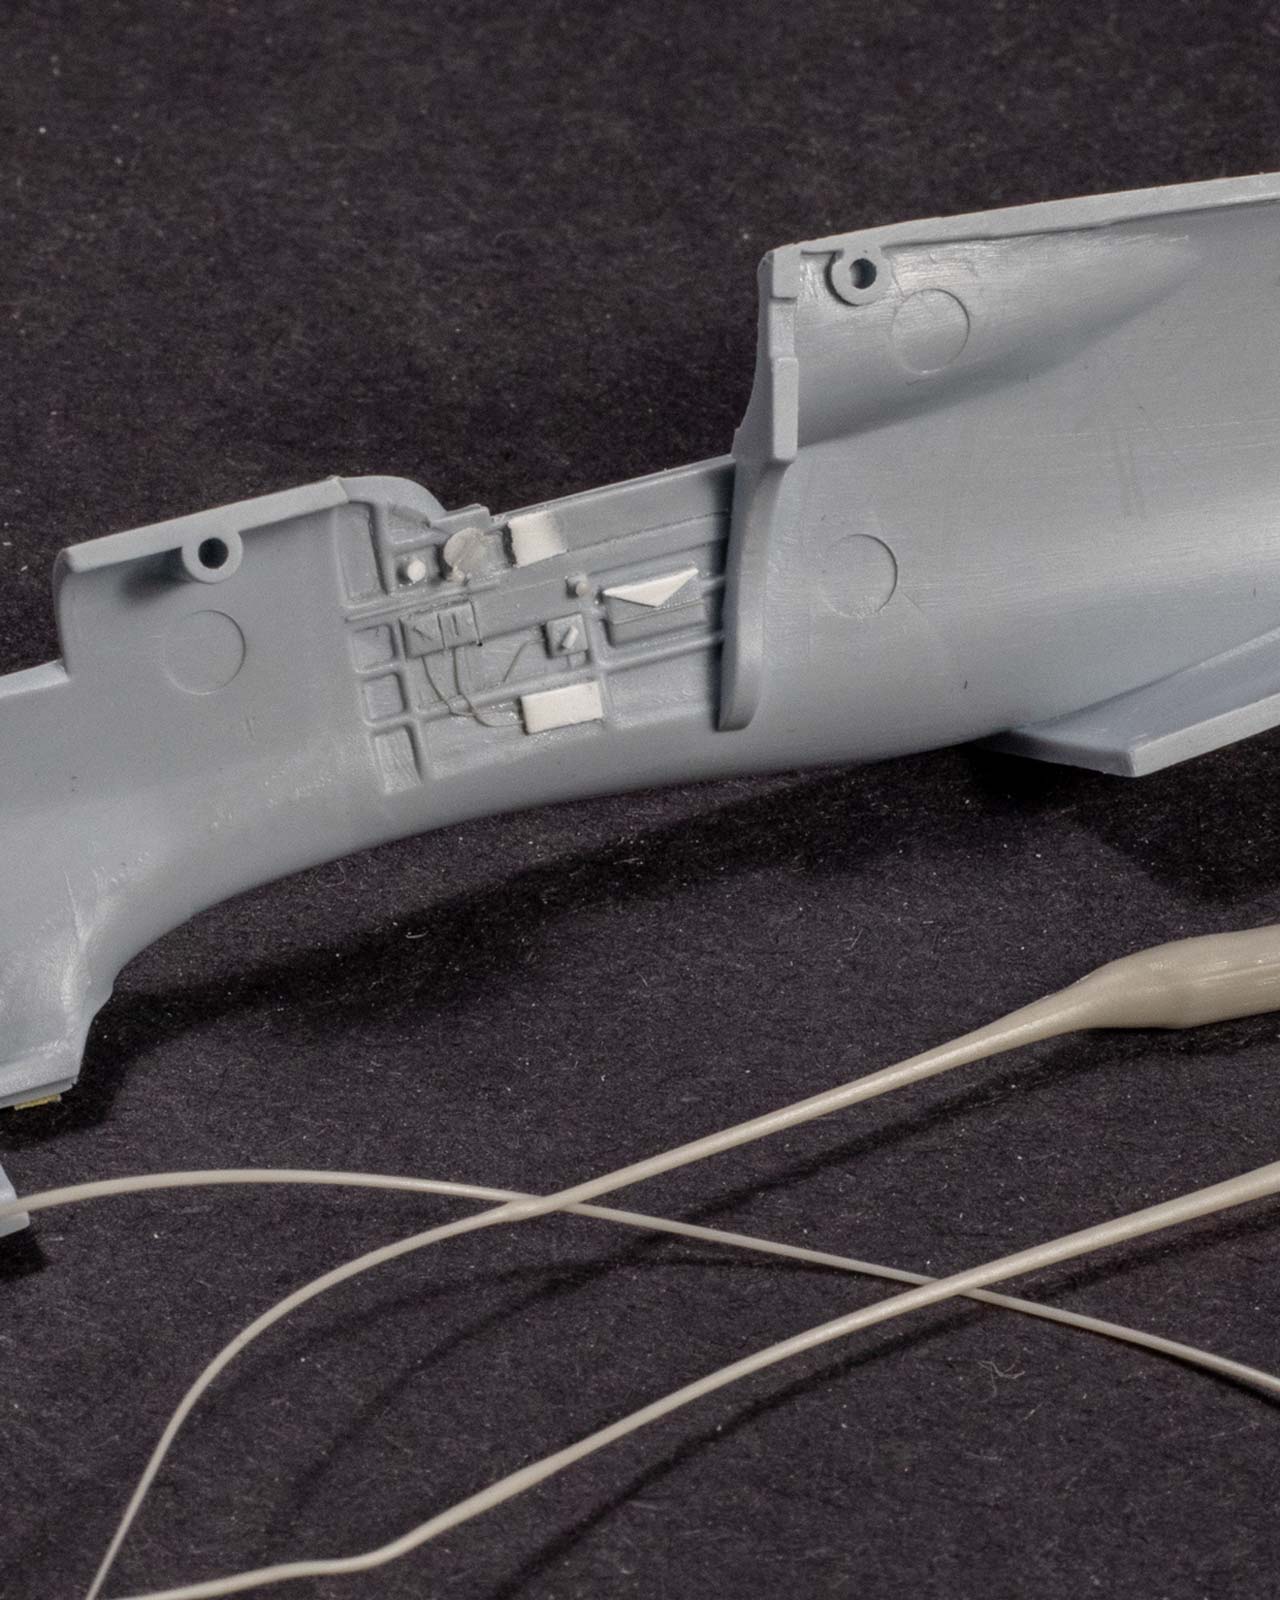
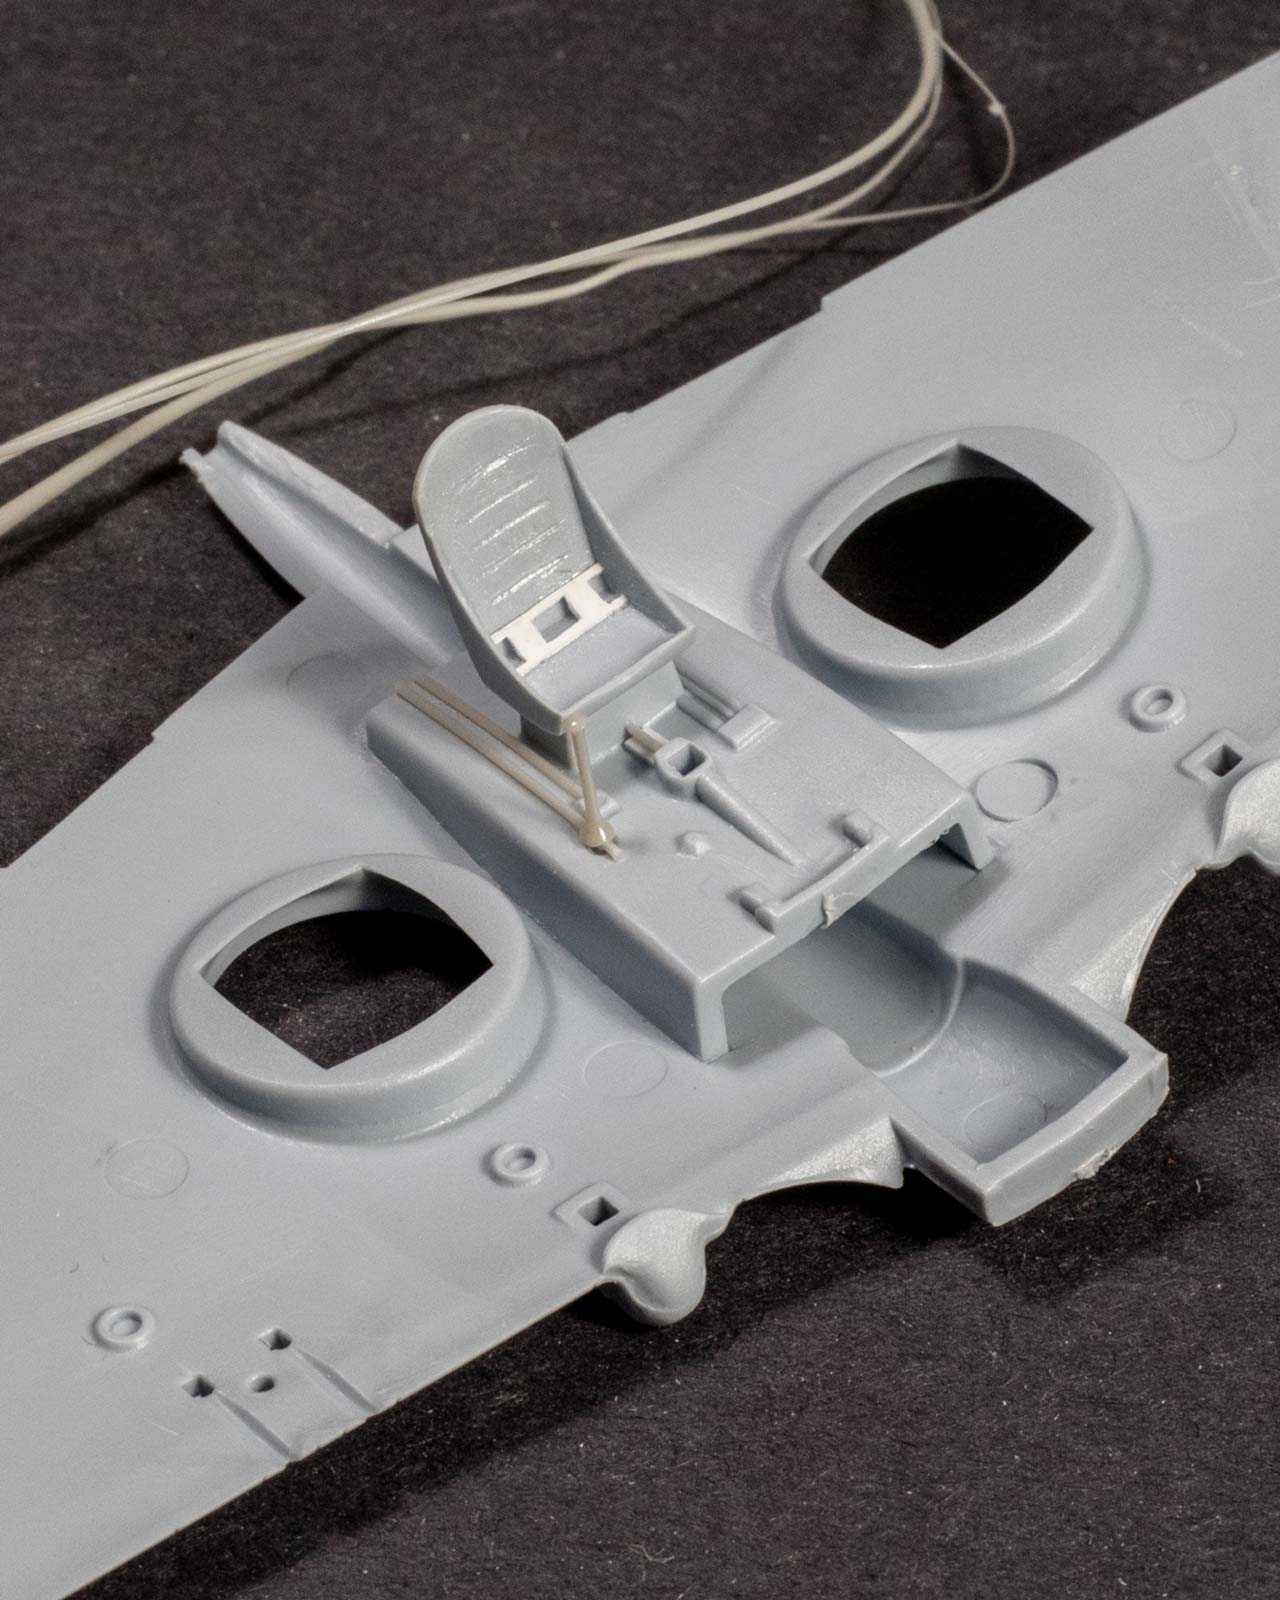
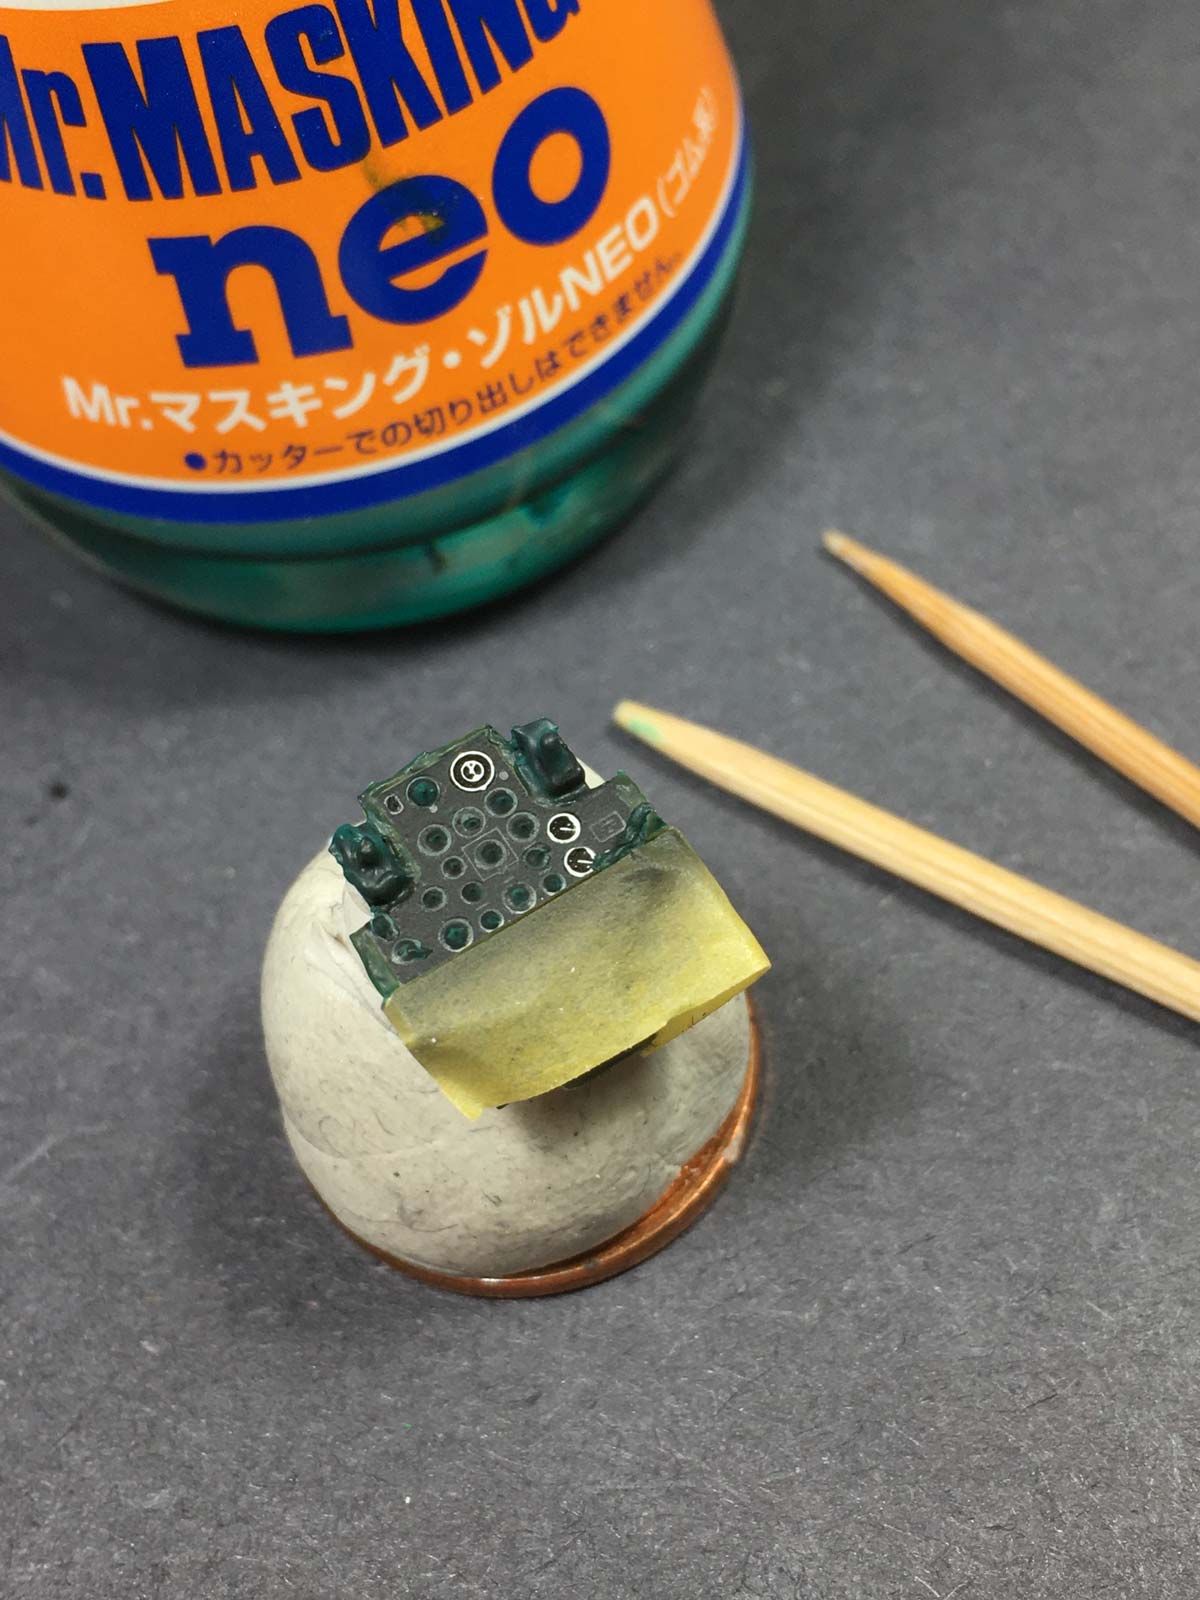
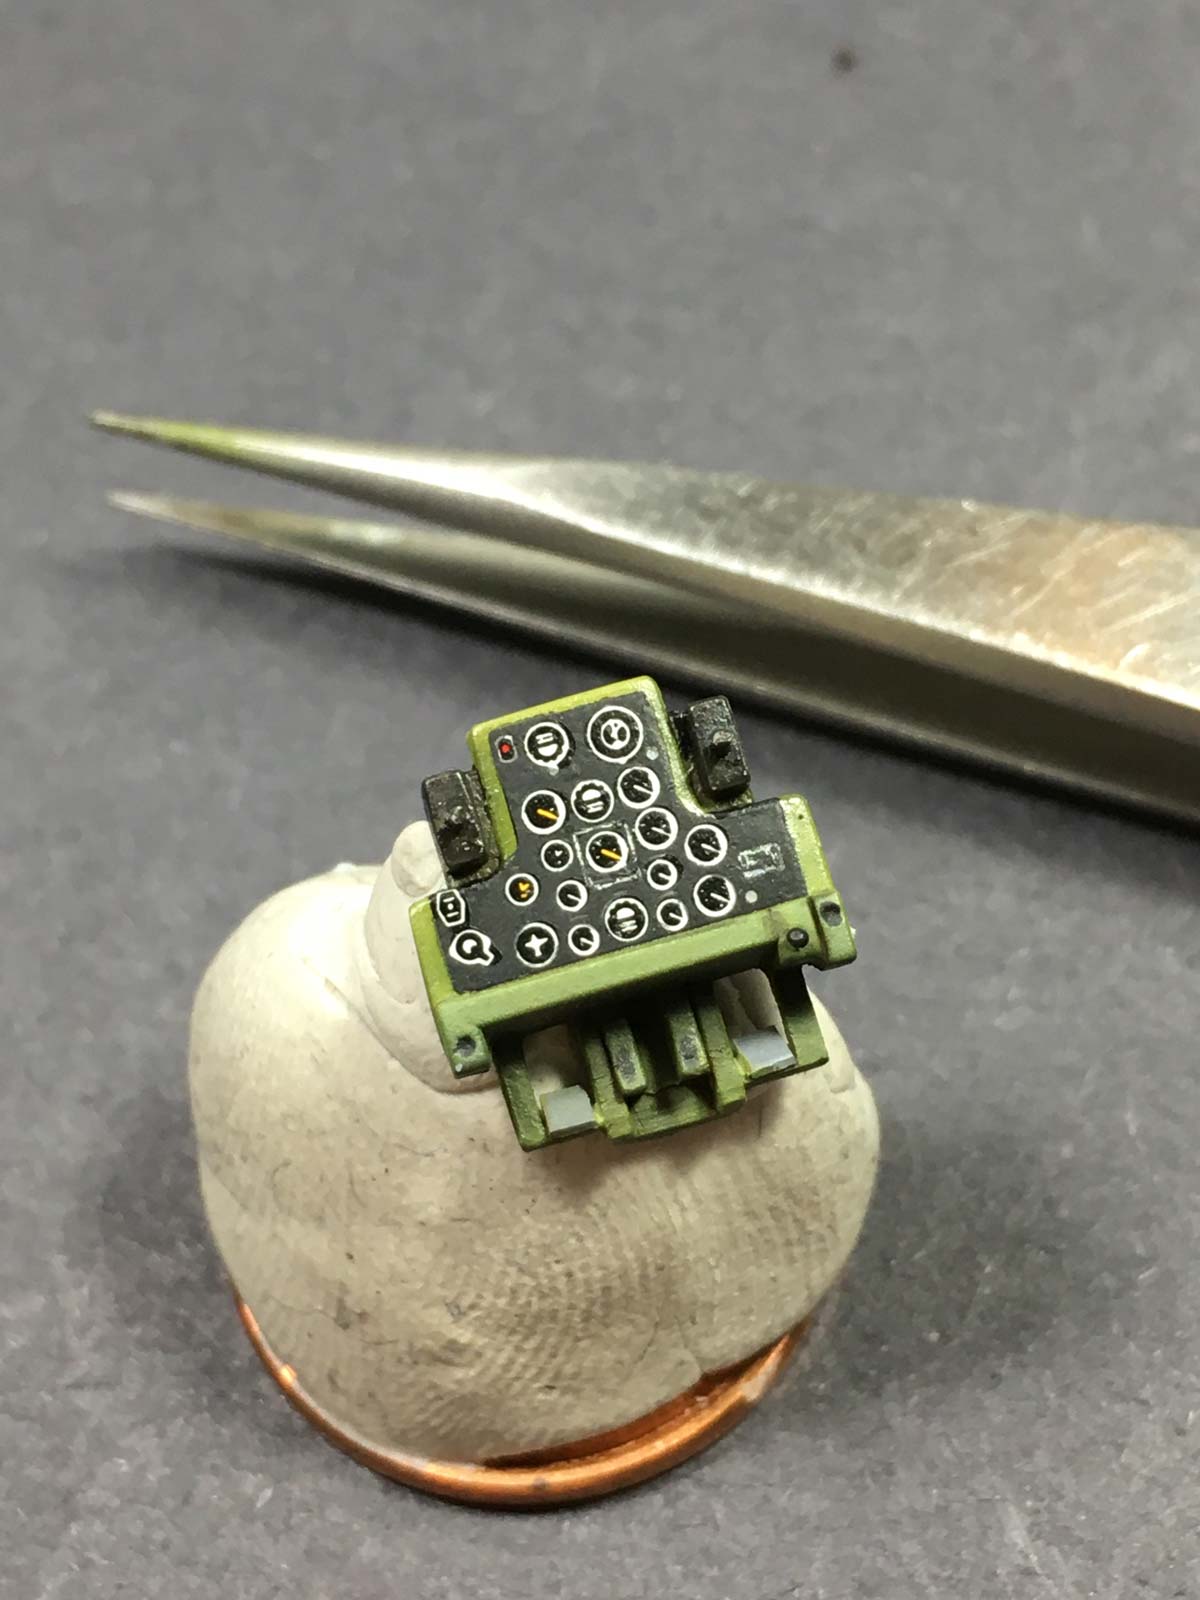
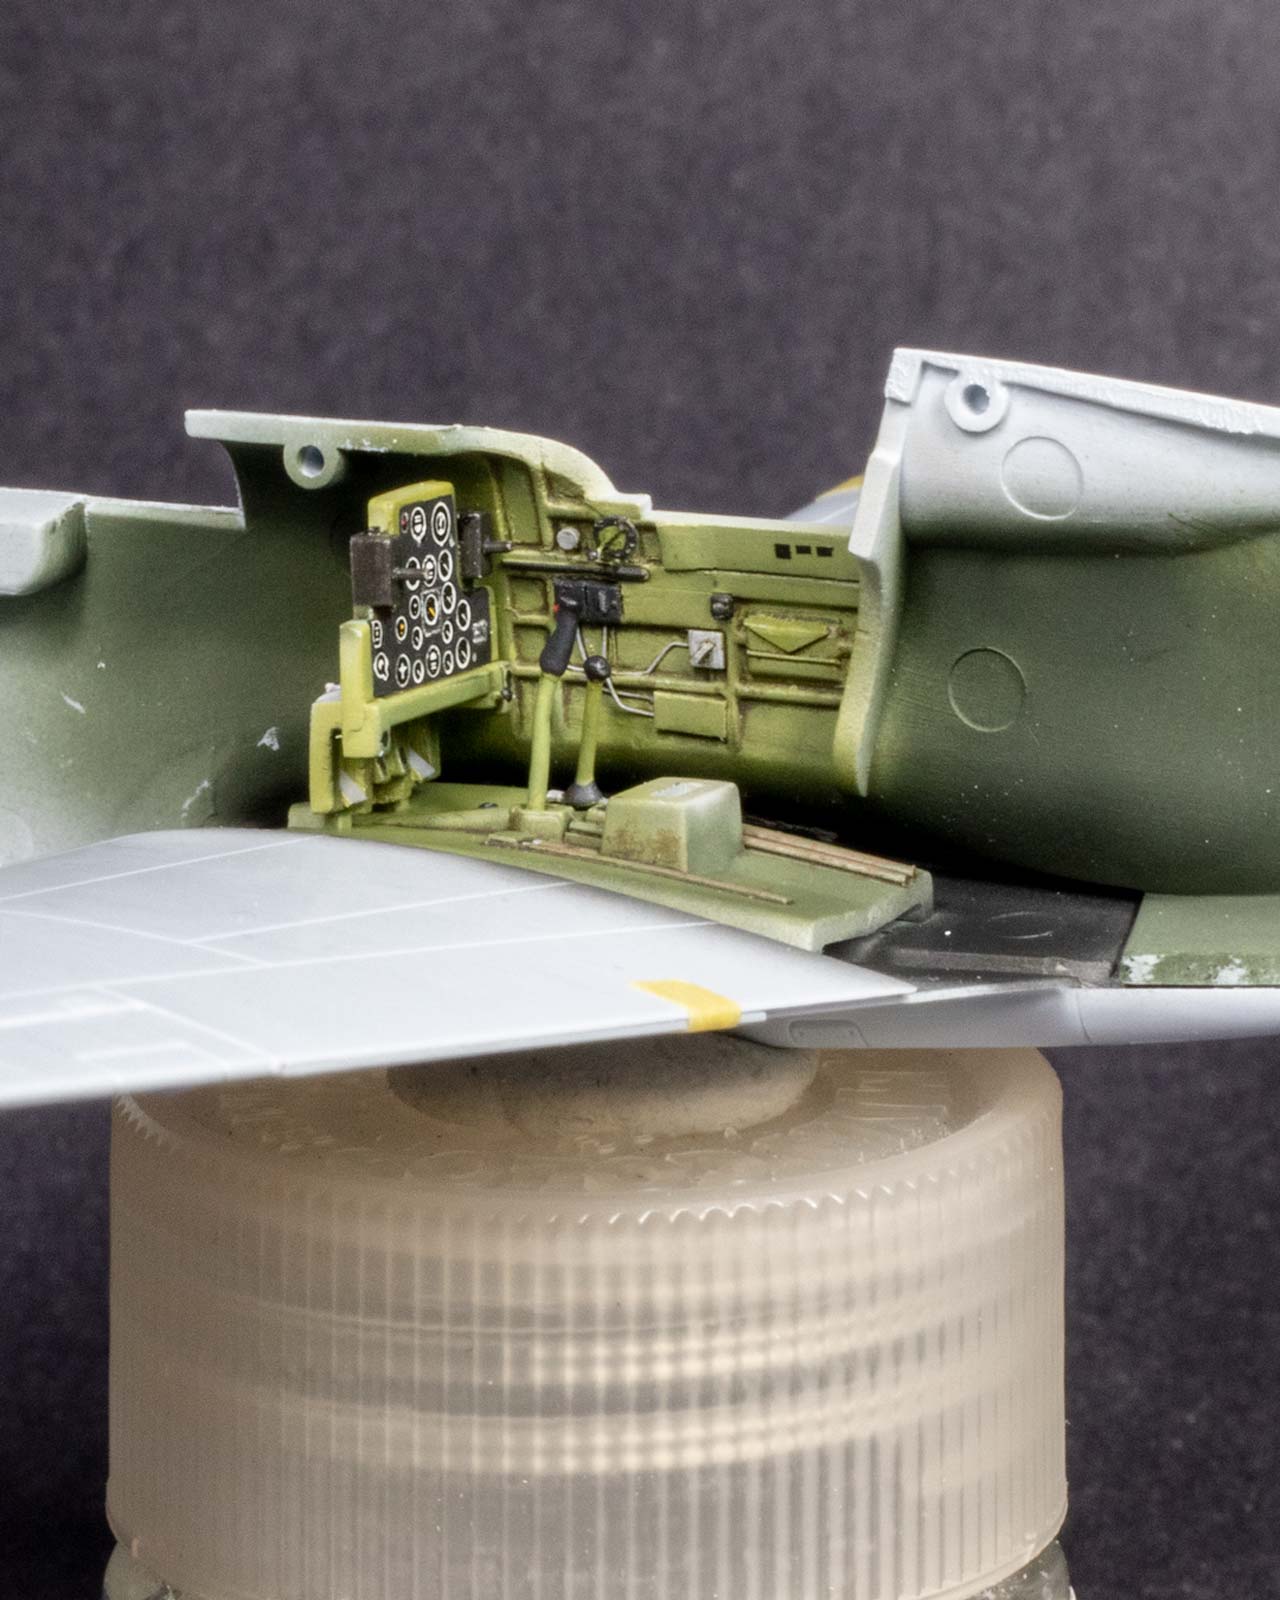
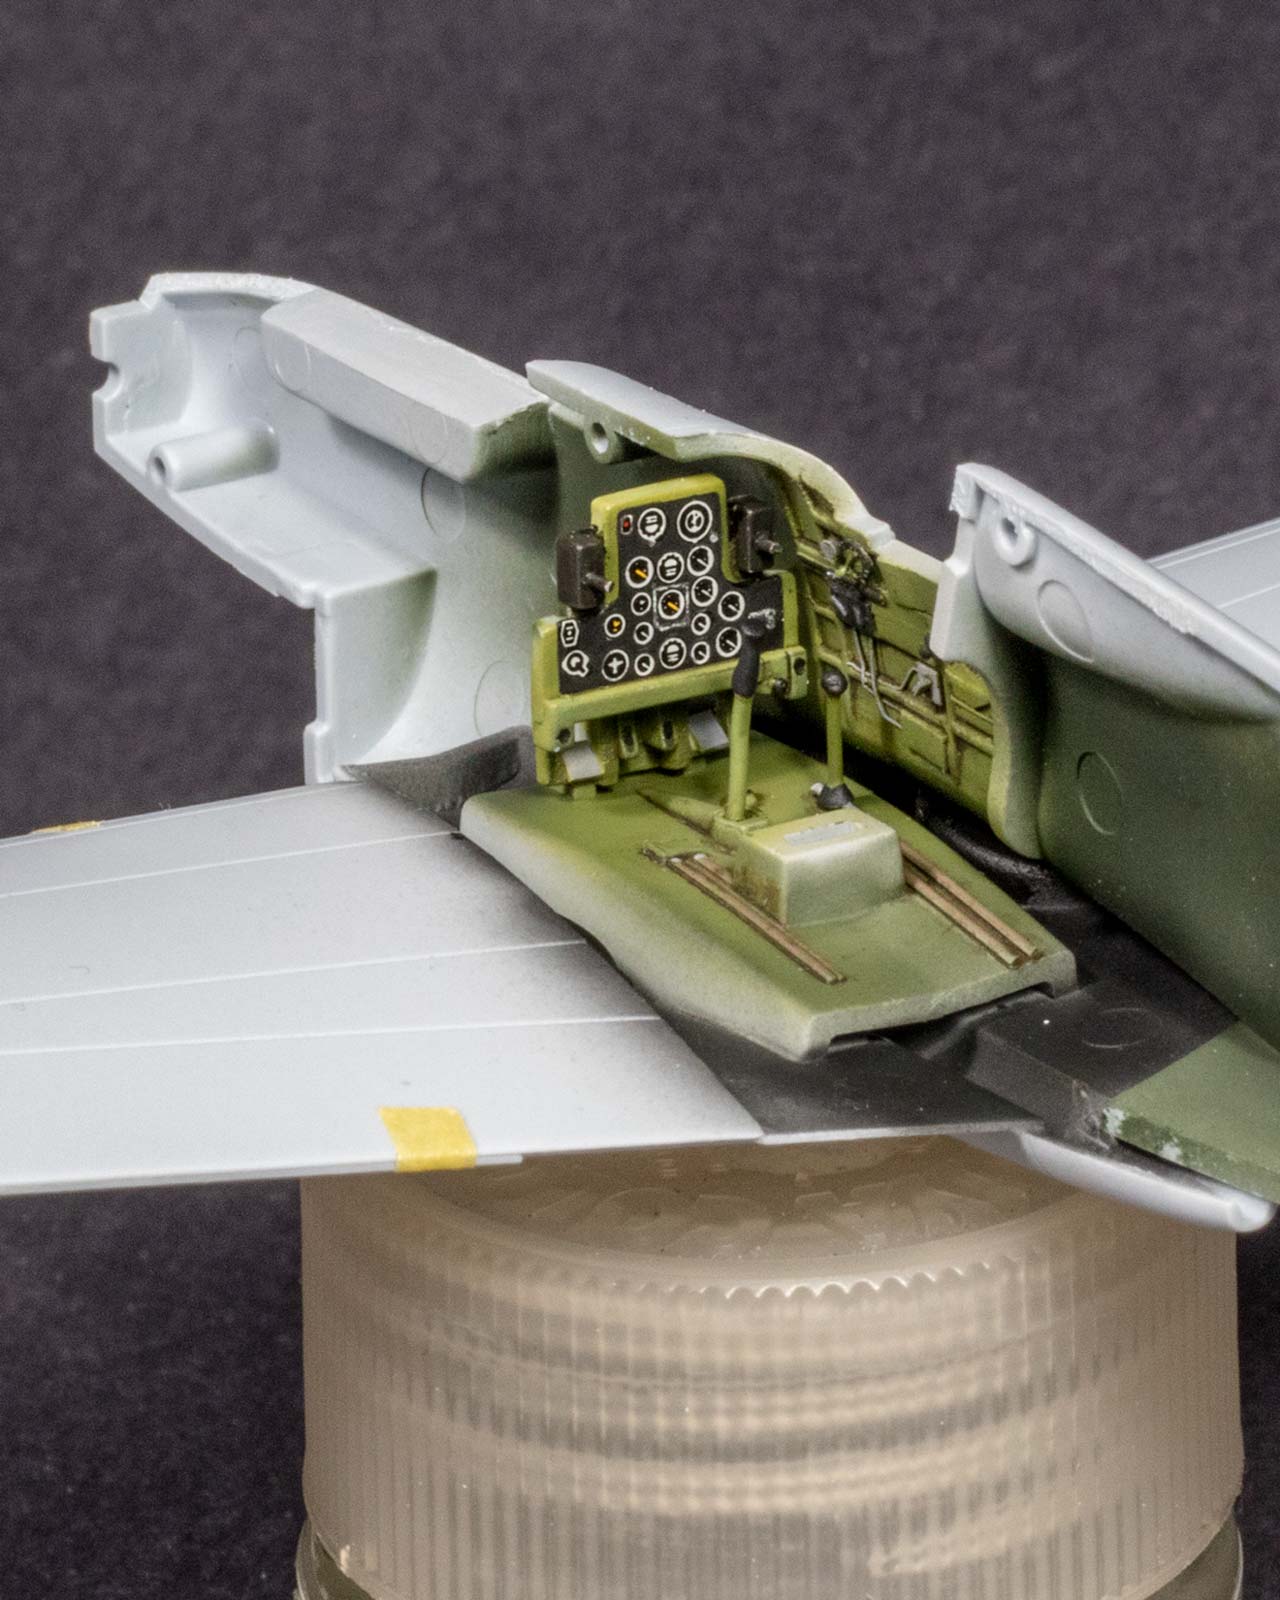
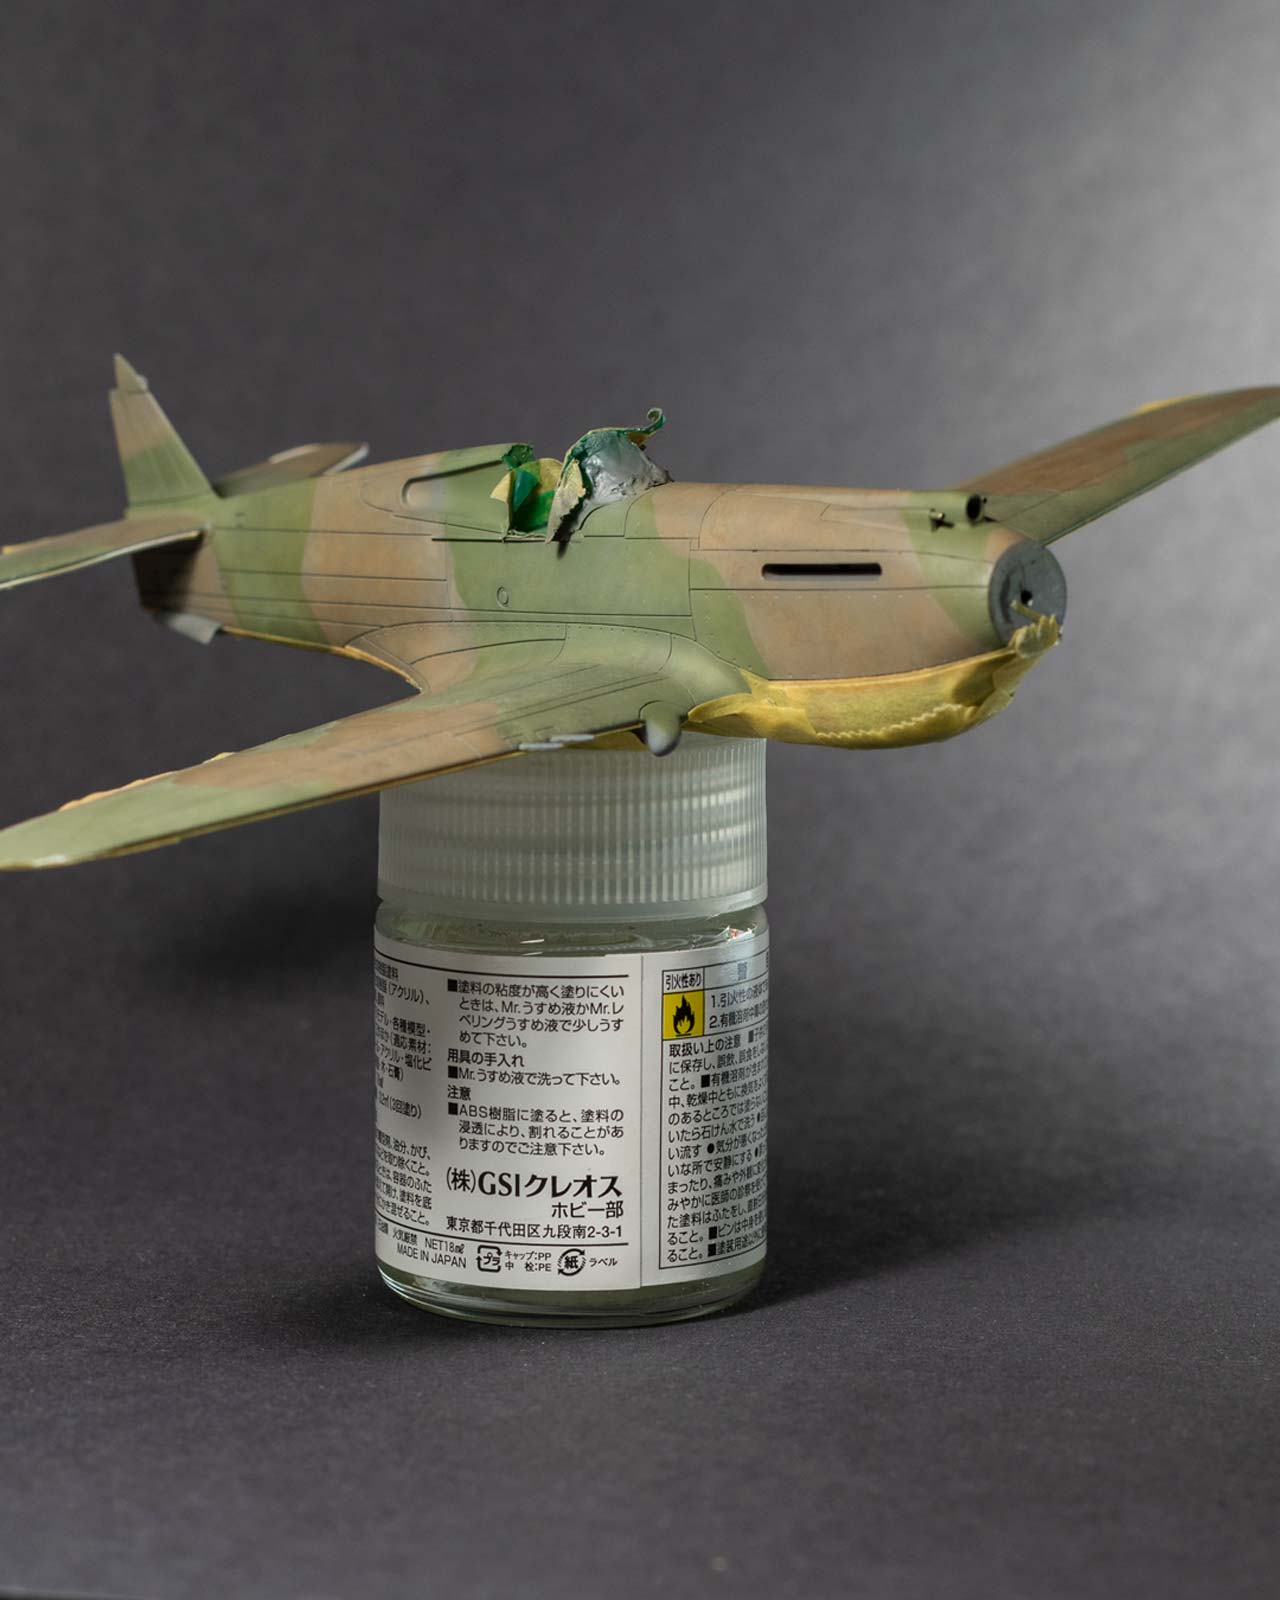
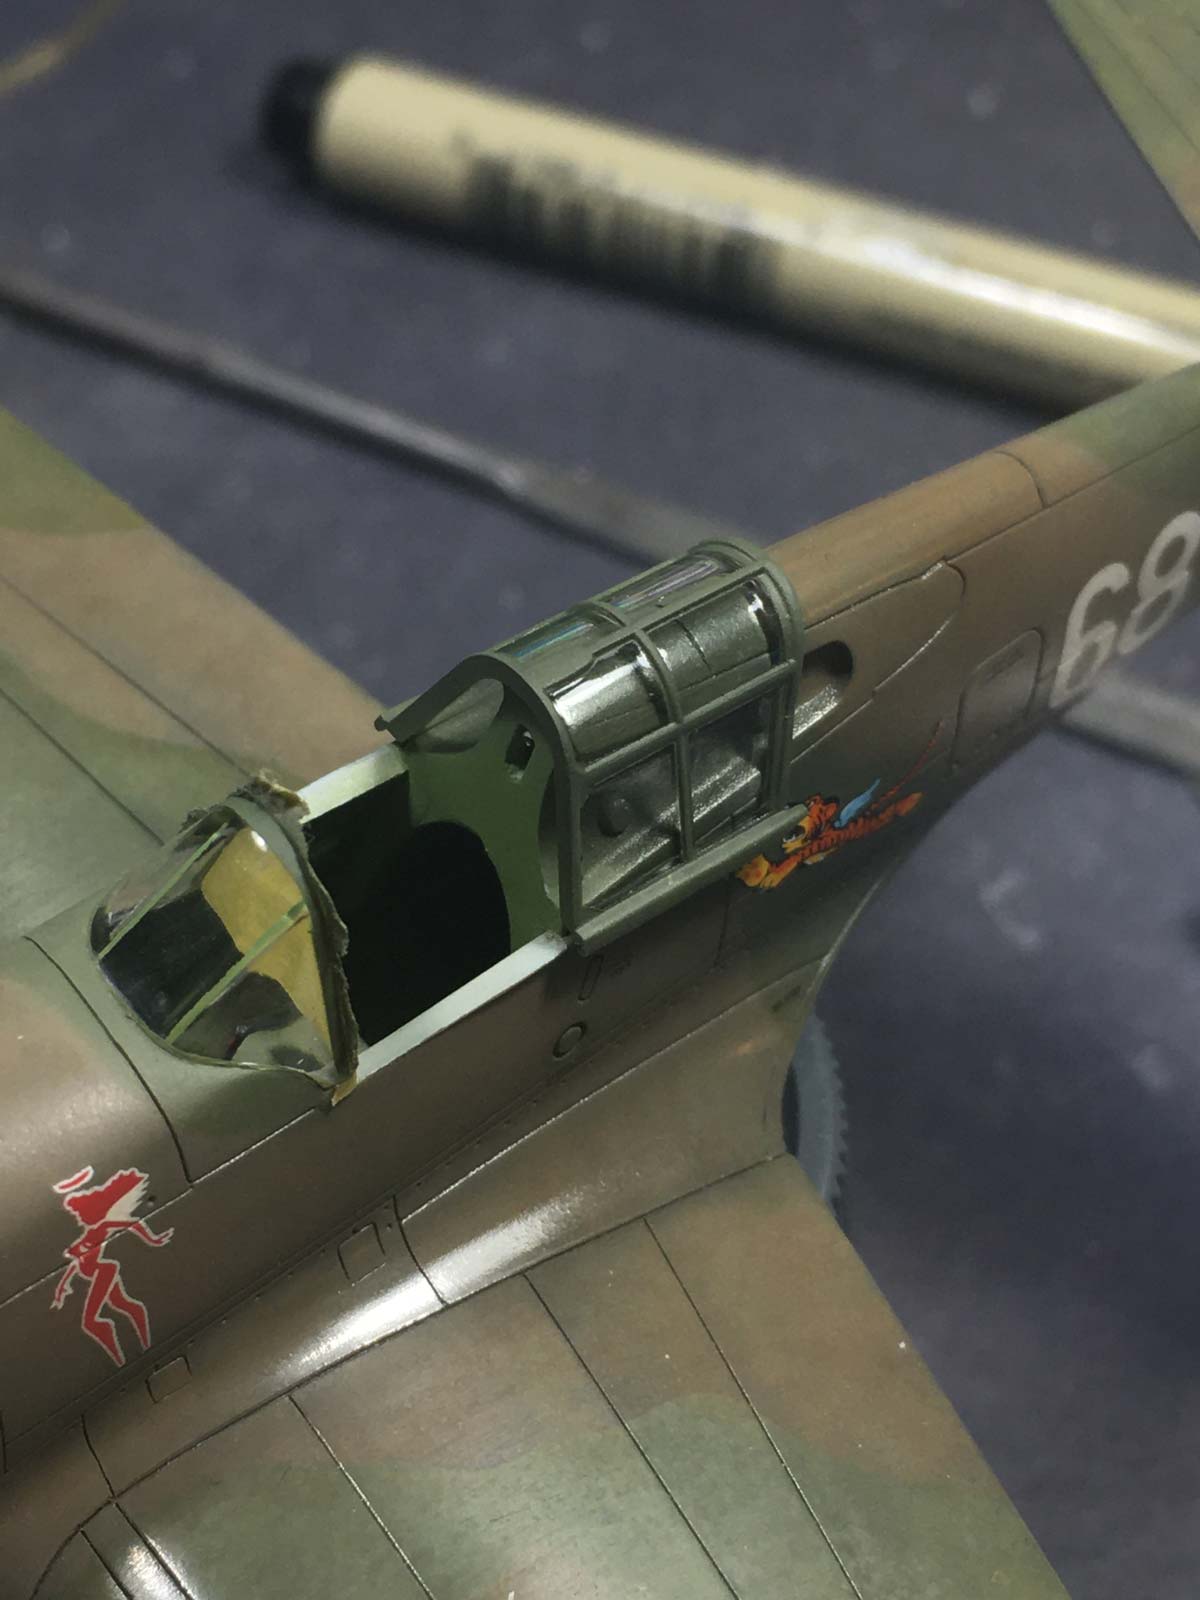
Cockpit detail is the most notable shortcoming of the kit and almost immediately derailed the box stock build plan. Details are shallow, poorly-defined, and the sidewall follows the exterior profile, disappearing into the wing root, and leaving sizeable gaps at the bottom. Considering the cockpit floor should be a continuous surface formed by the upper wing, this is a not-insignificant issue. The instrument panel is supplied as a decal, the artwork of which is fairly simple and stark.
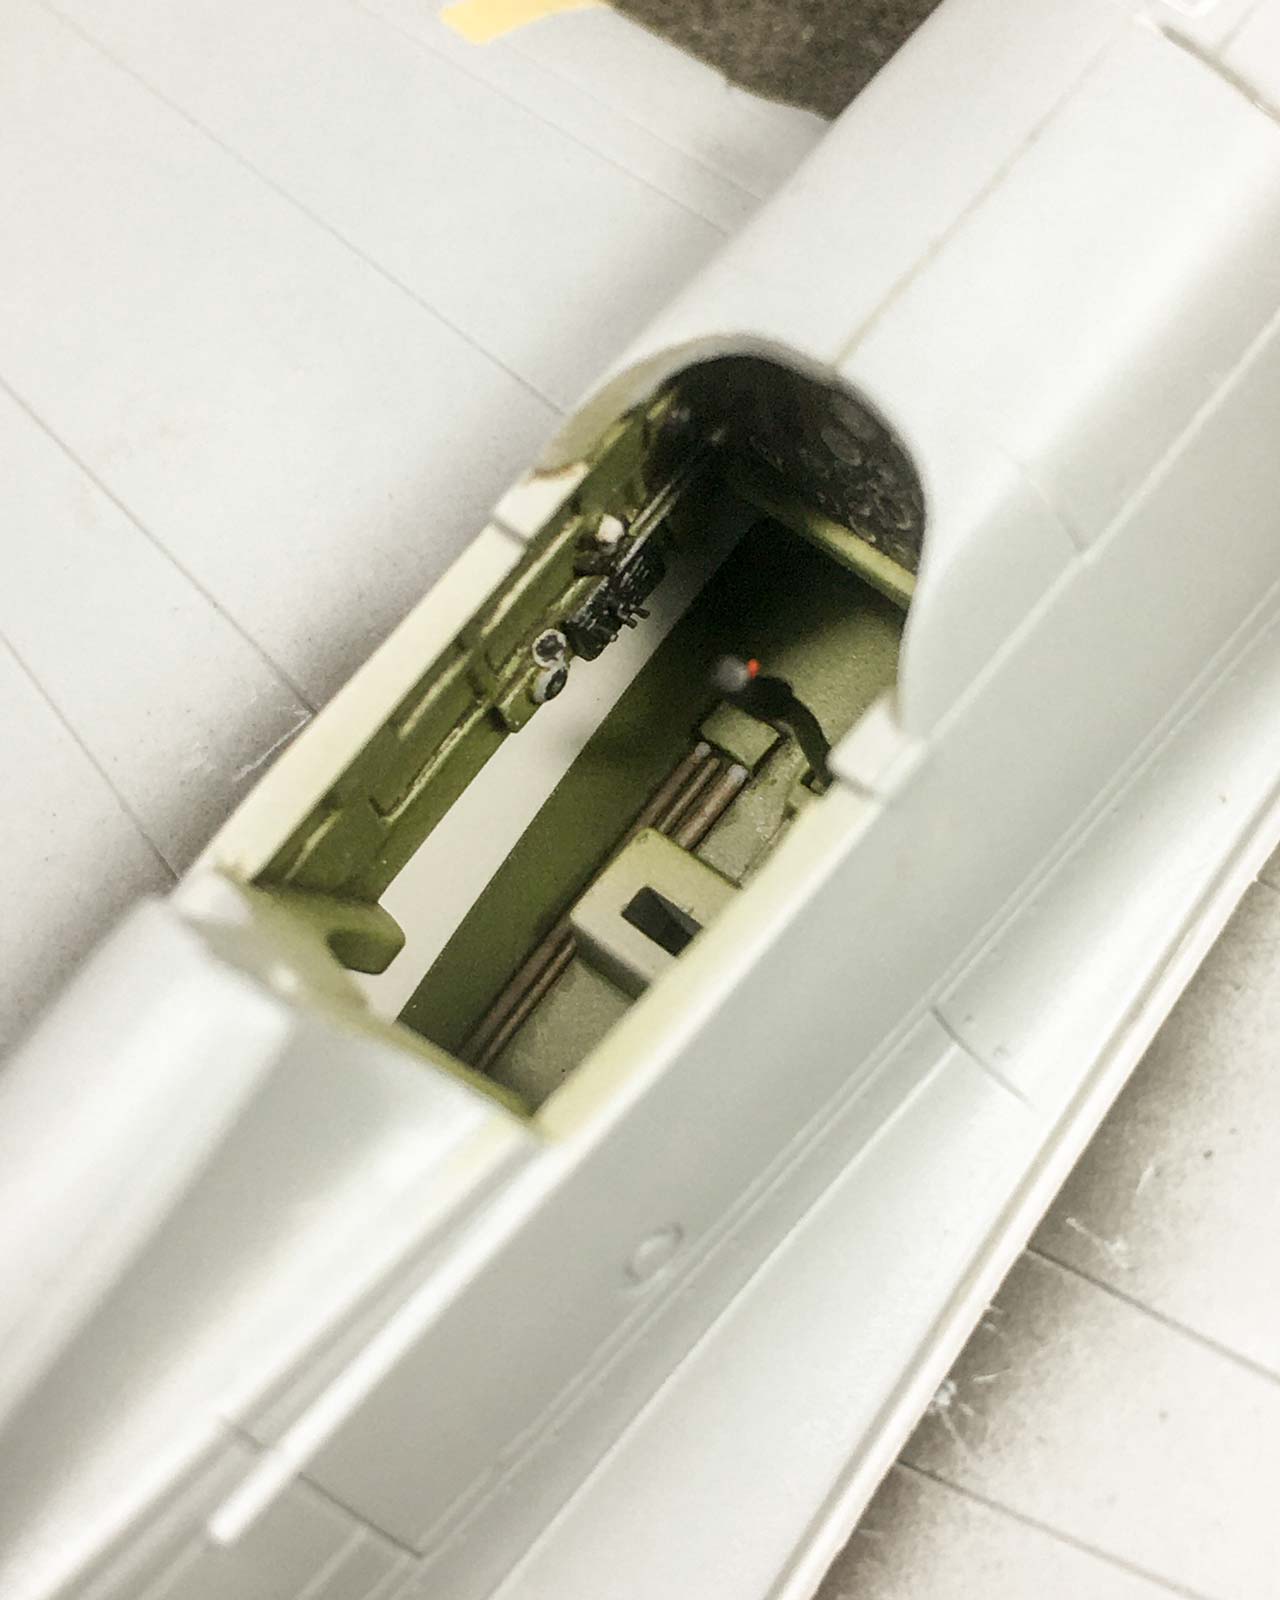
As the canopy was requested to be open, I was compelled to add enough detail that a look inside would be rewarded. Stretched sprue and Evergreen styrene strip were used to flesh out enough detail to indicate some features and details of the 1:1 aircraft. Meanwhile, other existing details were reshaped or replaced to provide better definition for washes and painting — as part of the soft detail, most inside corners of the moulded details were radiused, and as a result would not provide any corners for washes to collect in.
It should be noted that a number of detail kits are available for this kit — from CMK, I believe — which would resolve a number of the kit’s issues. Certainly adding just the cockpit detail set would make a great difference.
The shape of things.
The blank canvas of an empty cockpit can be a daunting prospect, with many WWII offices being complex environments to recreate, not to mention those of modern jets. When starting out, ascertain the basic shapes first and work to get those in place. This will add plenty of bulk, and from there you can start to determine which of the finer details are most important and within your means to produce.
airframe
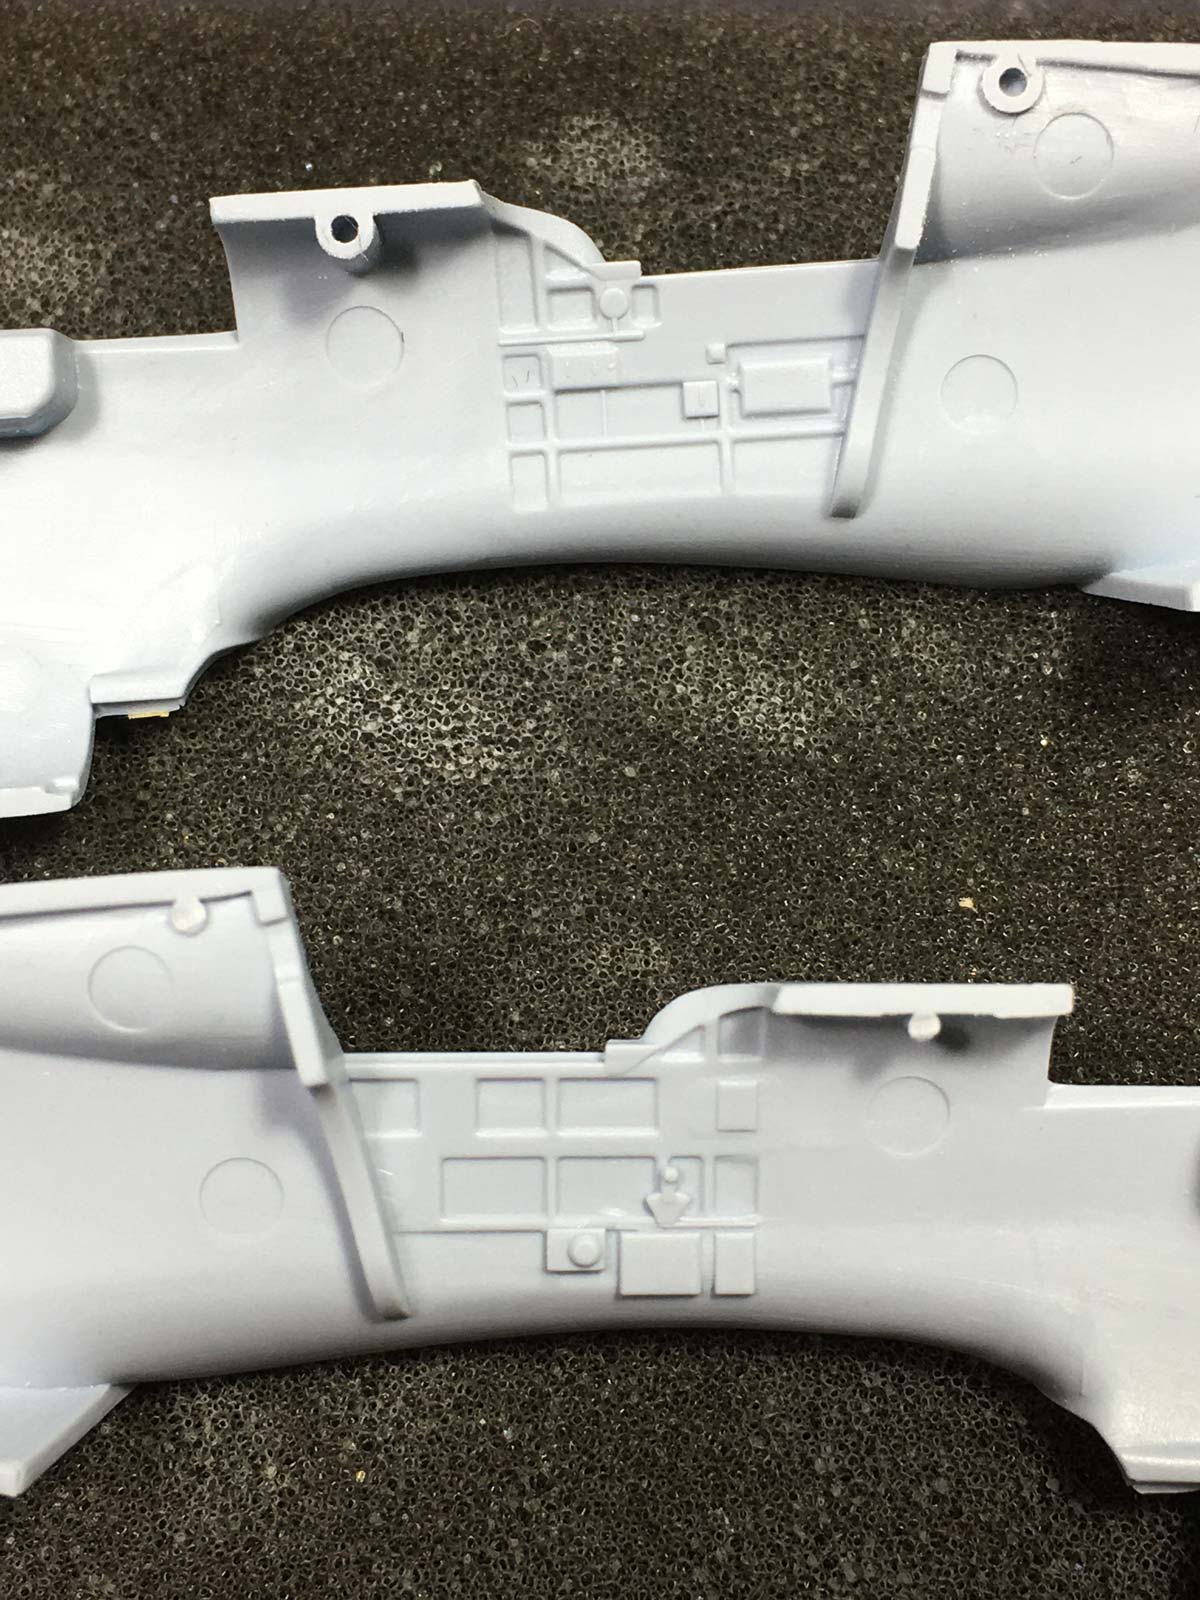
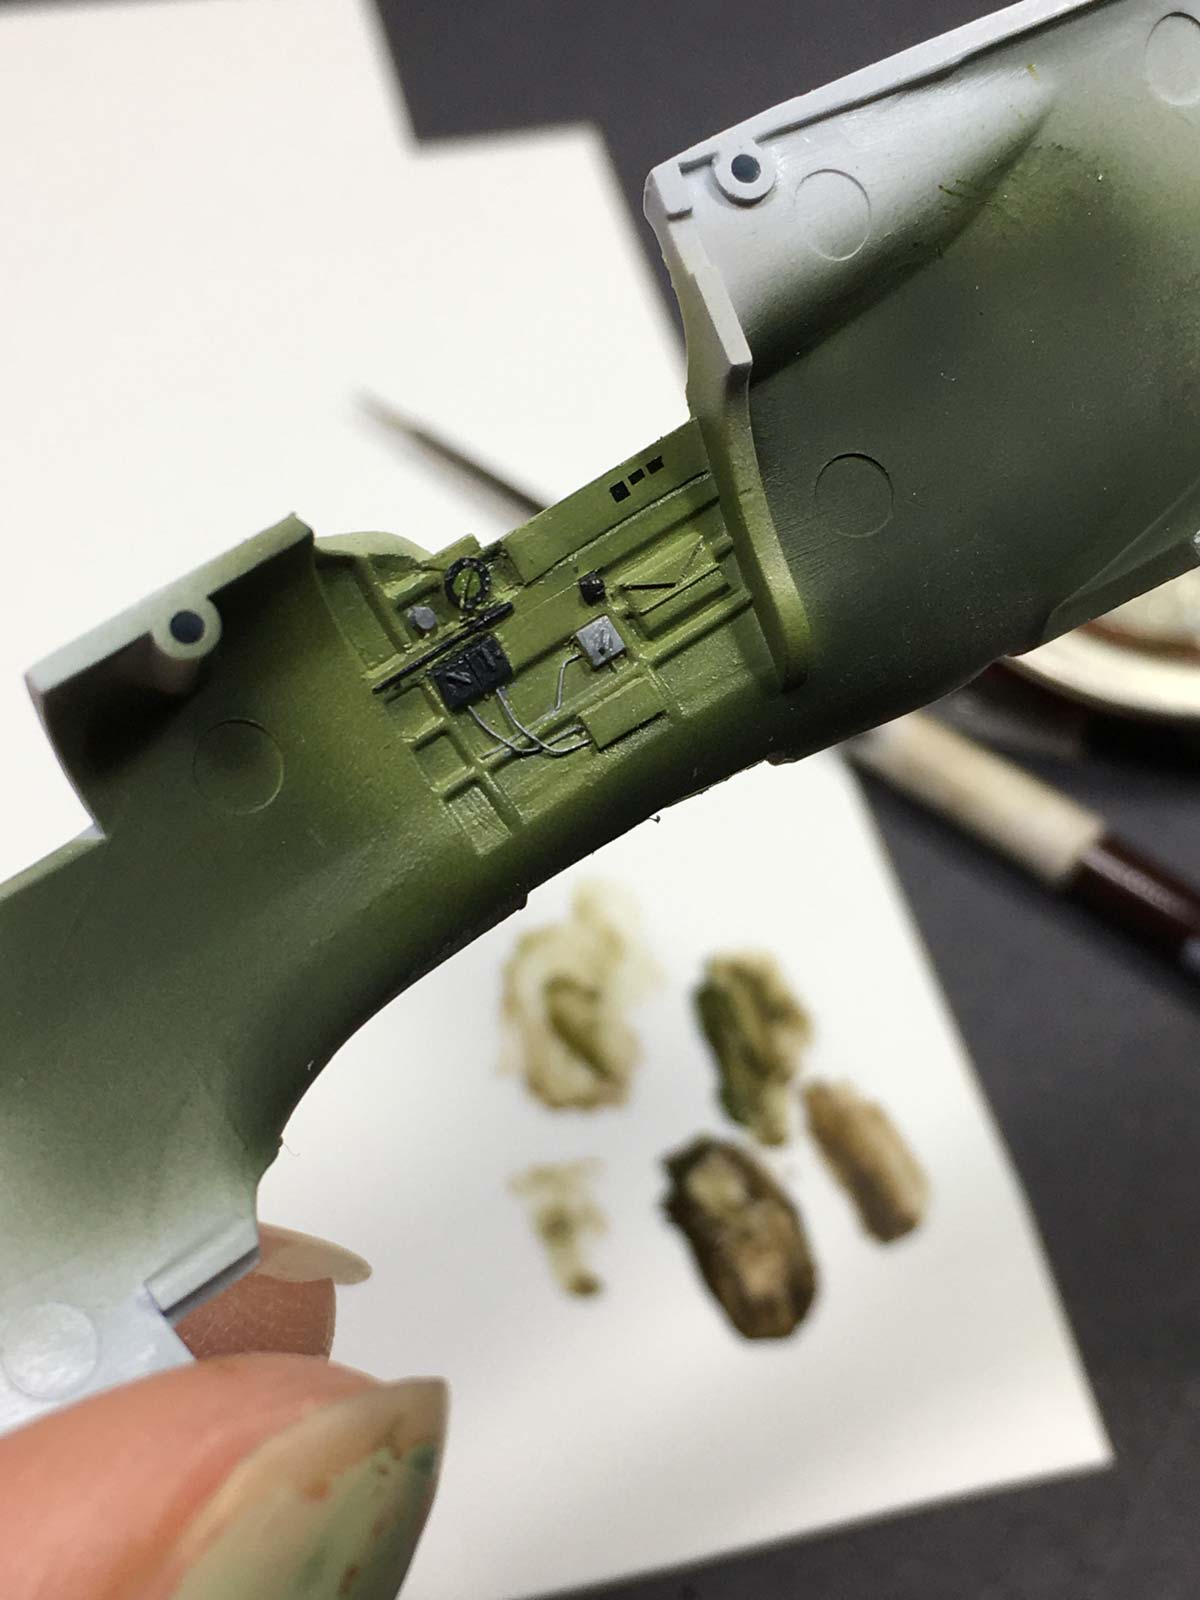
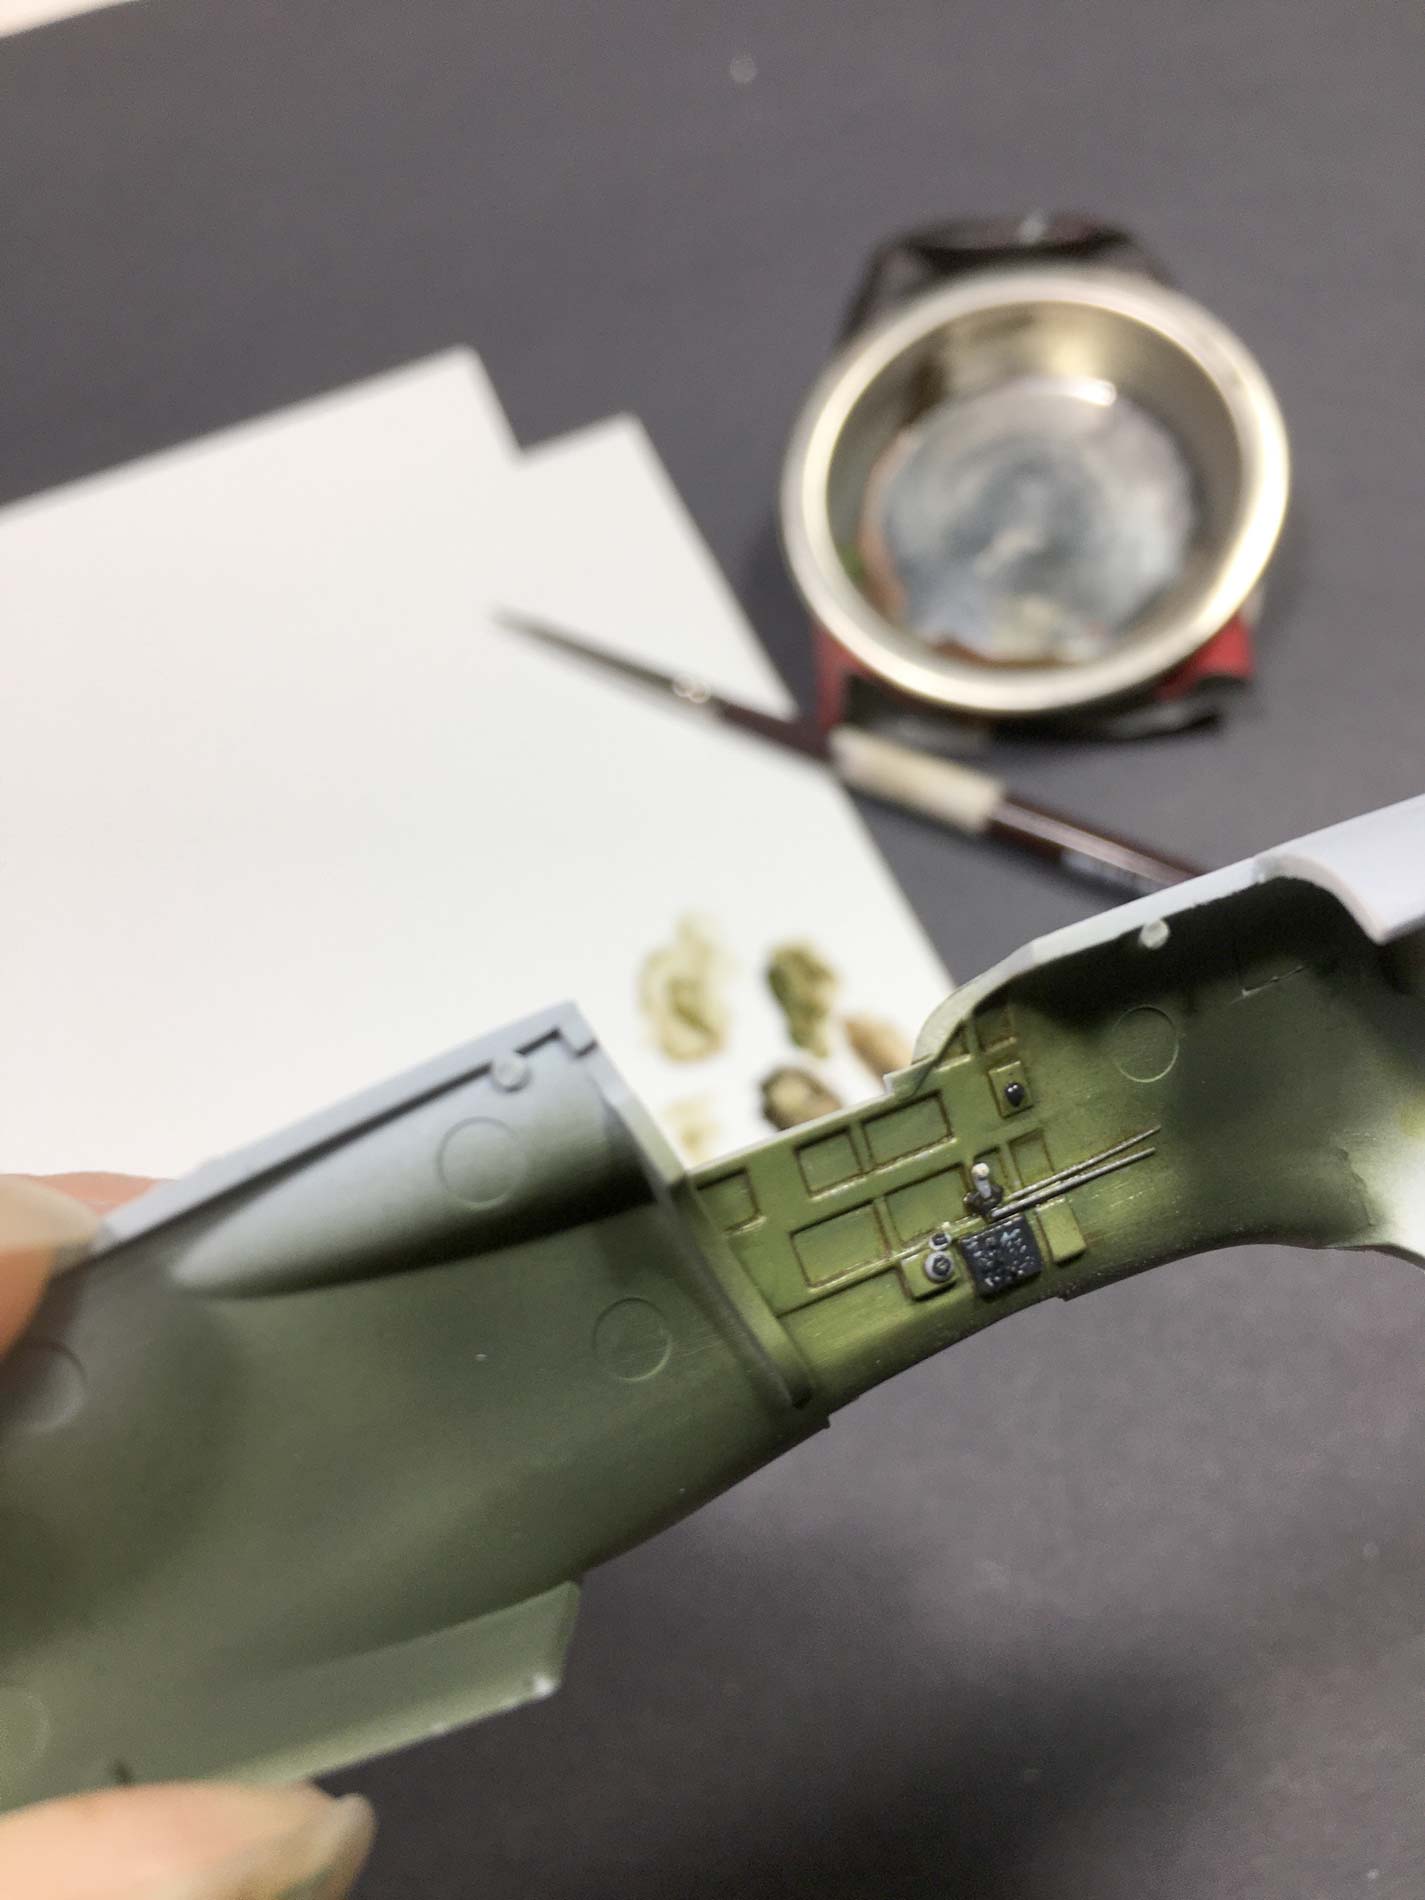
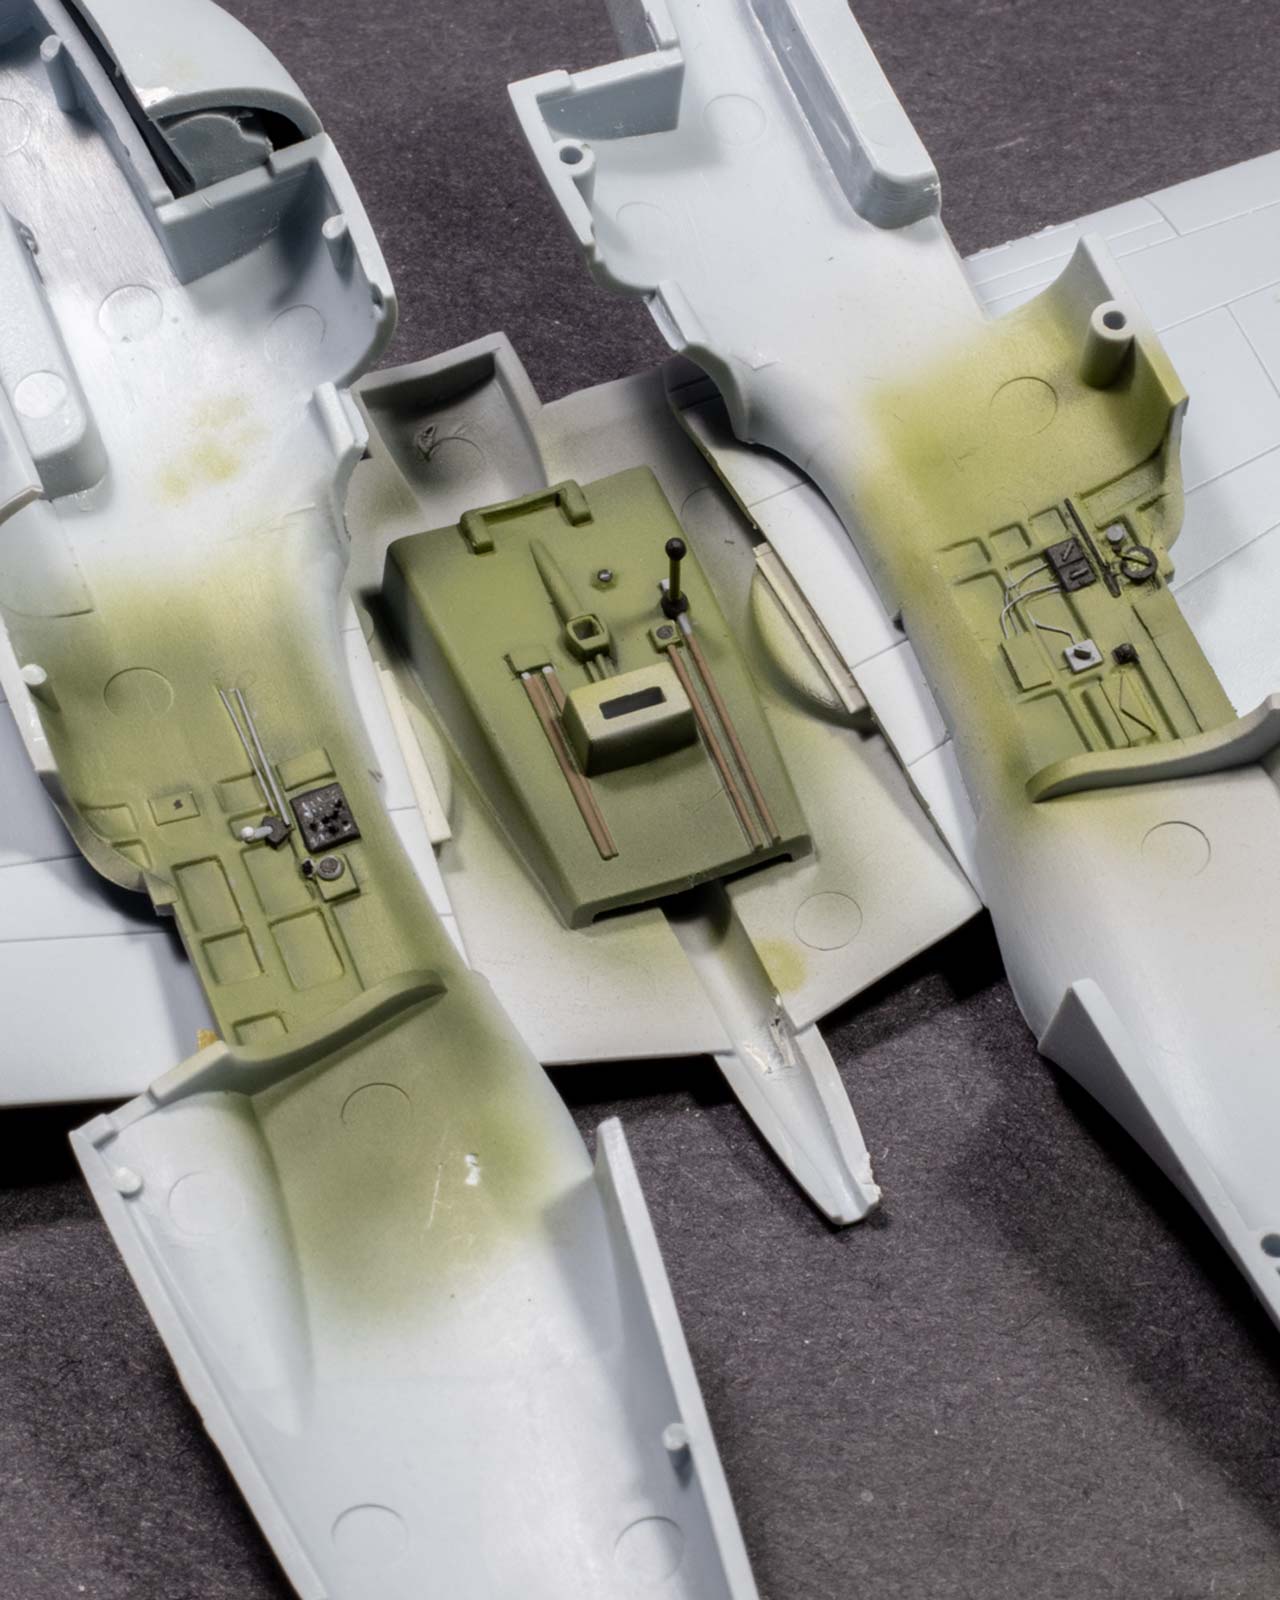
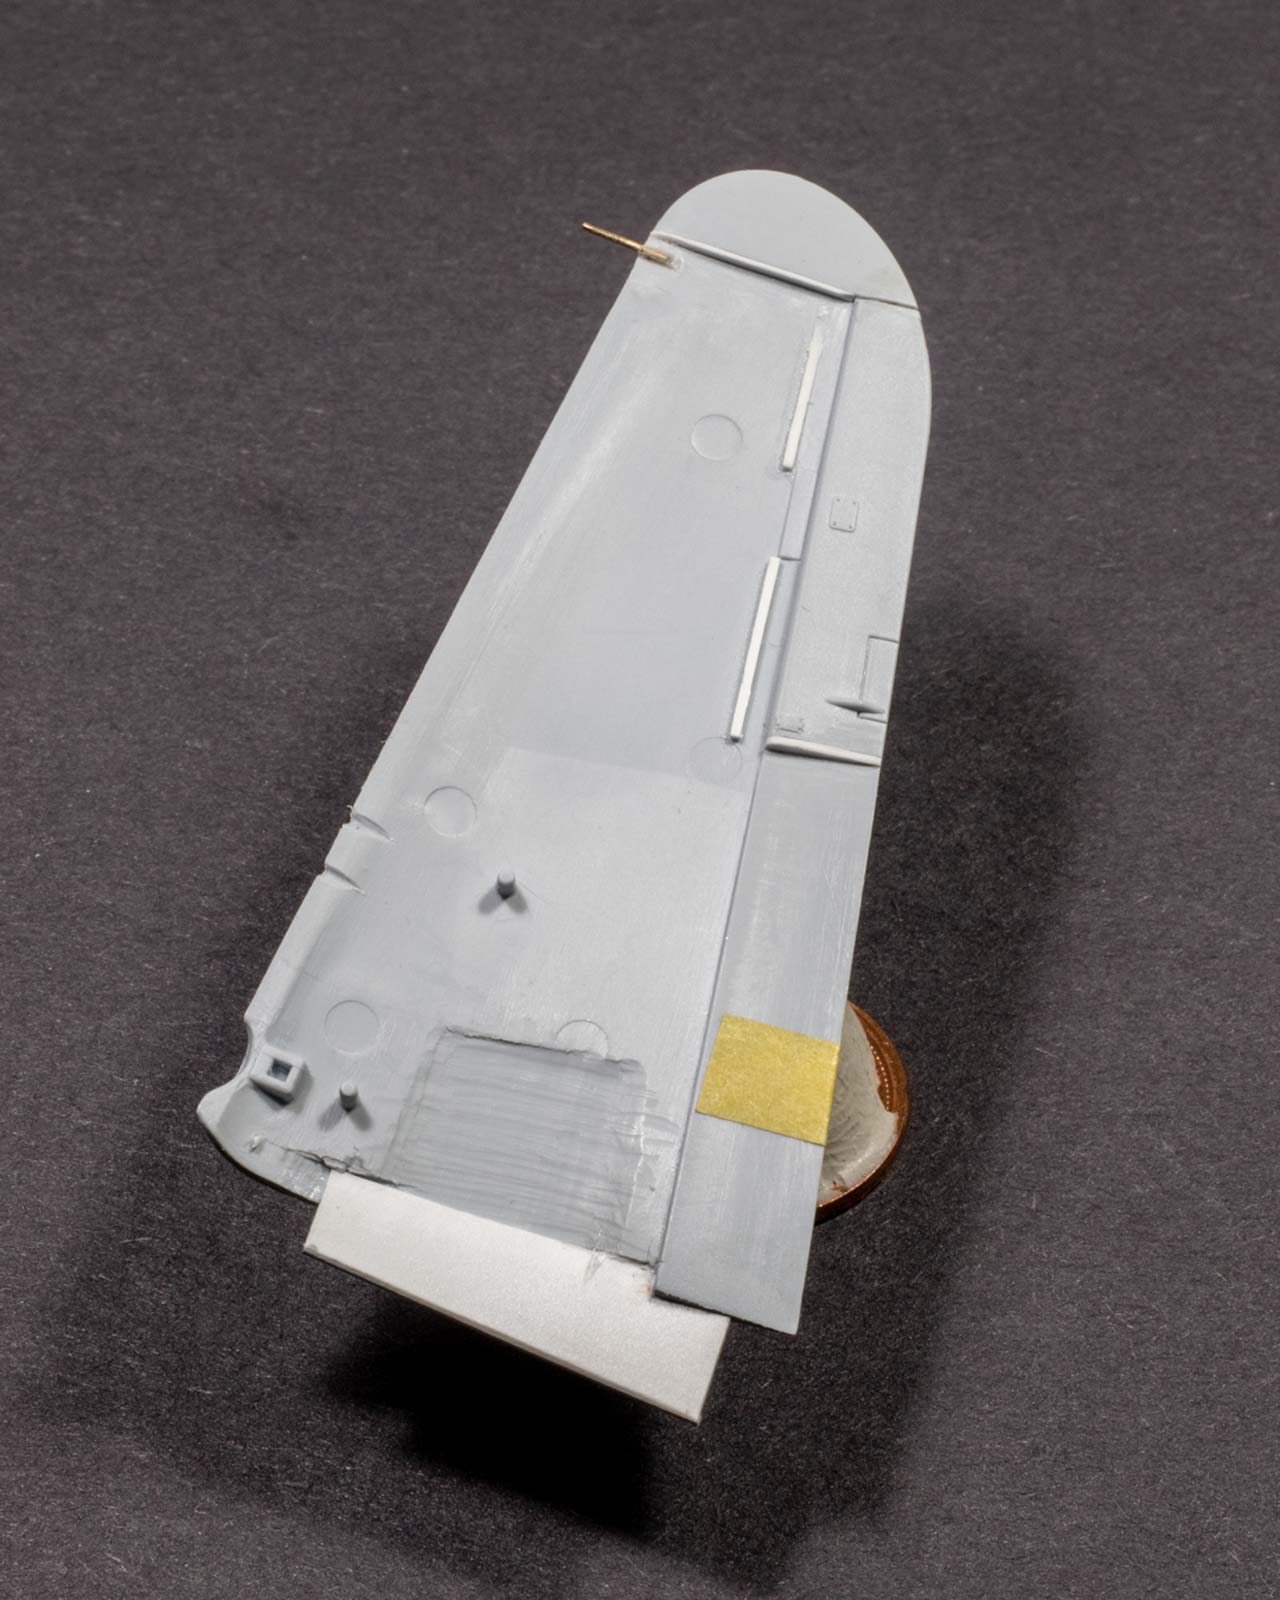
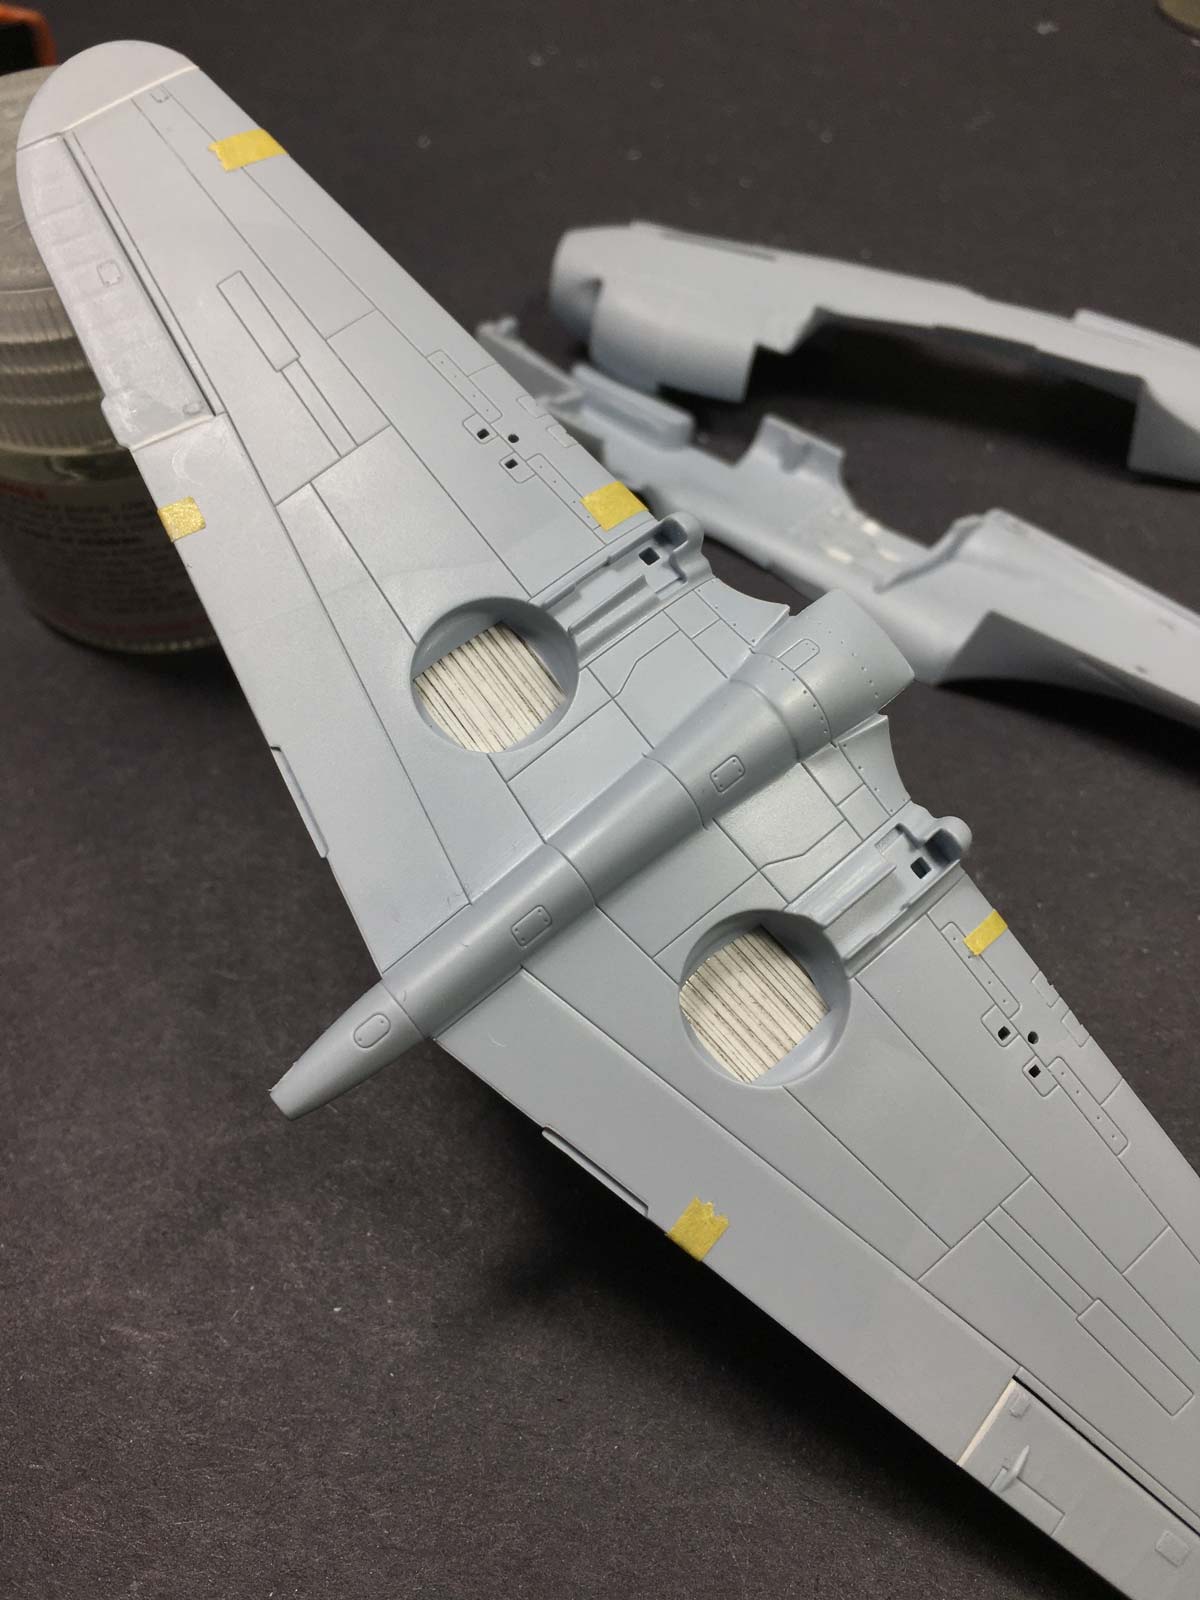
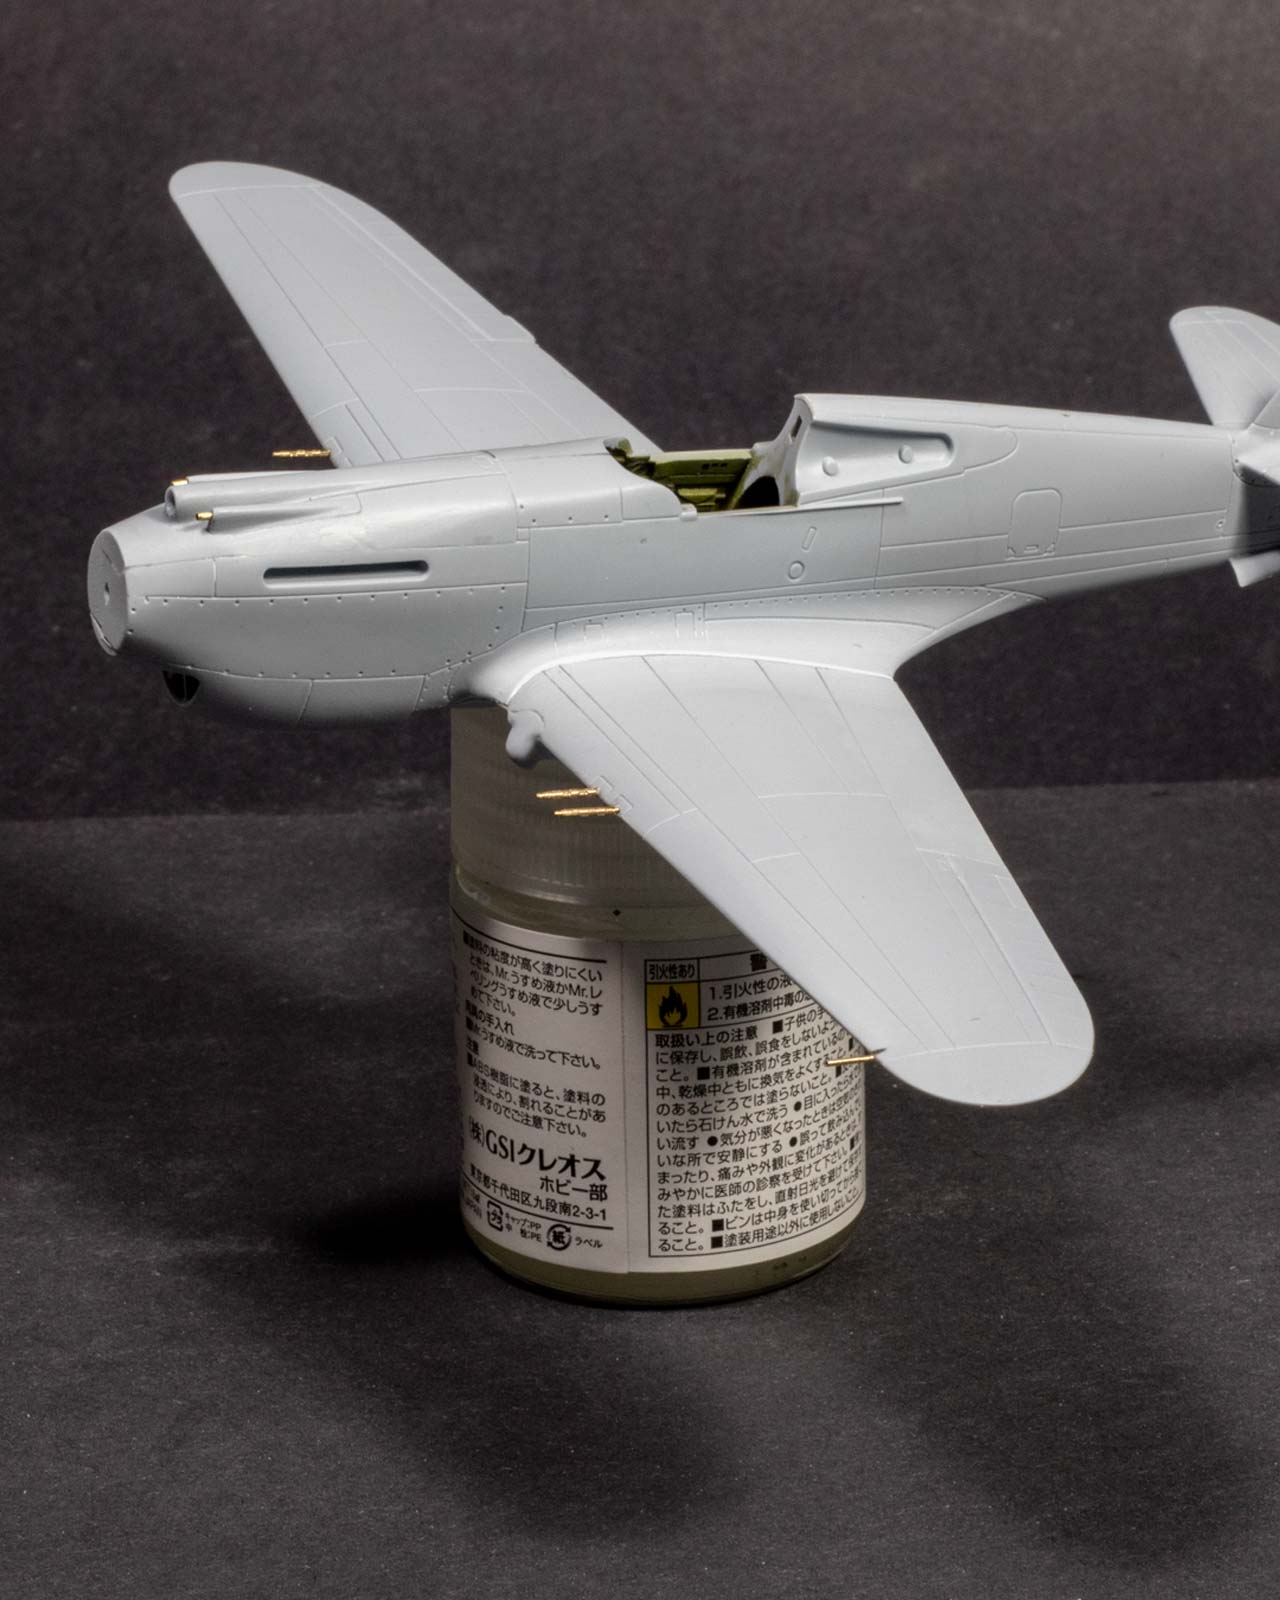
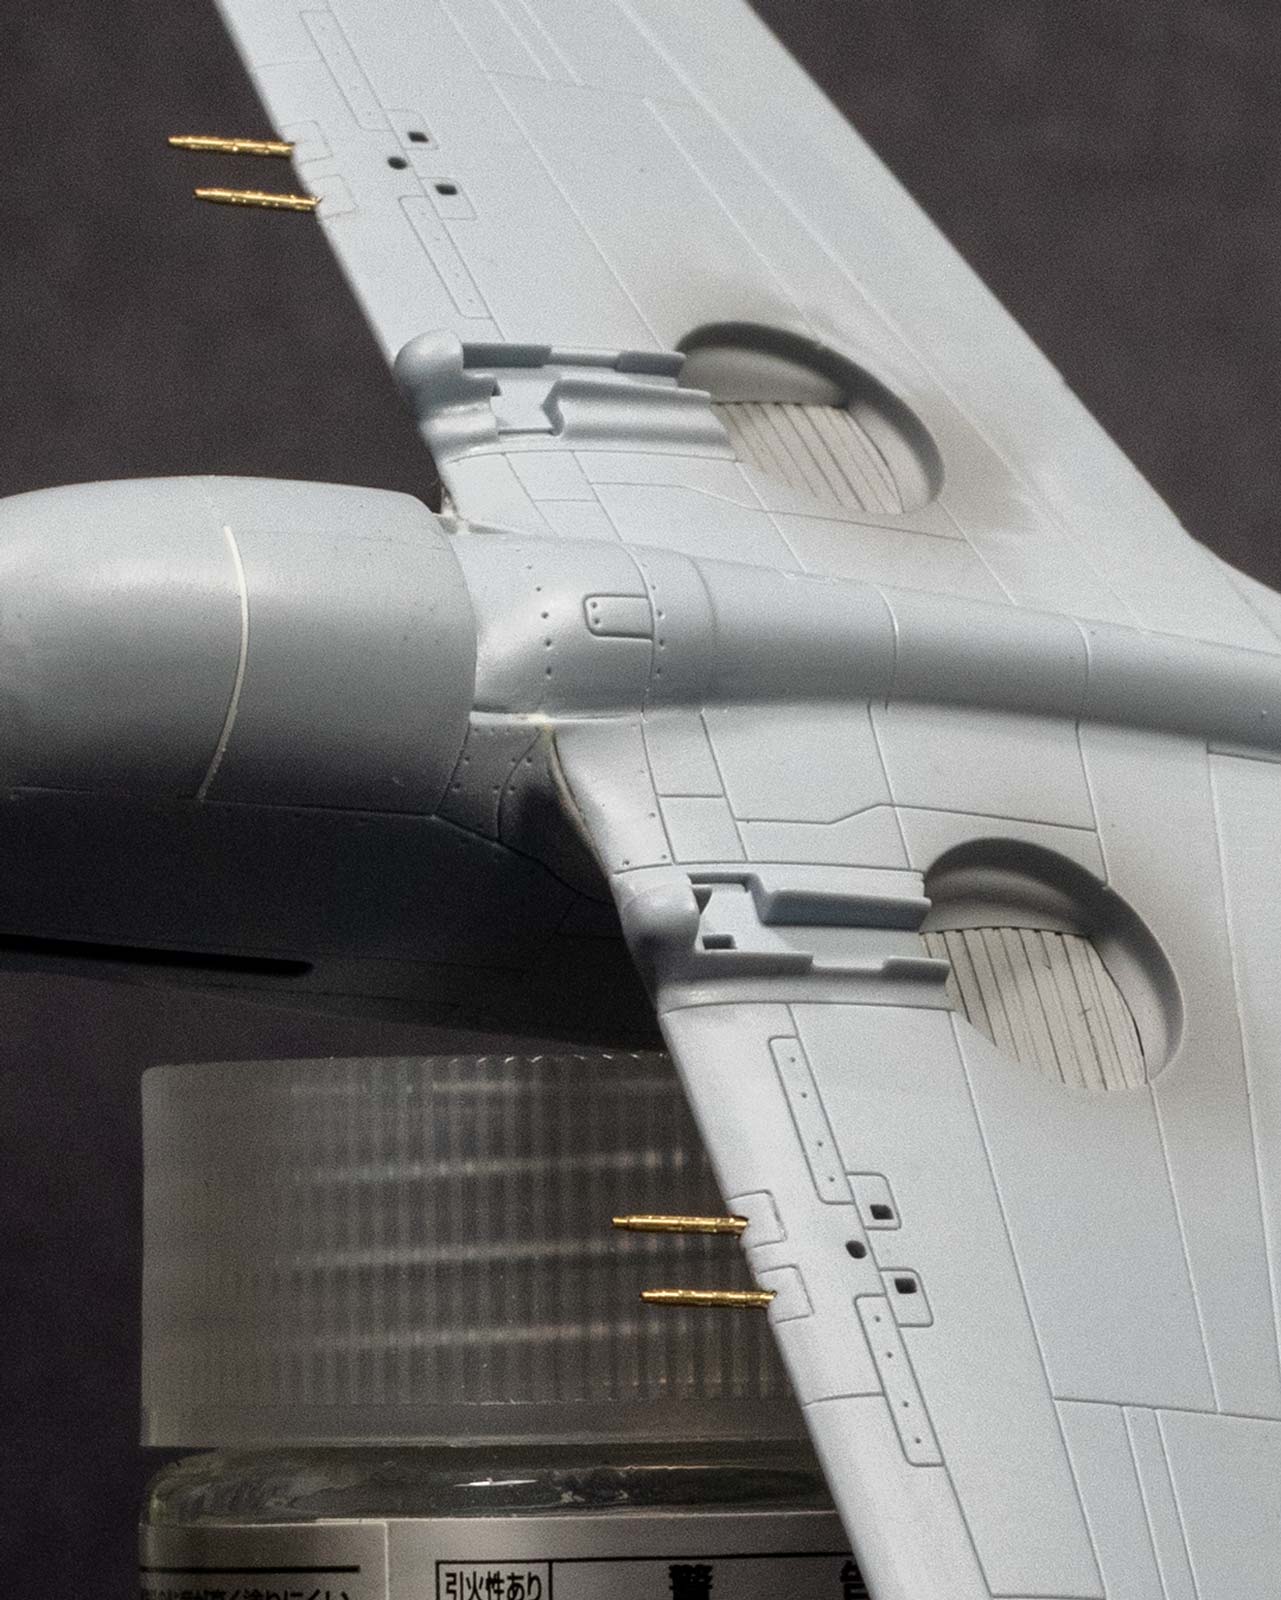
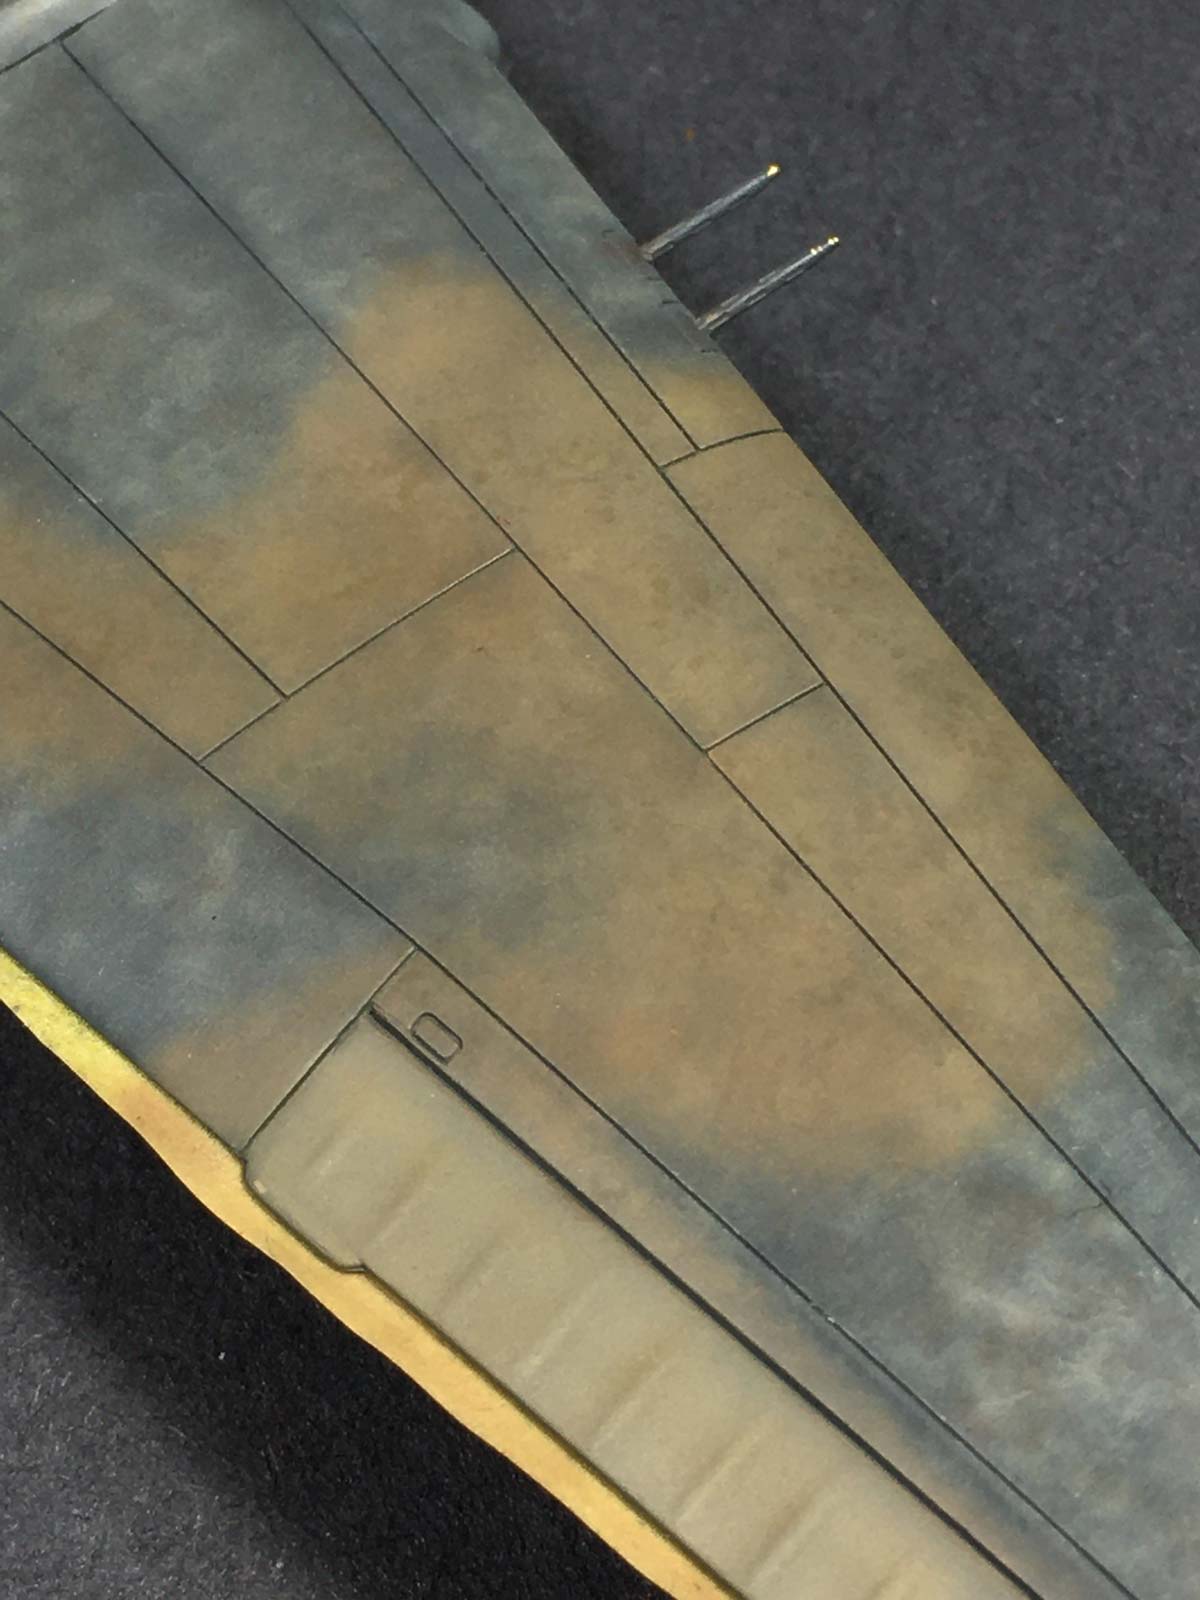
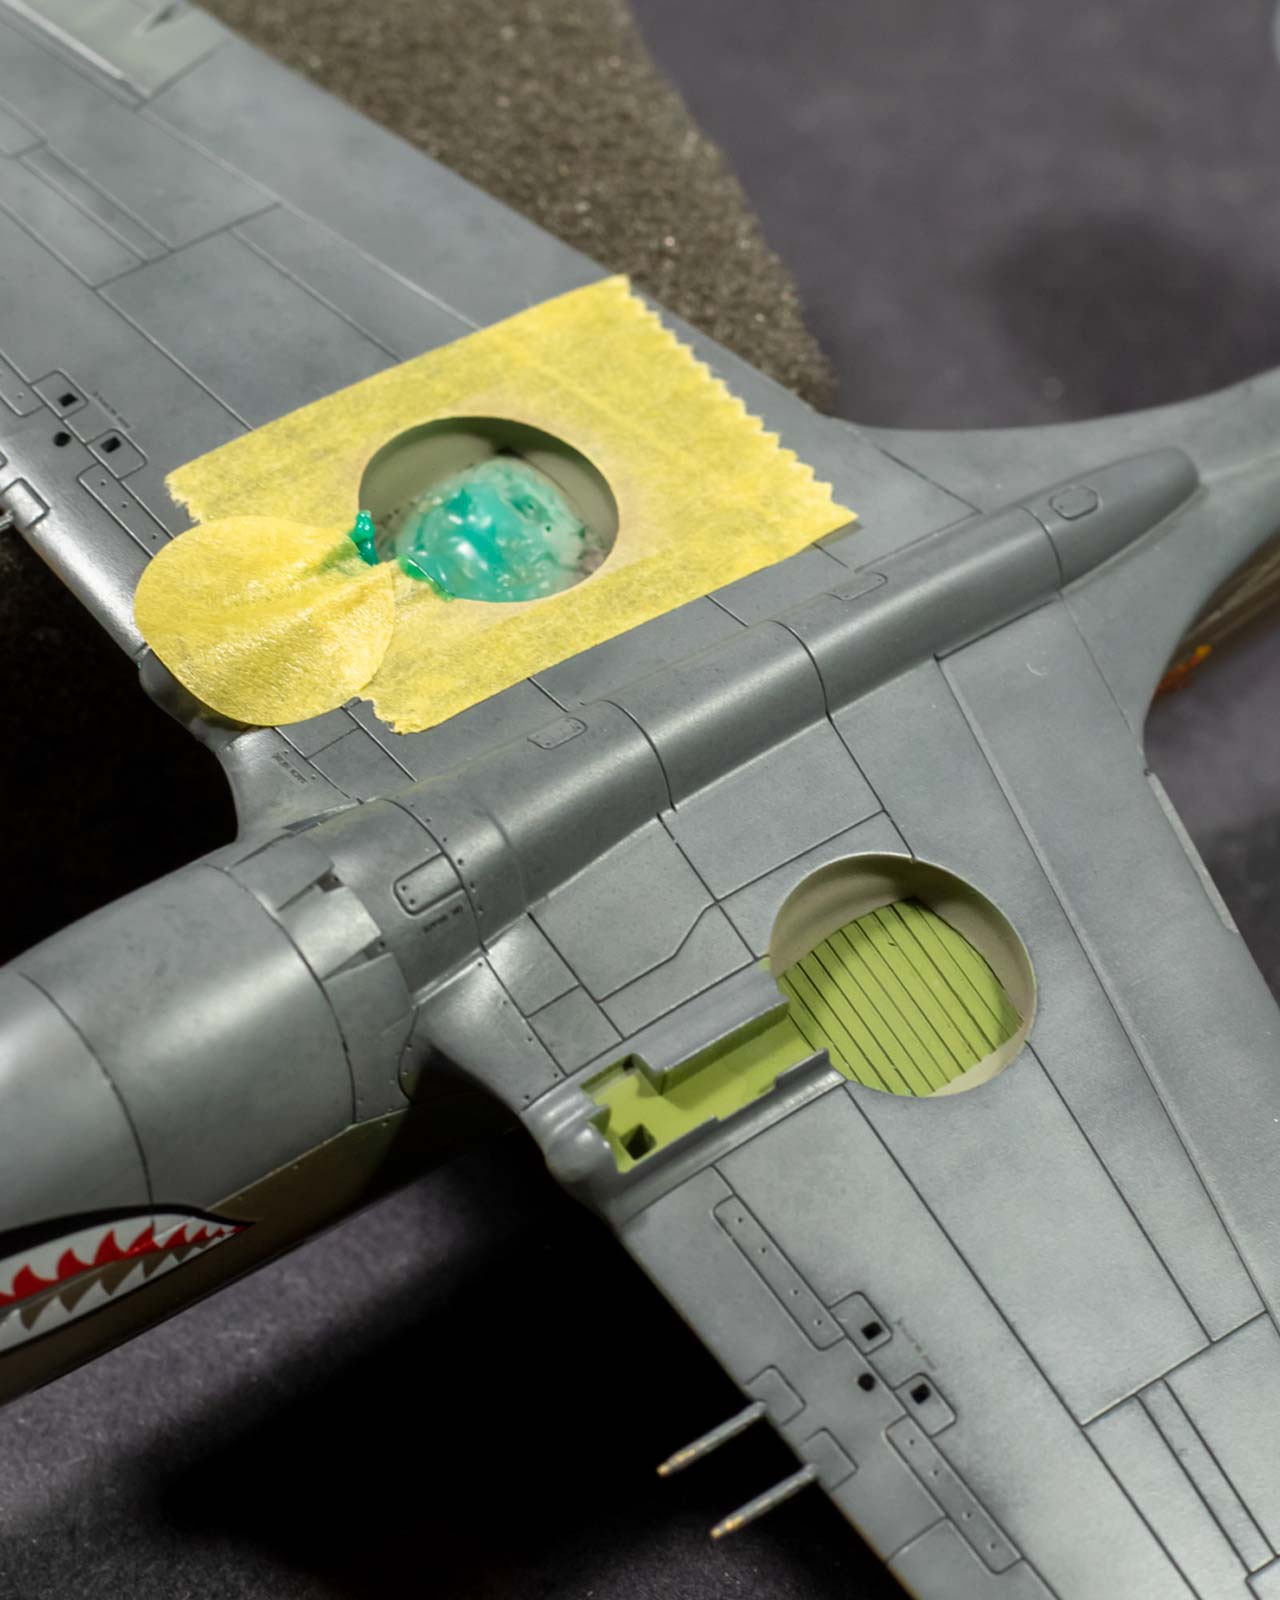
With plenty of planning, test-fitting and removal of unnecessarily large butt-join surfaces, I was able to get most sections to fit well. Thin shims of .125mm and .25mm were used in a number of spots to fill in slight gaps and create a cleaner surface, as seen in the gallery photos. This approach allowed me to mate parts to their critical alignment points, the plastic shims making up for any gaps where they were easier to blend in.
The wing roots required significantly more work, though here again I used shims and cyan glue to fill the space as this approach is more solid than trying to fill with putties, which can shrink and crack when handling the kit. The kink in the wing root join, close to the knuckles on the wing leading edge were particularly troublesome, and a fair amount of scrap plastic was added and shaped to ensure a snug join, and zero flex.
The first image also shows where the moulded detail for the interior surface of the landing gear bay has been ground away. Like the cockpit detail, the inside corners were very soft and would not effectively hold a wash. Replacement detail was easily made with styrene strip, using a second piece placed adjacent as a spacer to ensure they all ran parallel.
prep & Prime
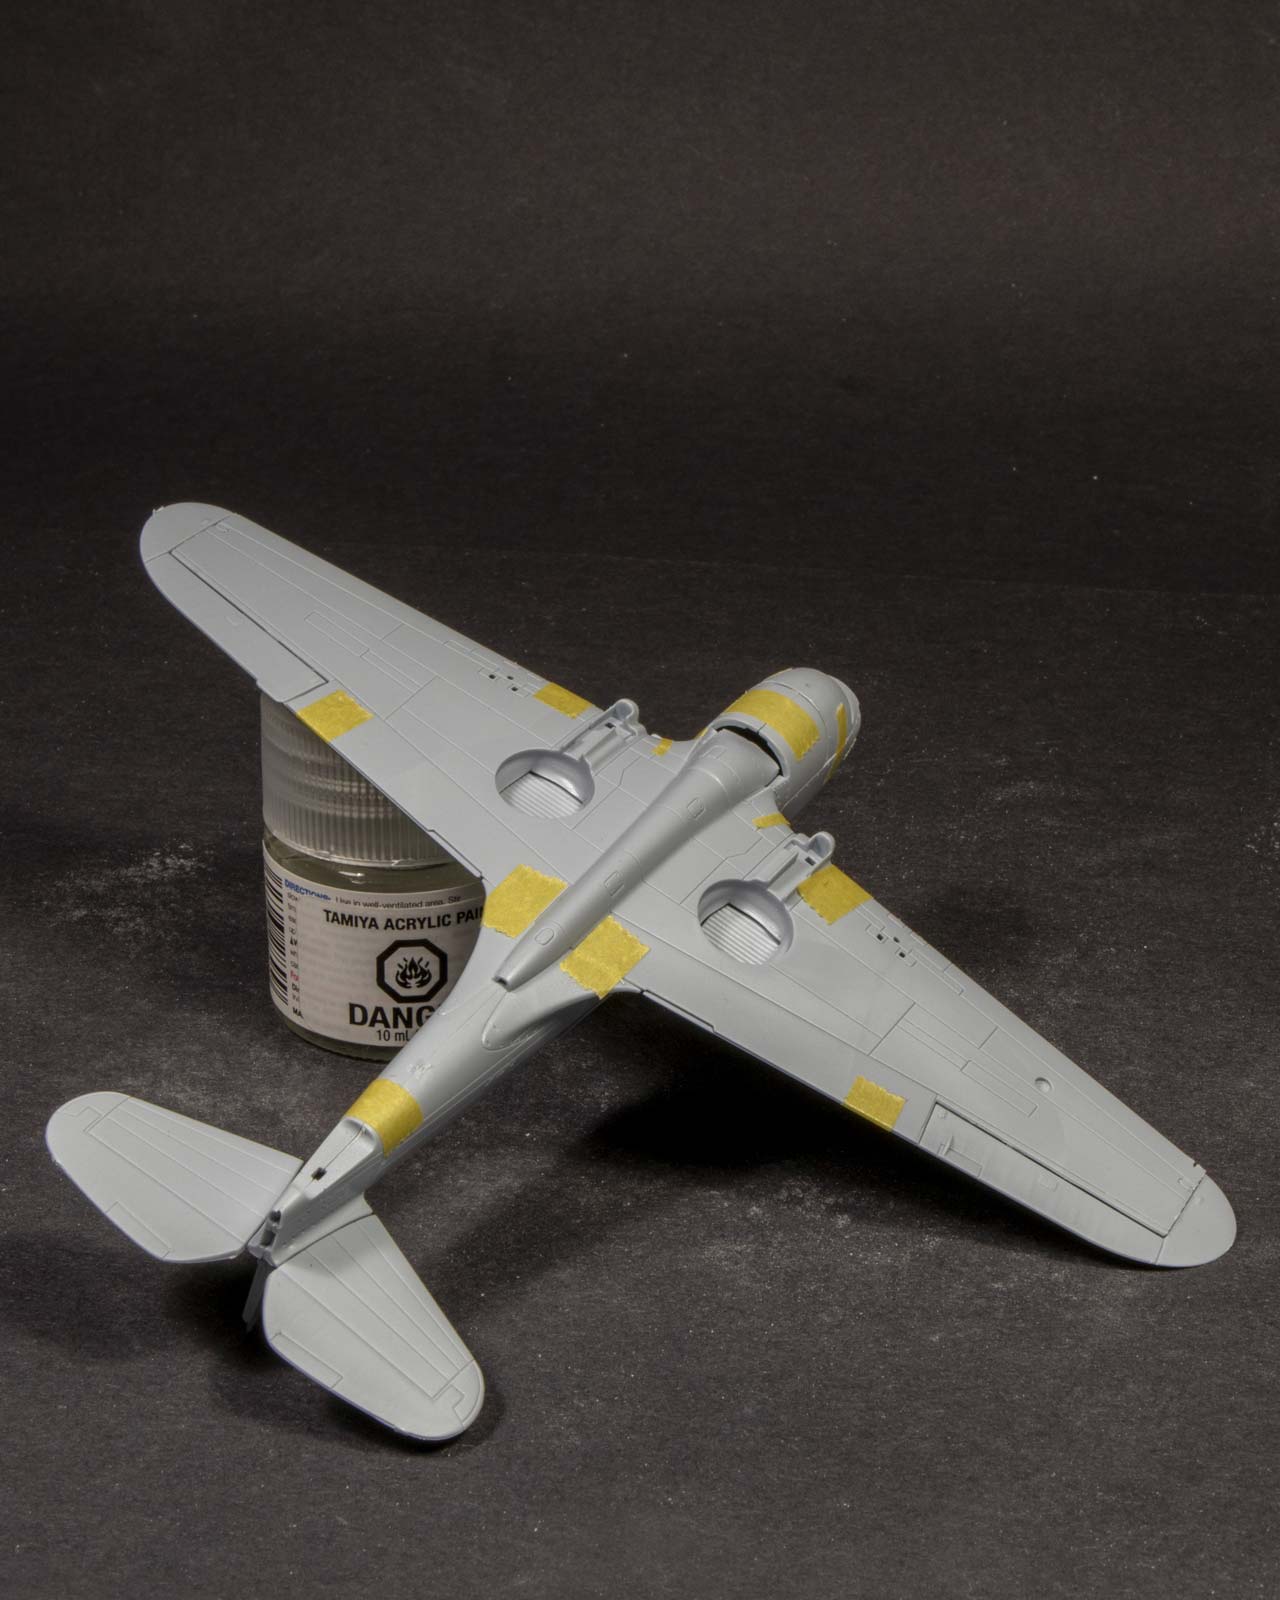
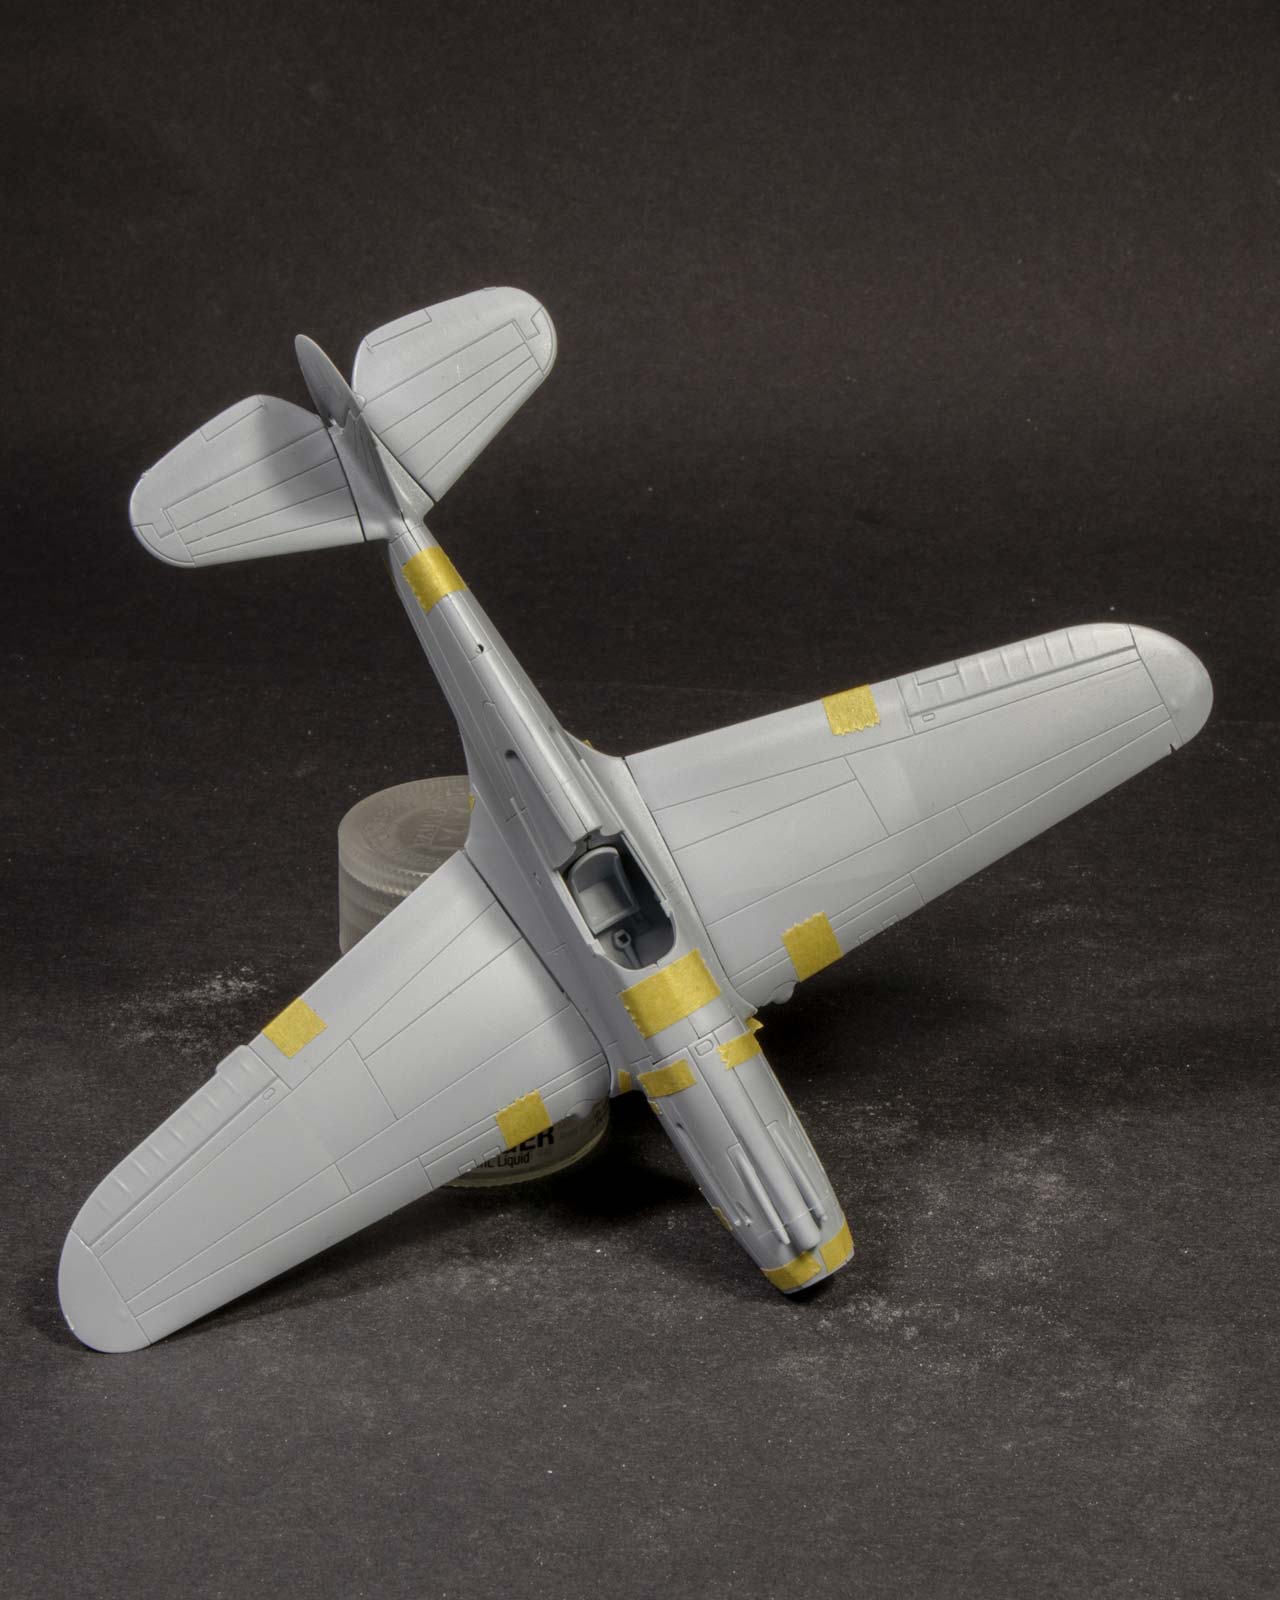
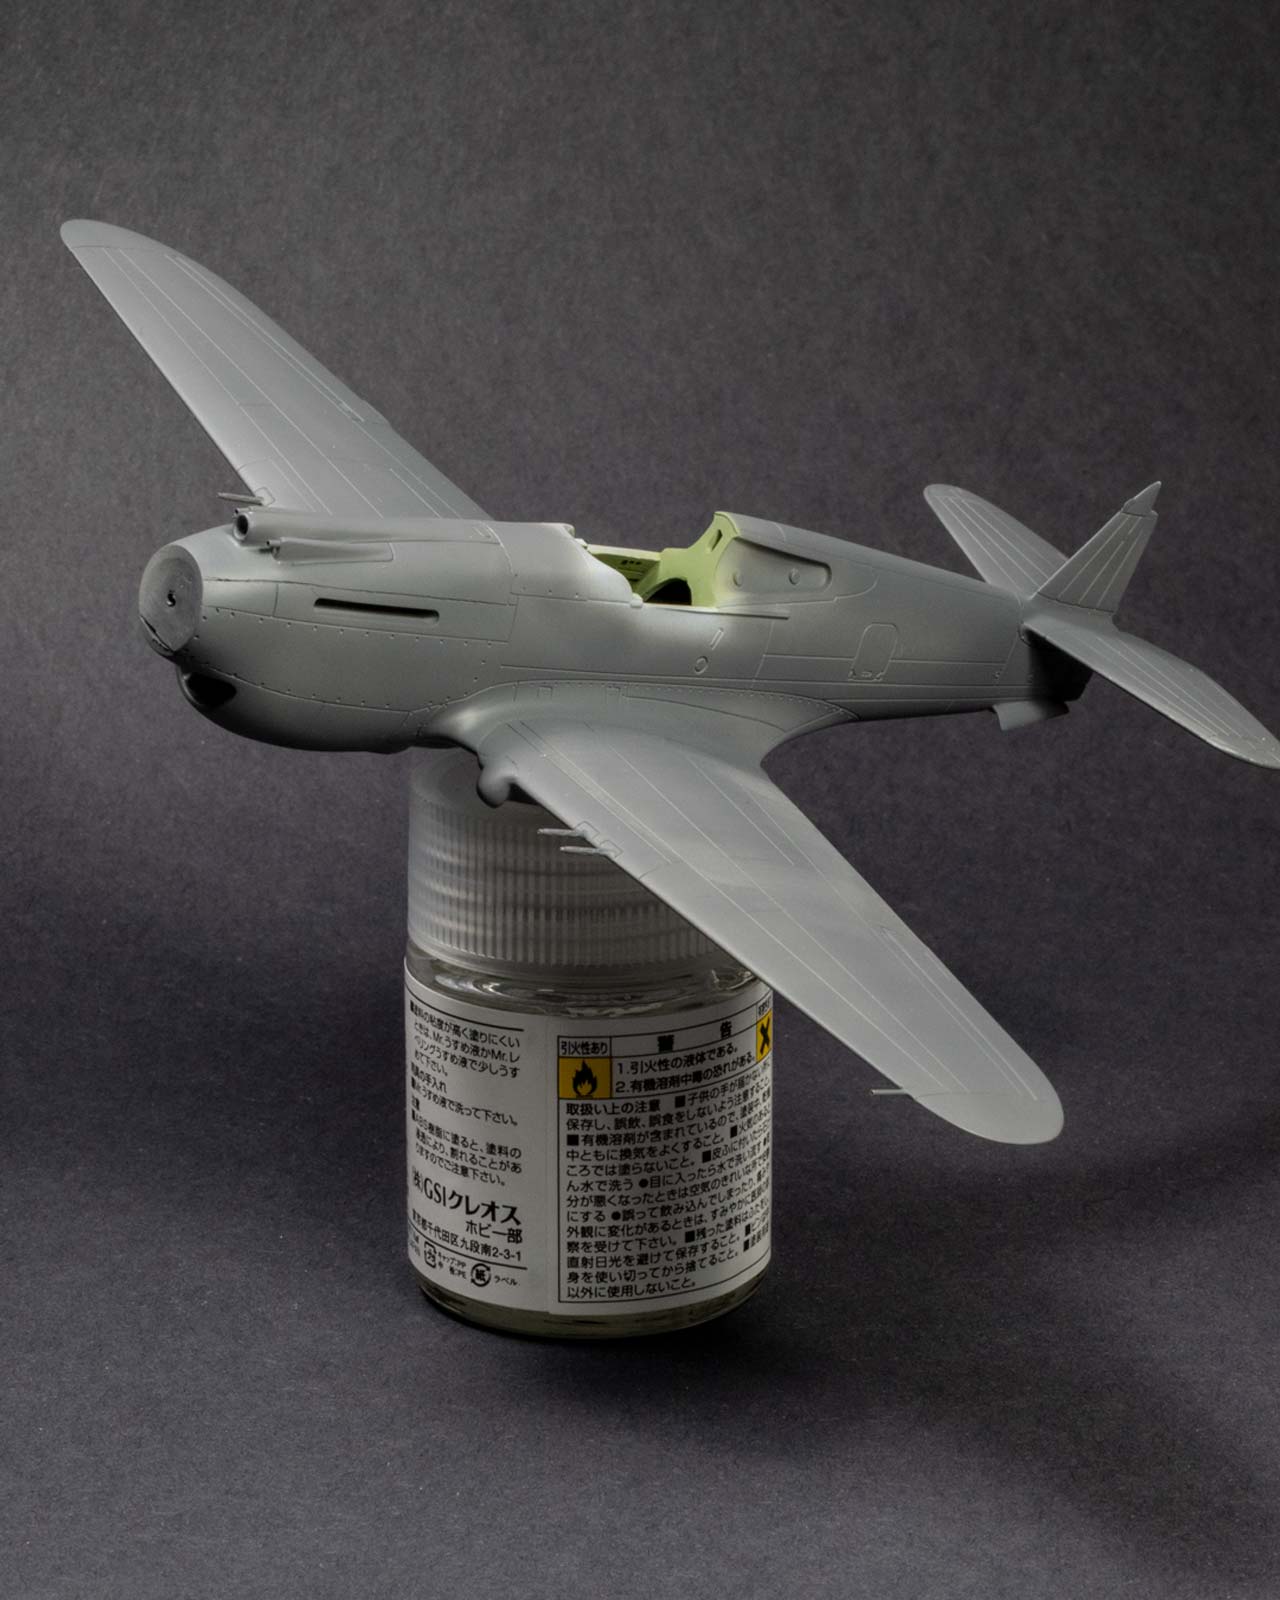
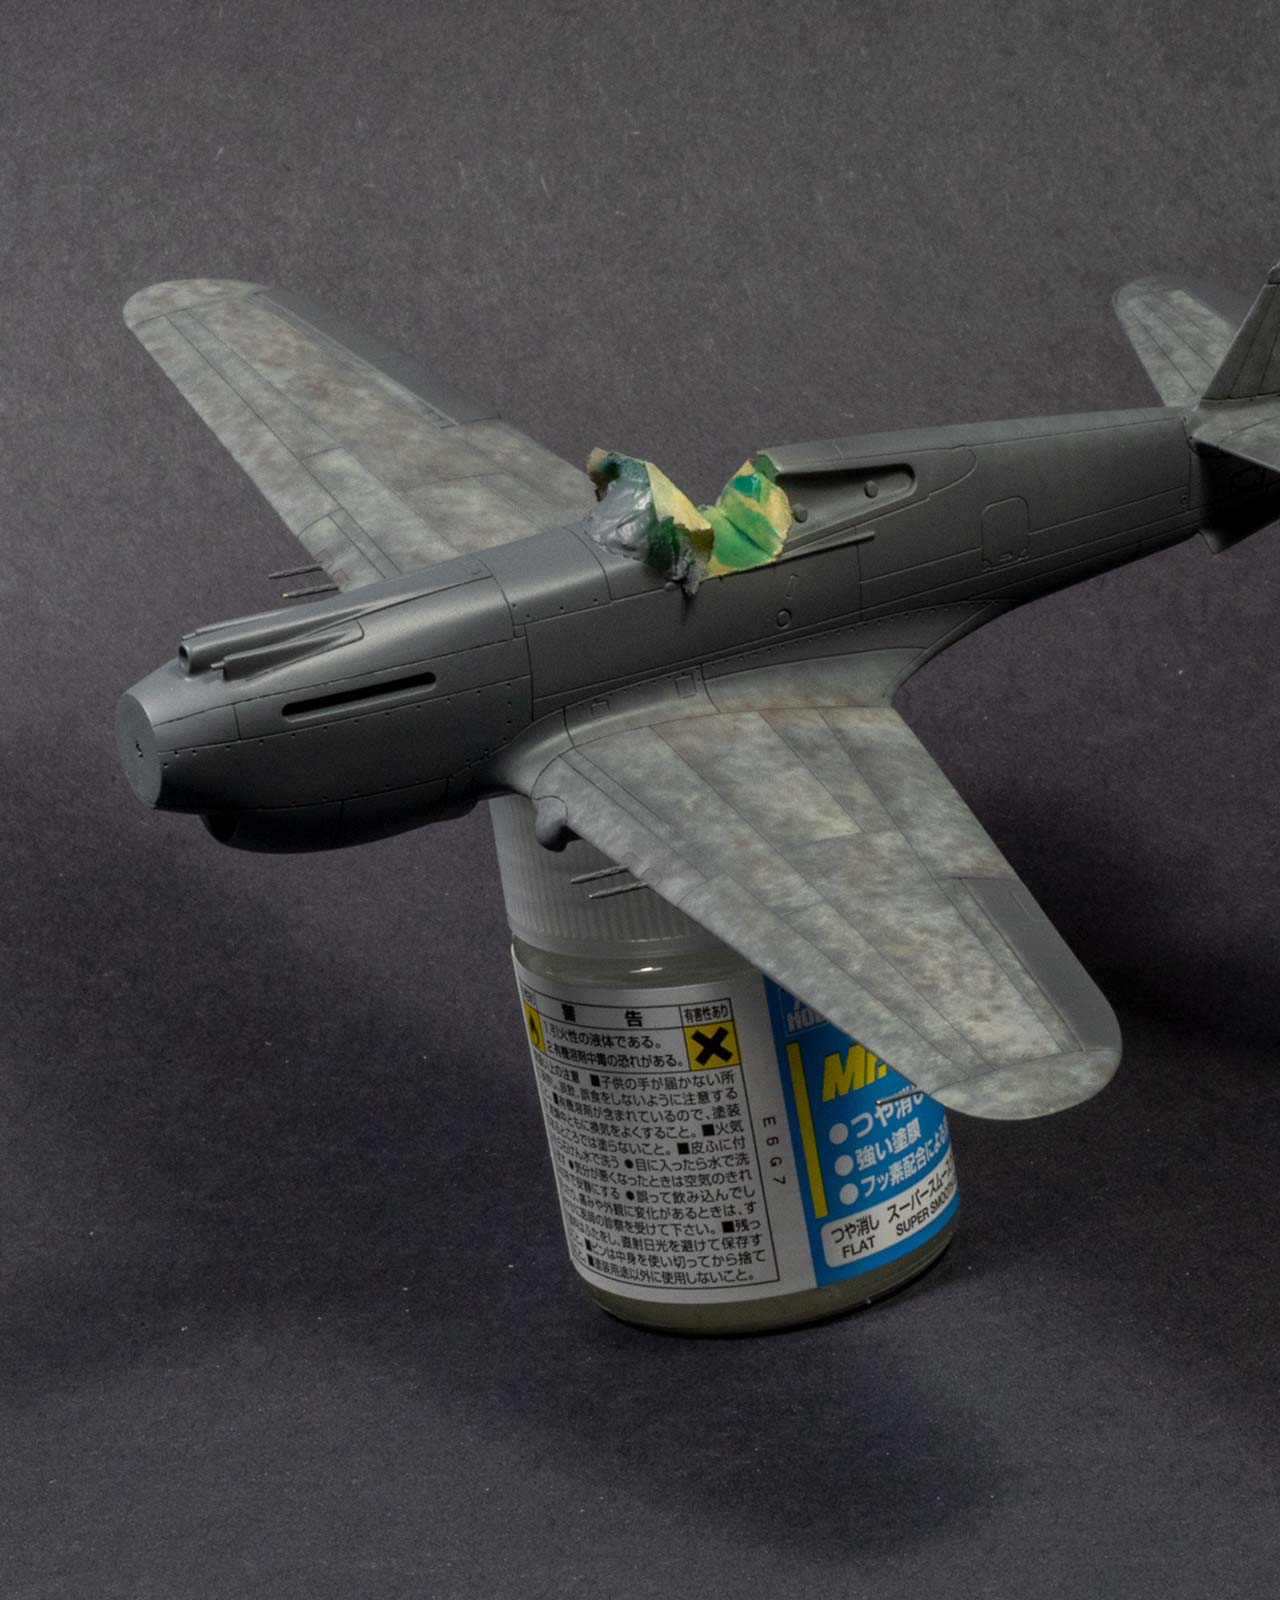
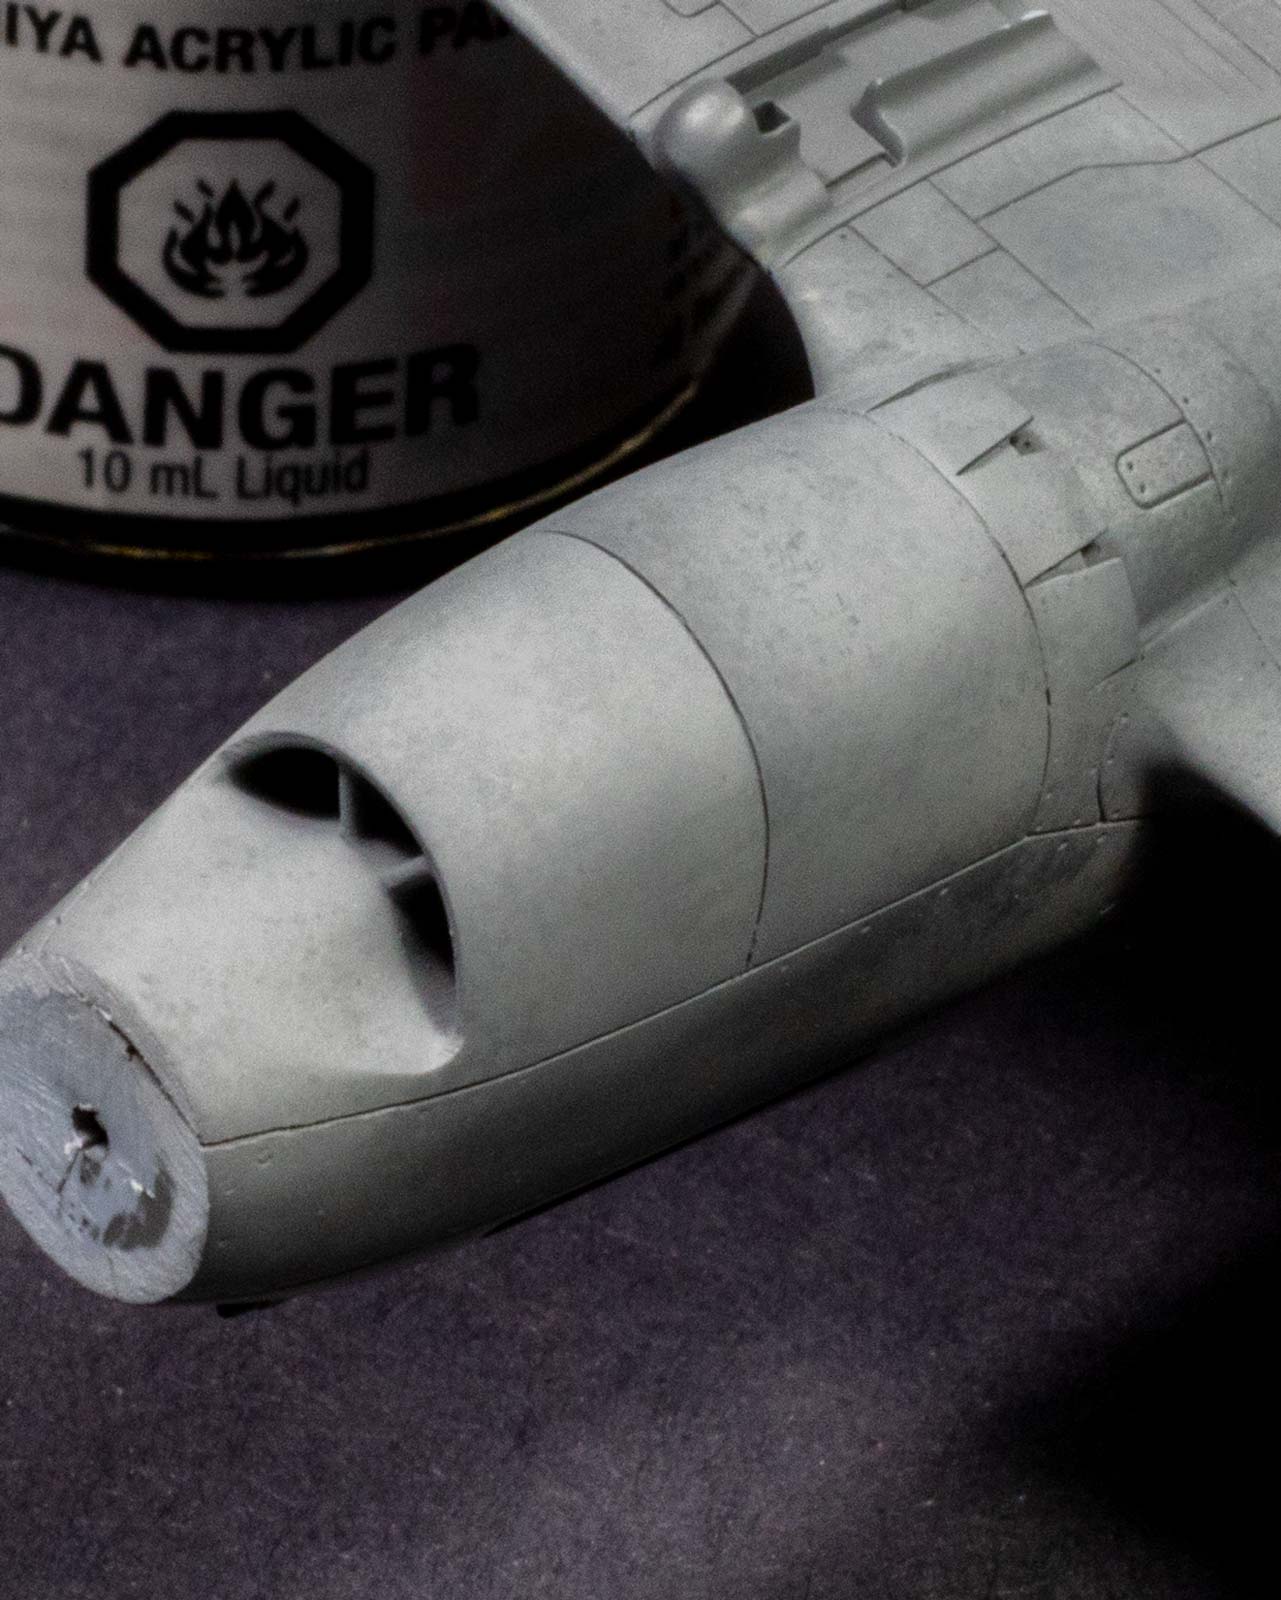
With assembly finished, the aircraft was given a coat of Mr. Finishing Surfacer 1500 grey and inspected for imperfections, the majority of which were around the wing roots, along with a few small casting imperfections on the surface. Once corrected, the entire model was resprayed with a darker grey and the surface sanded down with 4000 grit sanding cloth.
Being a relatively straightforward build, there wasn’t allowance for any significant weathering, still, these were workhorse machines in a rugged corner of the war. It was important that they still showed some degree of distressing to their finish.
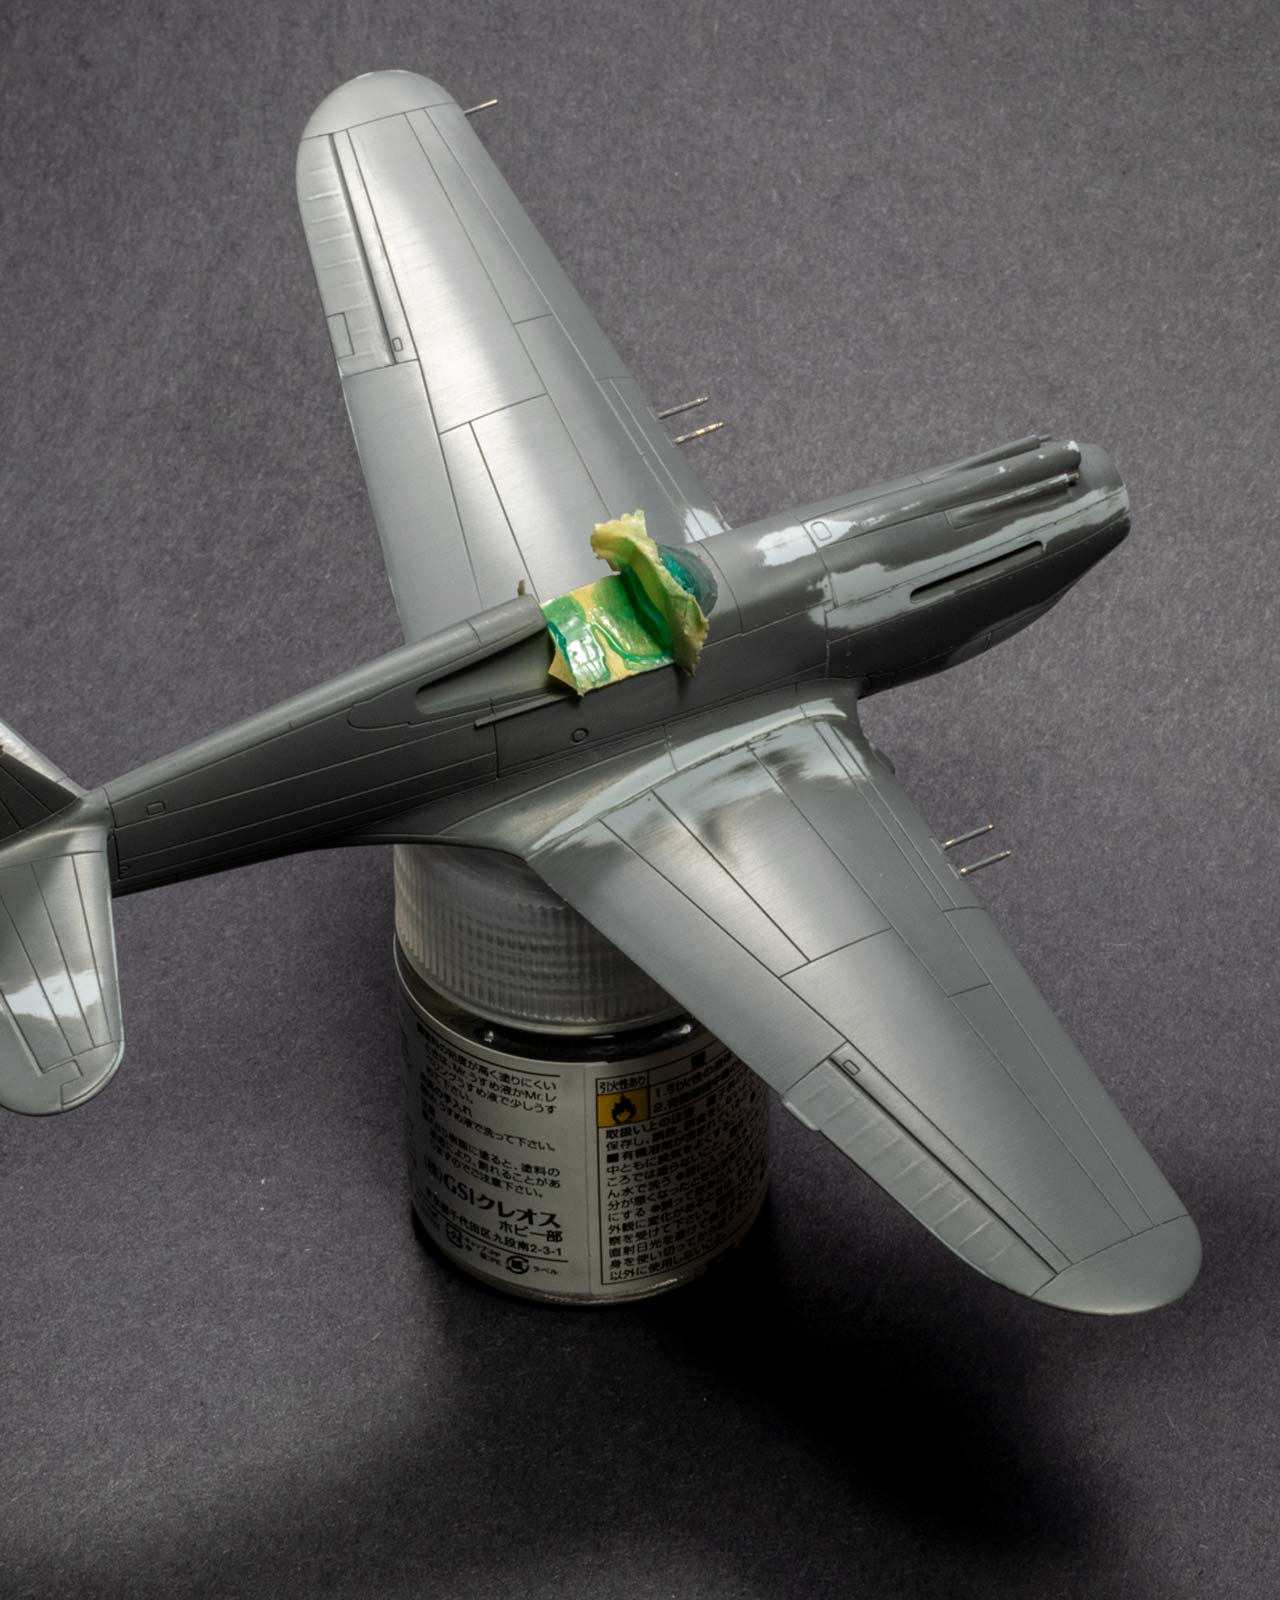
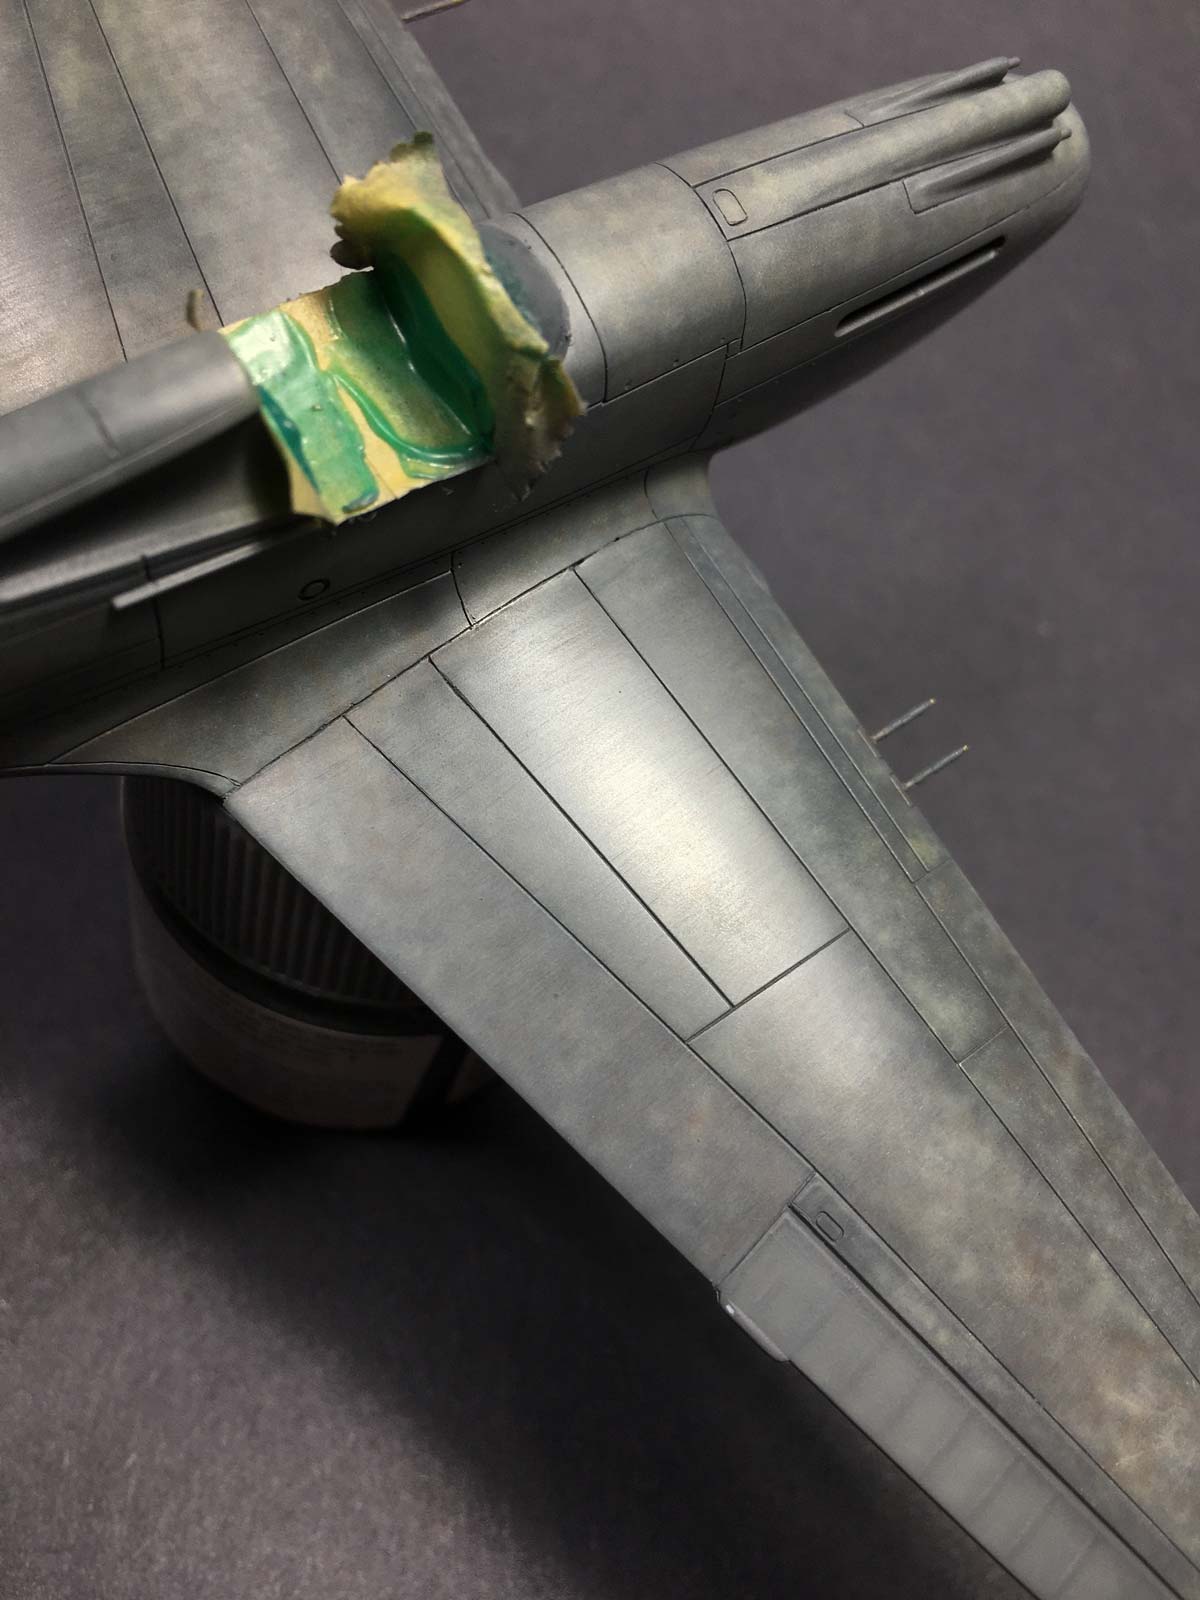
The easiest way to accomplish this was to prioritize my time on the underpainting. Using my Iwata HP-B with a 0.2mm needle, I slowly freehand mottled may way across the aircraft with a couple different greys from Gunze Mr. Color. Each panel was painted individually, darker towards the front, lighter at the rear, with additional mottling then sprayed across some panel lines to avoid a patchwork look.
Once complete, the entire model was again sanded with 6000 grit cloth. Even though the coverage was very thin, the durability of Mr. Color paint was enough to stand up to the abrasive, and where slight amounts were sanded away only contributed to the distressed effect
Paintwork
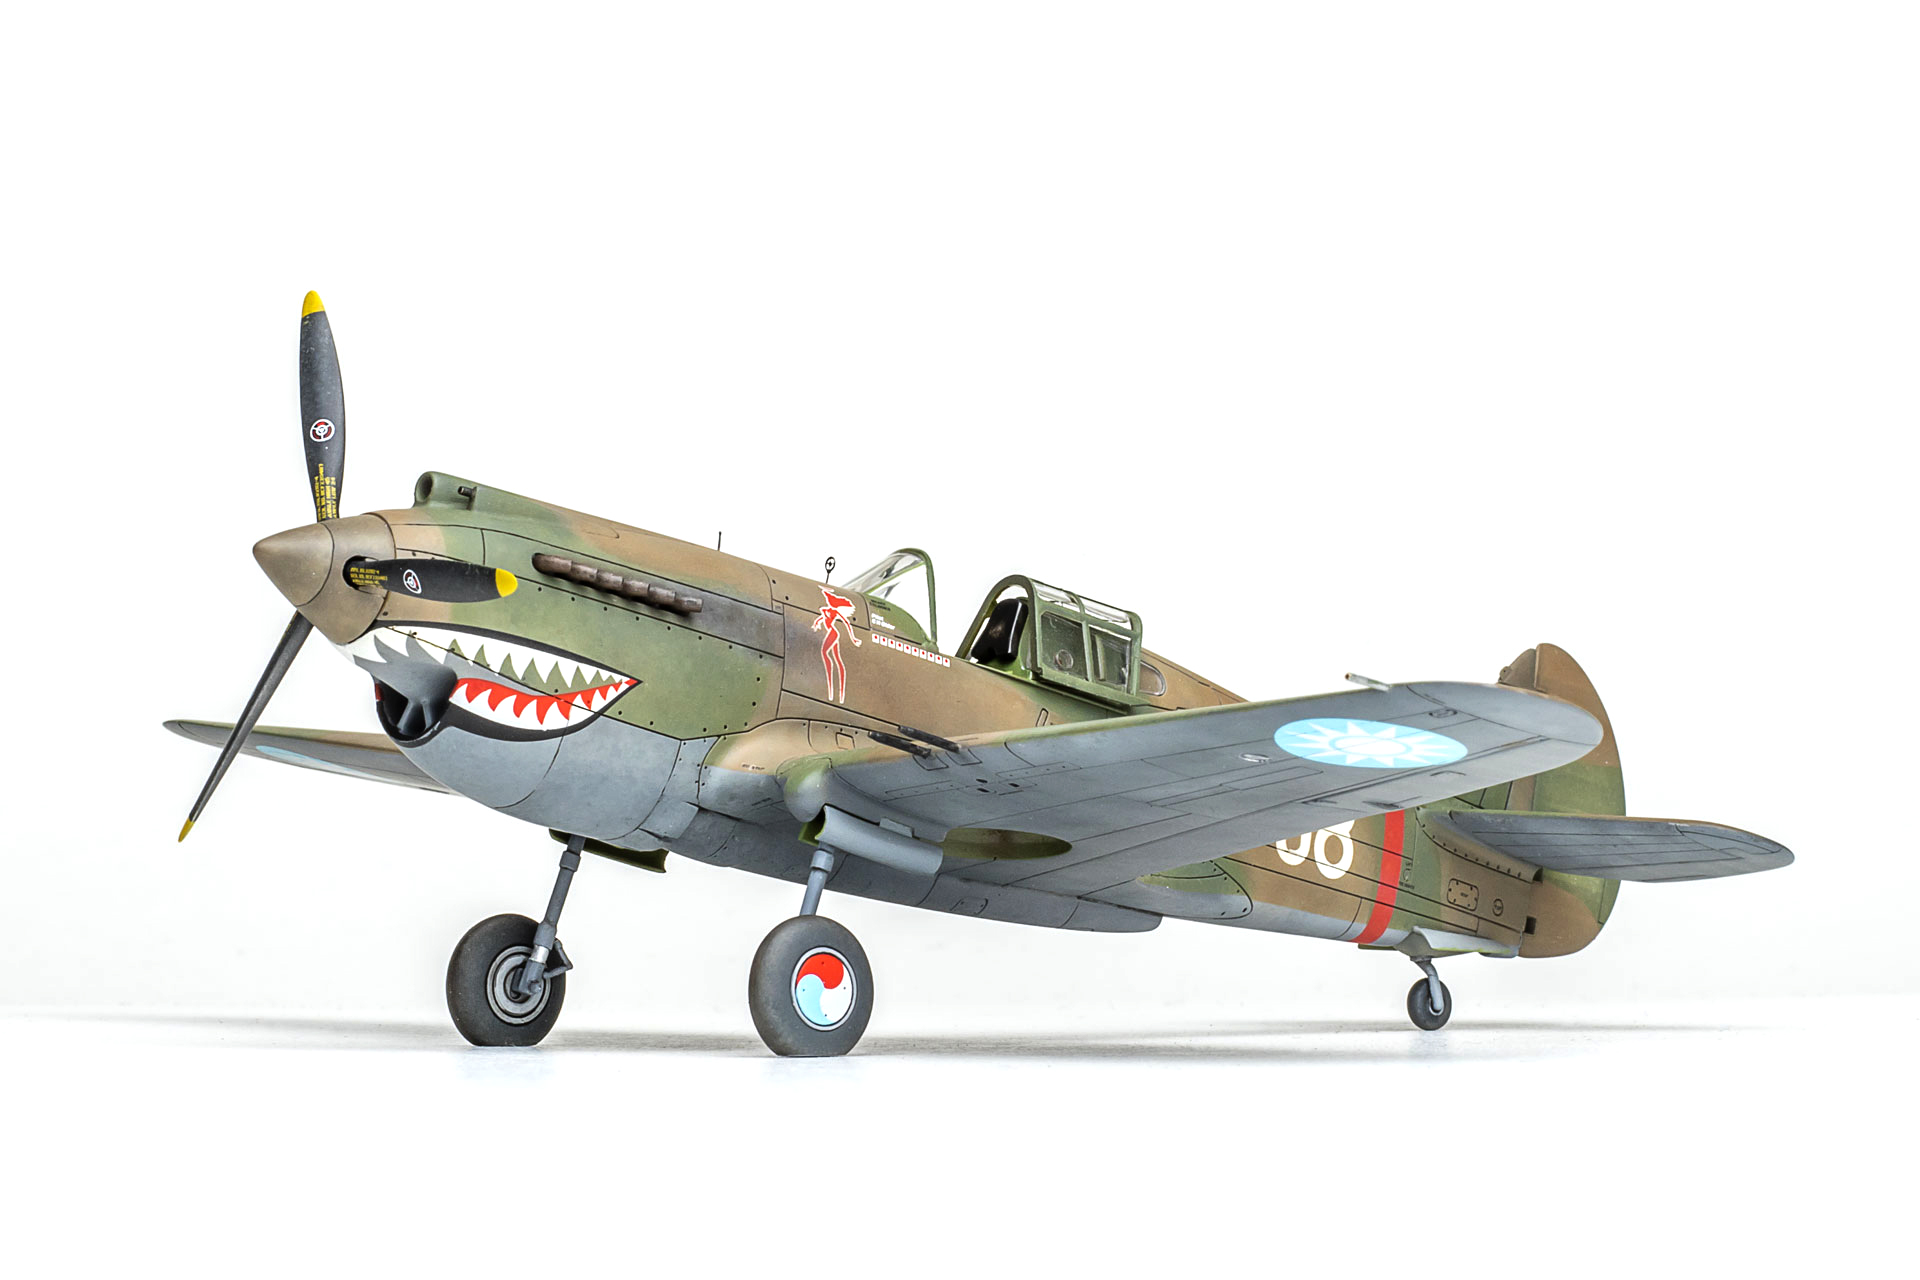
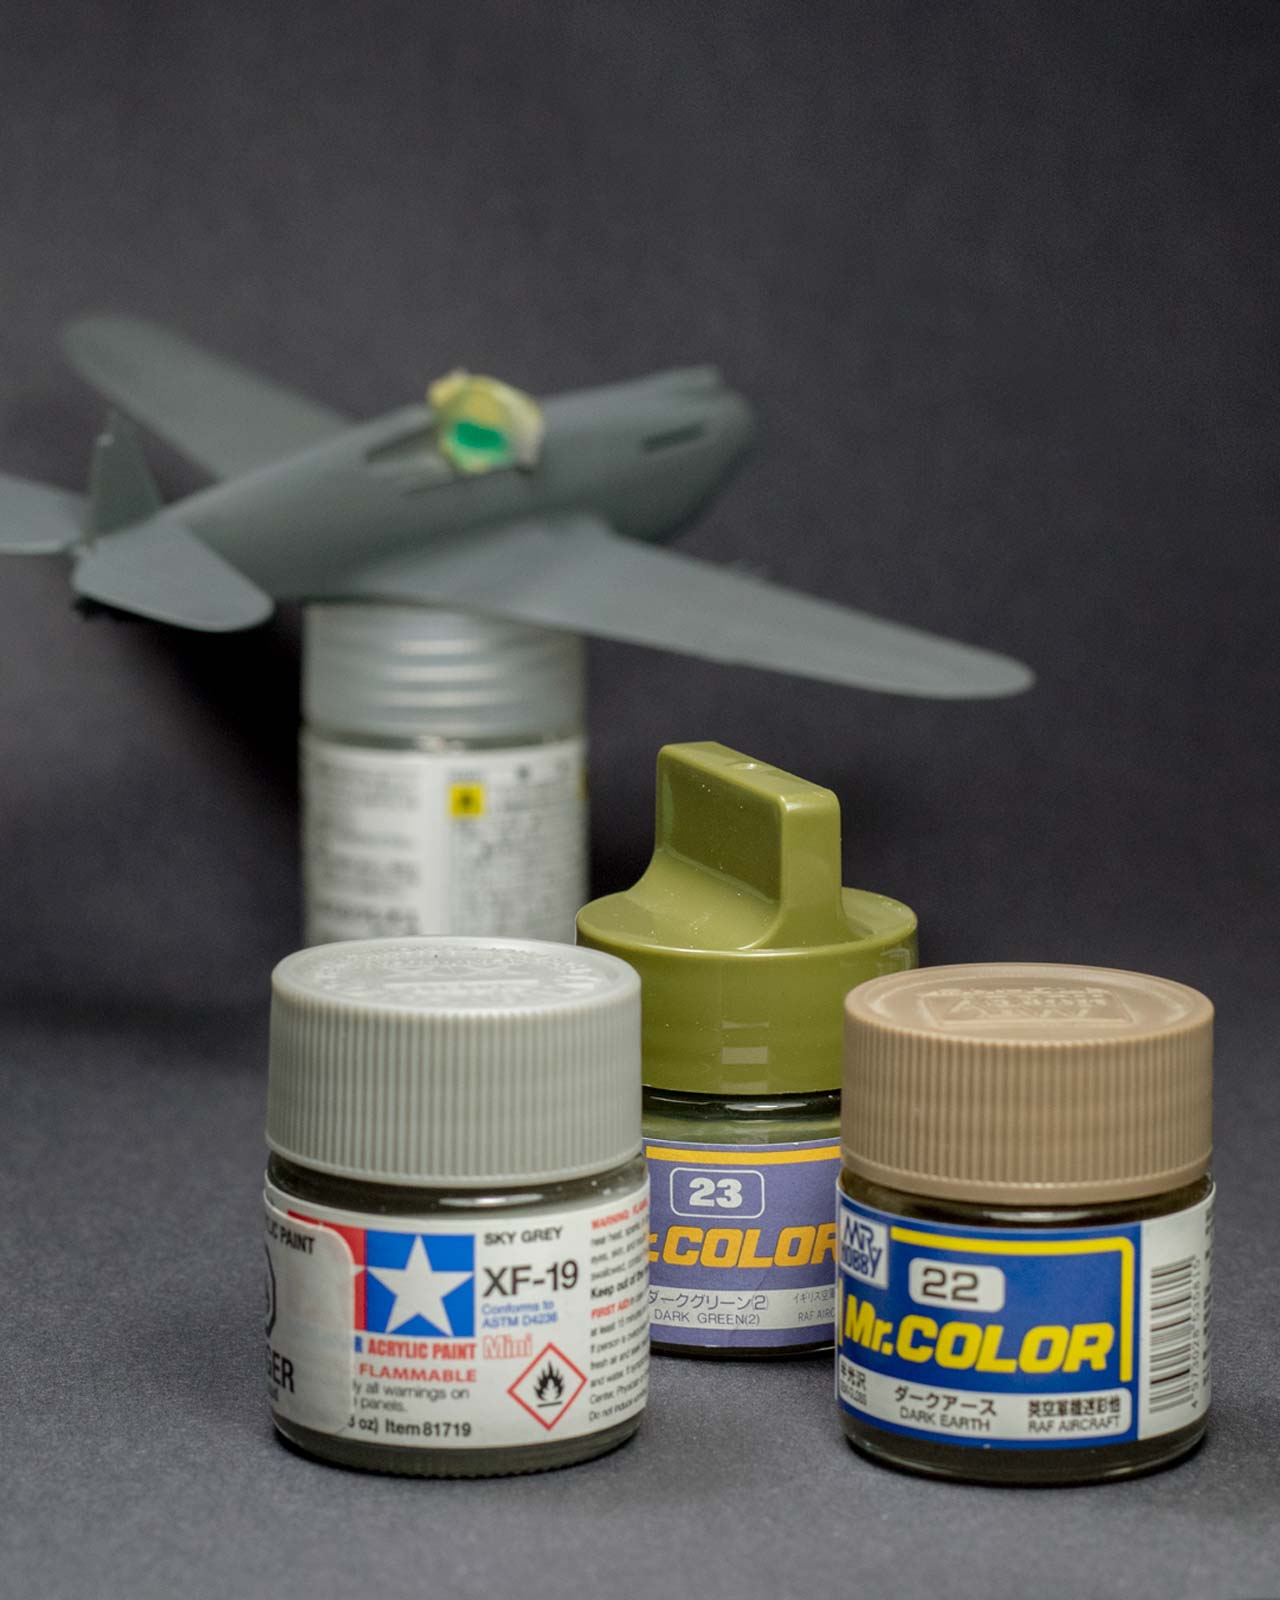
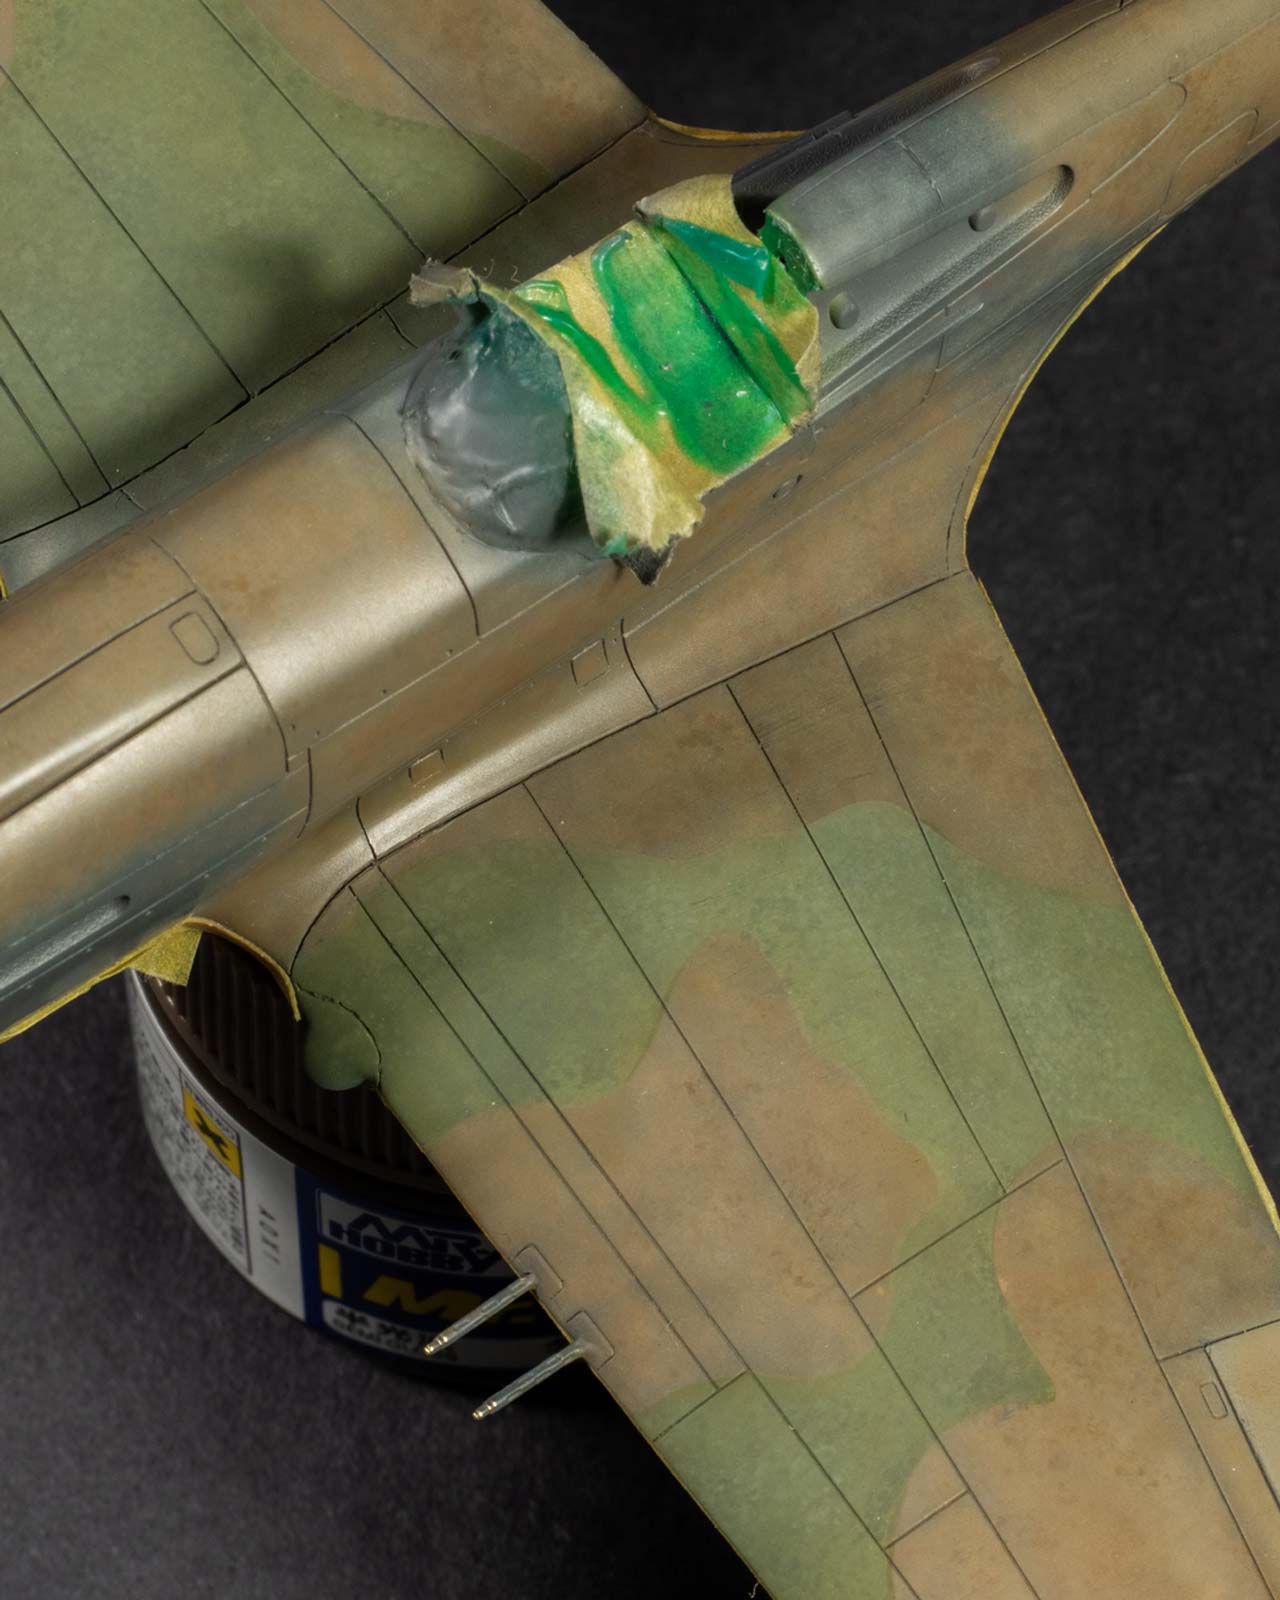
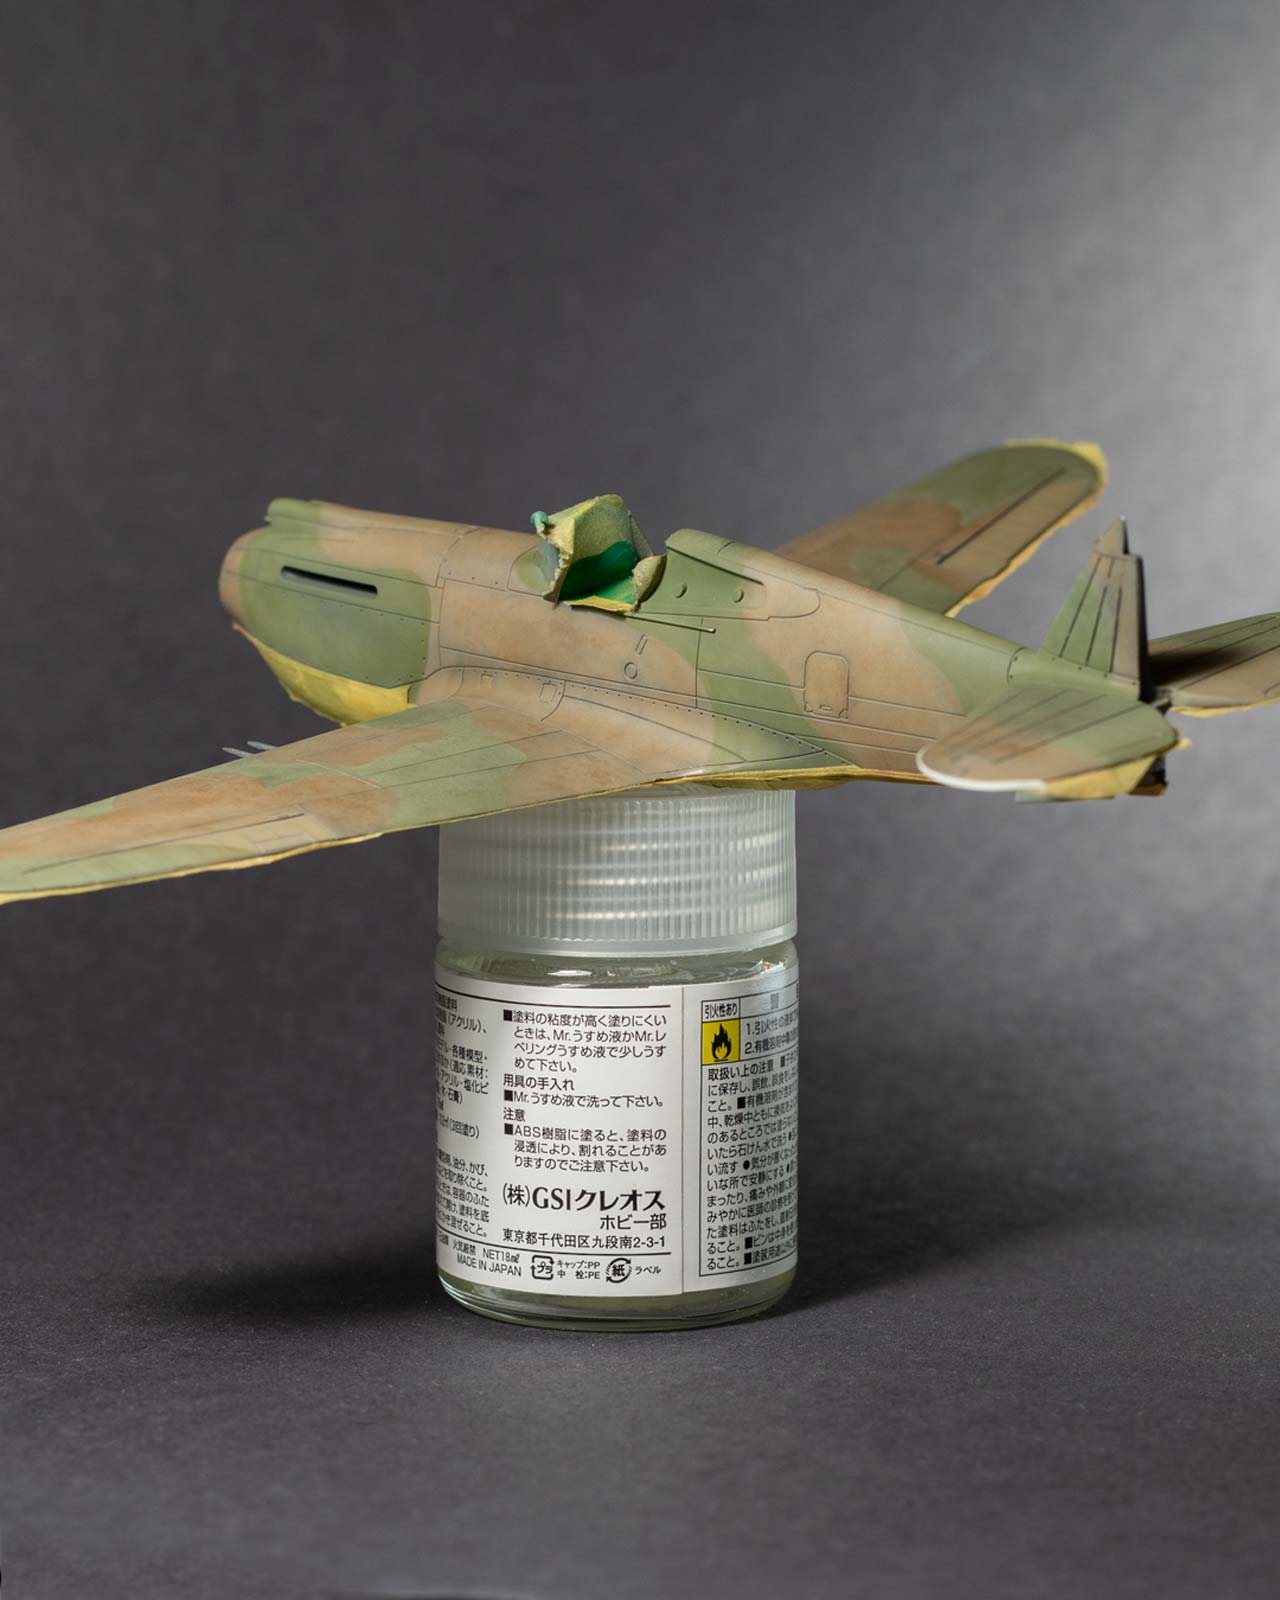
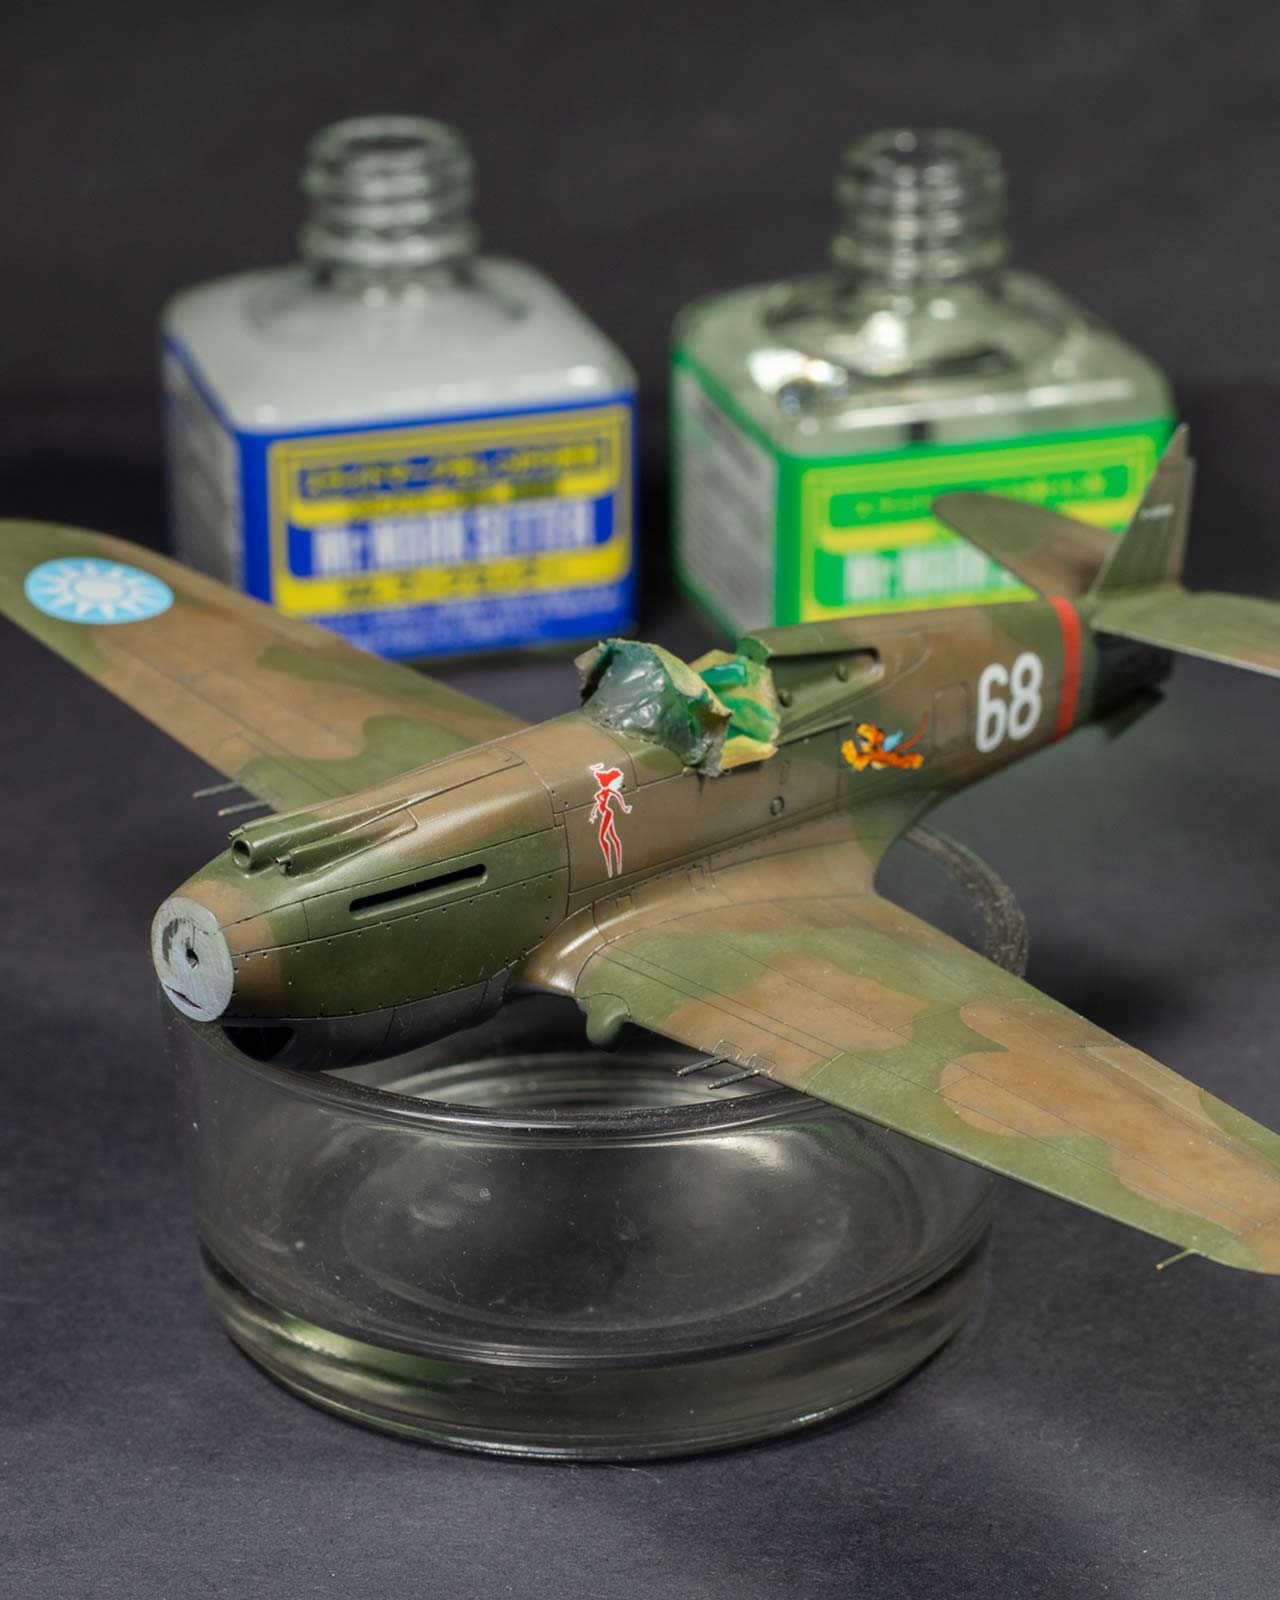
For this build used Mr. Color 22 Dark Earth and 23 Dark Green. The Mr. Color lacquers spray well, dry fast, and provide a durable finish. For the underside, I had a pot of Tamiya Sky Grey on hand, and opted to use some of it up.
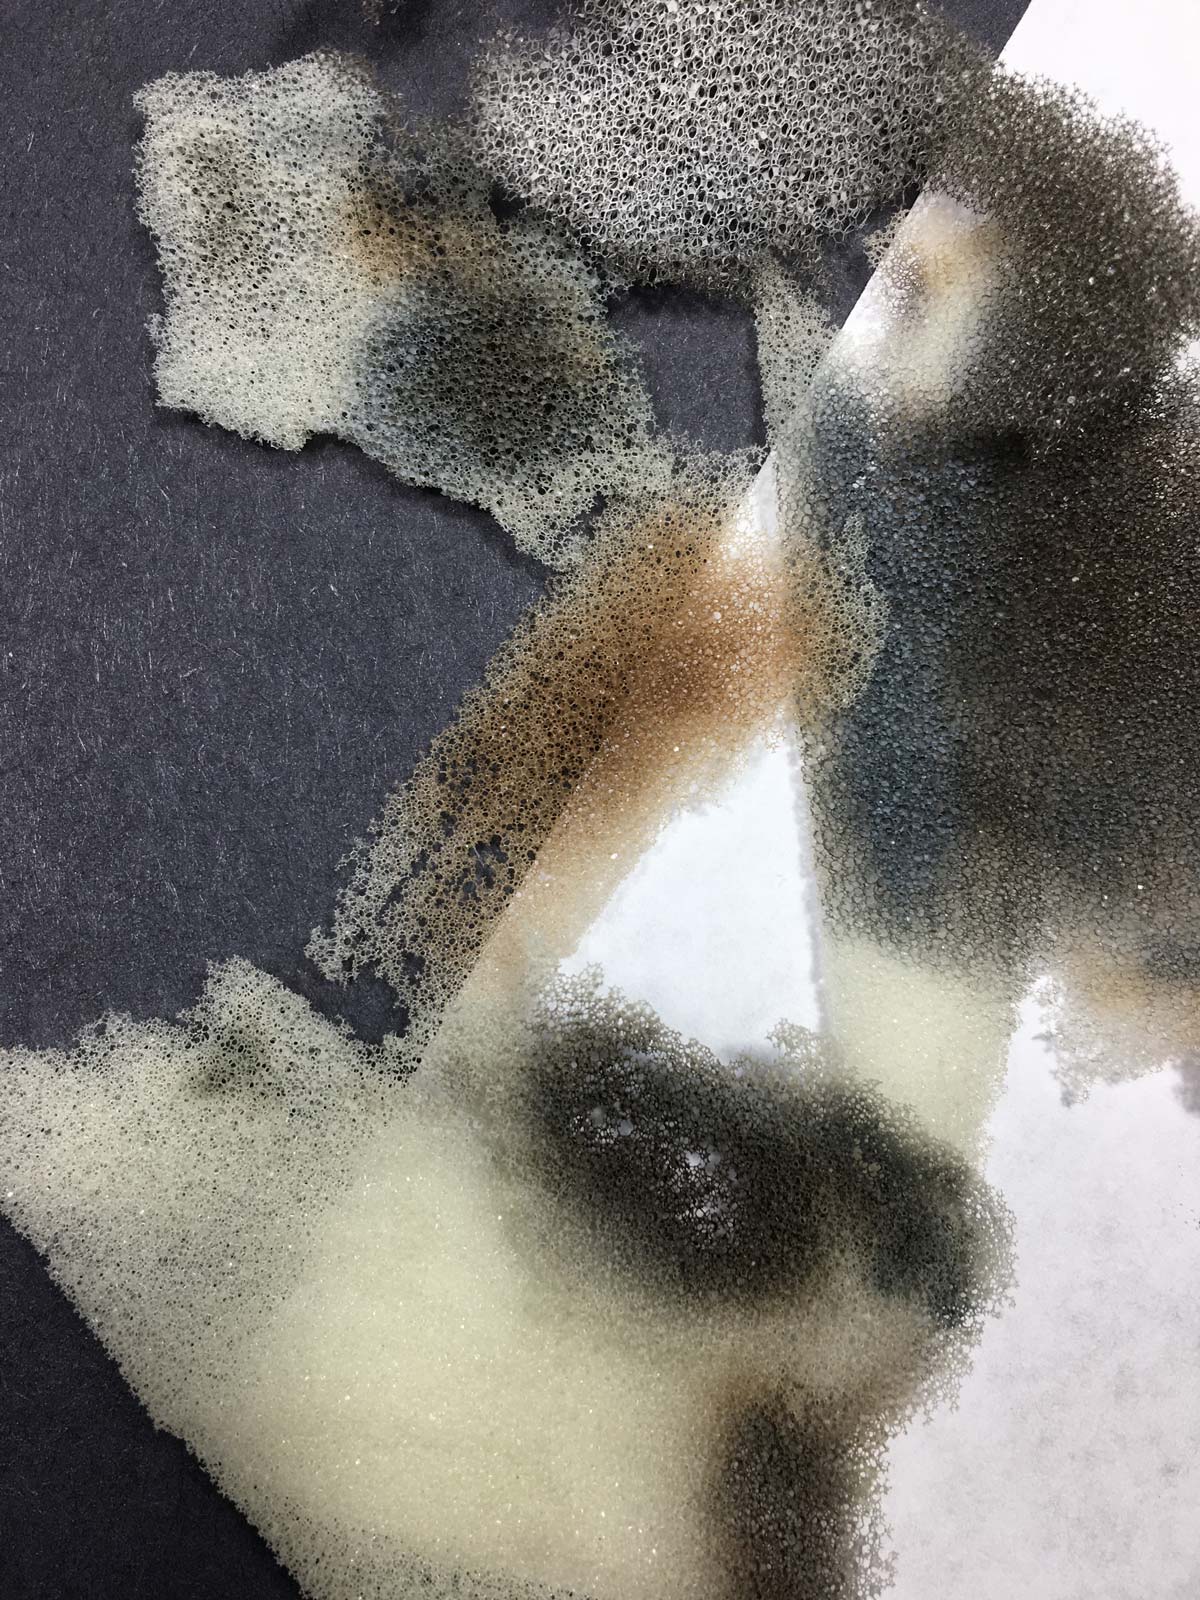
With the time invested in the underpainting, it was important that the colour be built up gradually. The colour coats were applied in a mix of wide spray to build up colour, and very fine freehand, following the underpainting to build up differential amounts of coverage. I sprayed the Dark Earth first, roughly following the demarcation lines, then printed a scale profile of the aircraft, cutting it apart to make a mask for spraying the Dark Green. Once the main colour coats were down, darker and lighter shades of the base tones were sprayed and mottled through shaved pieces of packing foam to create some texture.
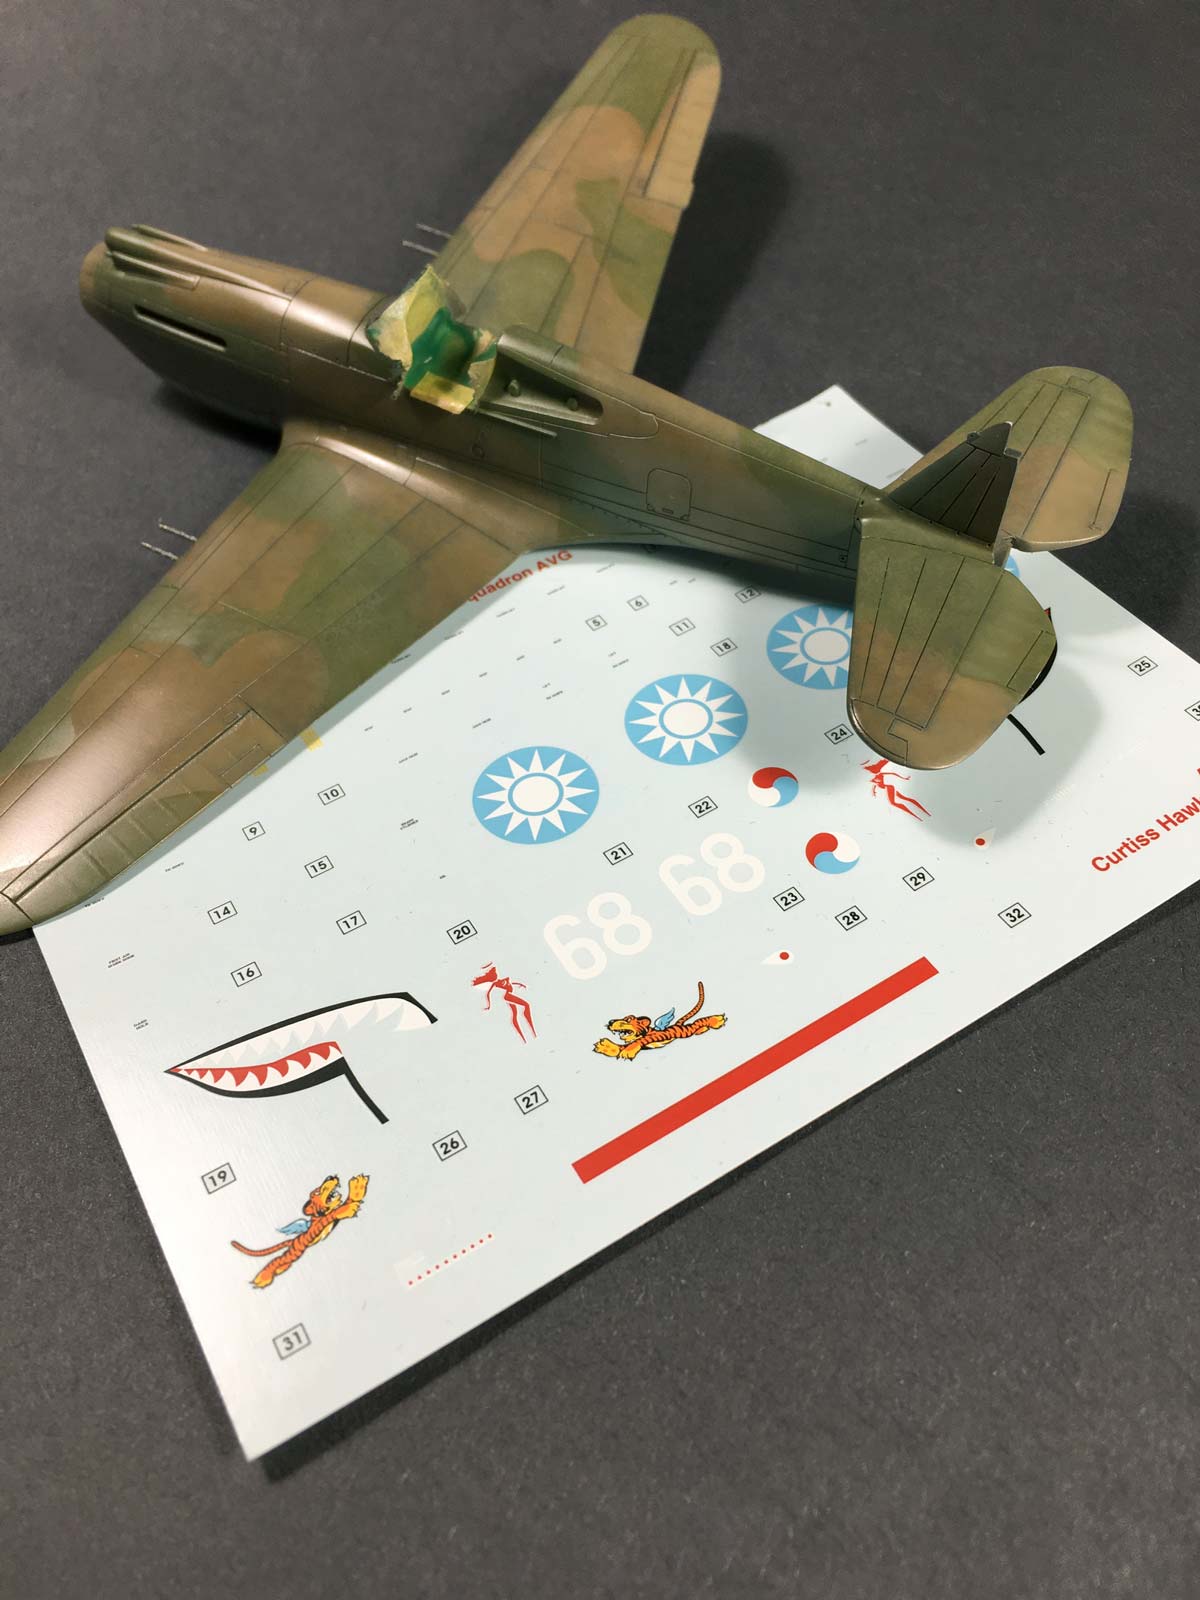
Decals
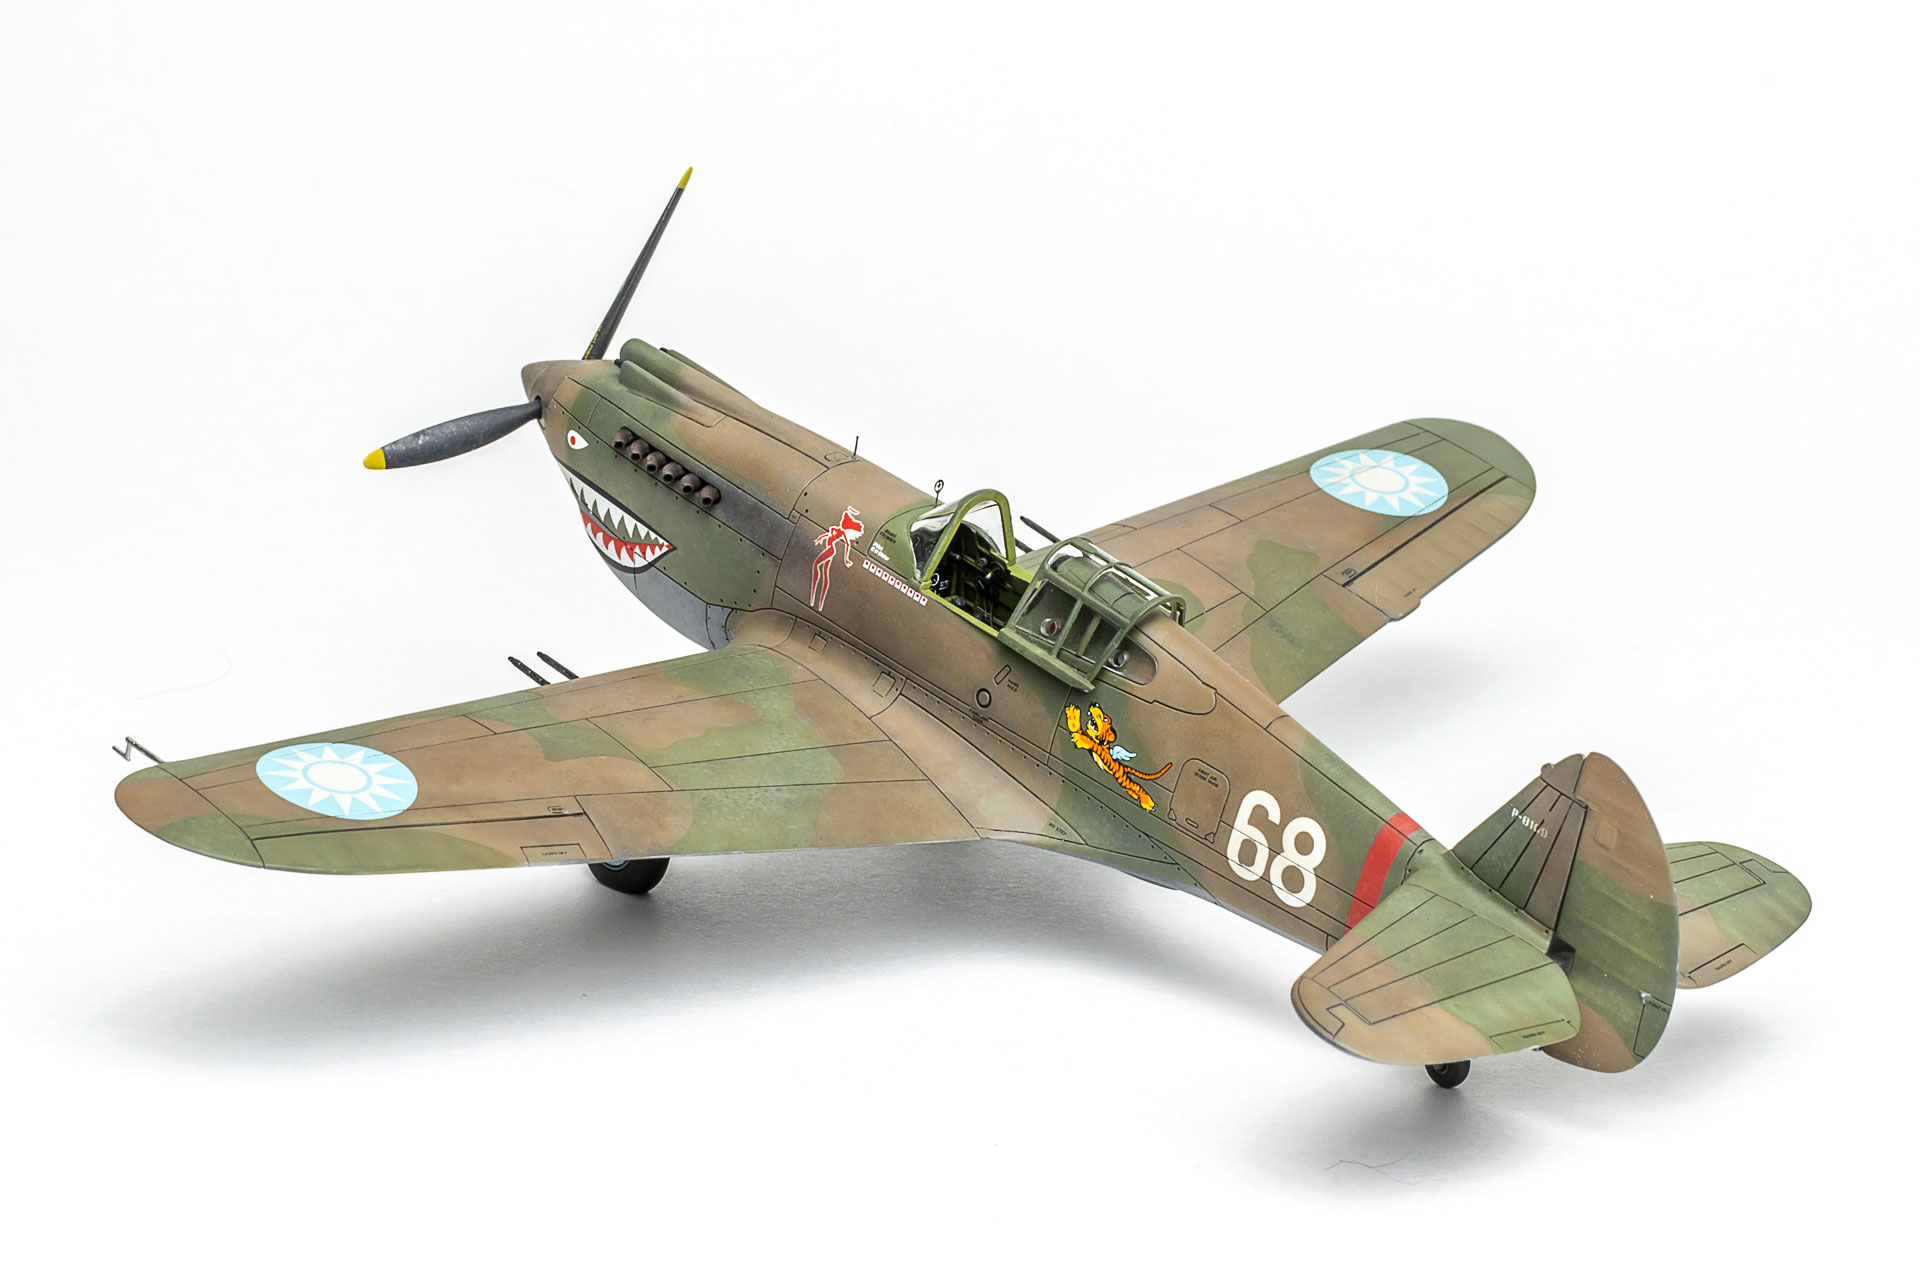
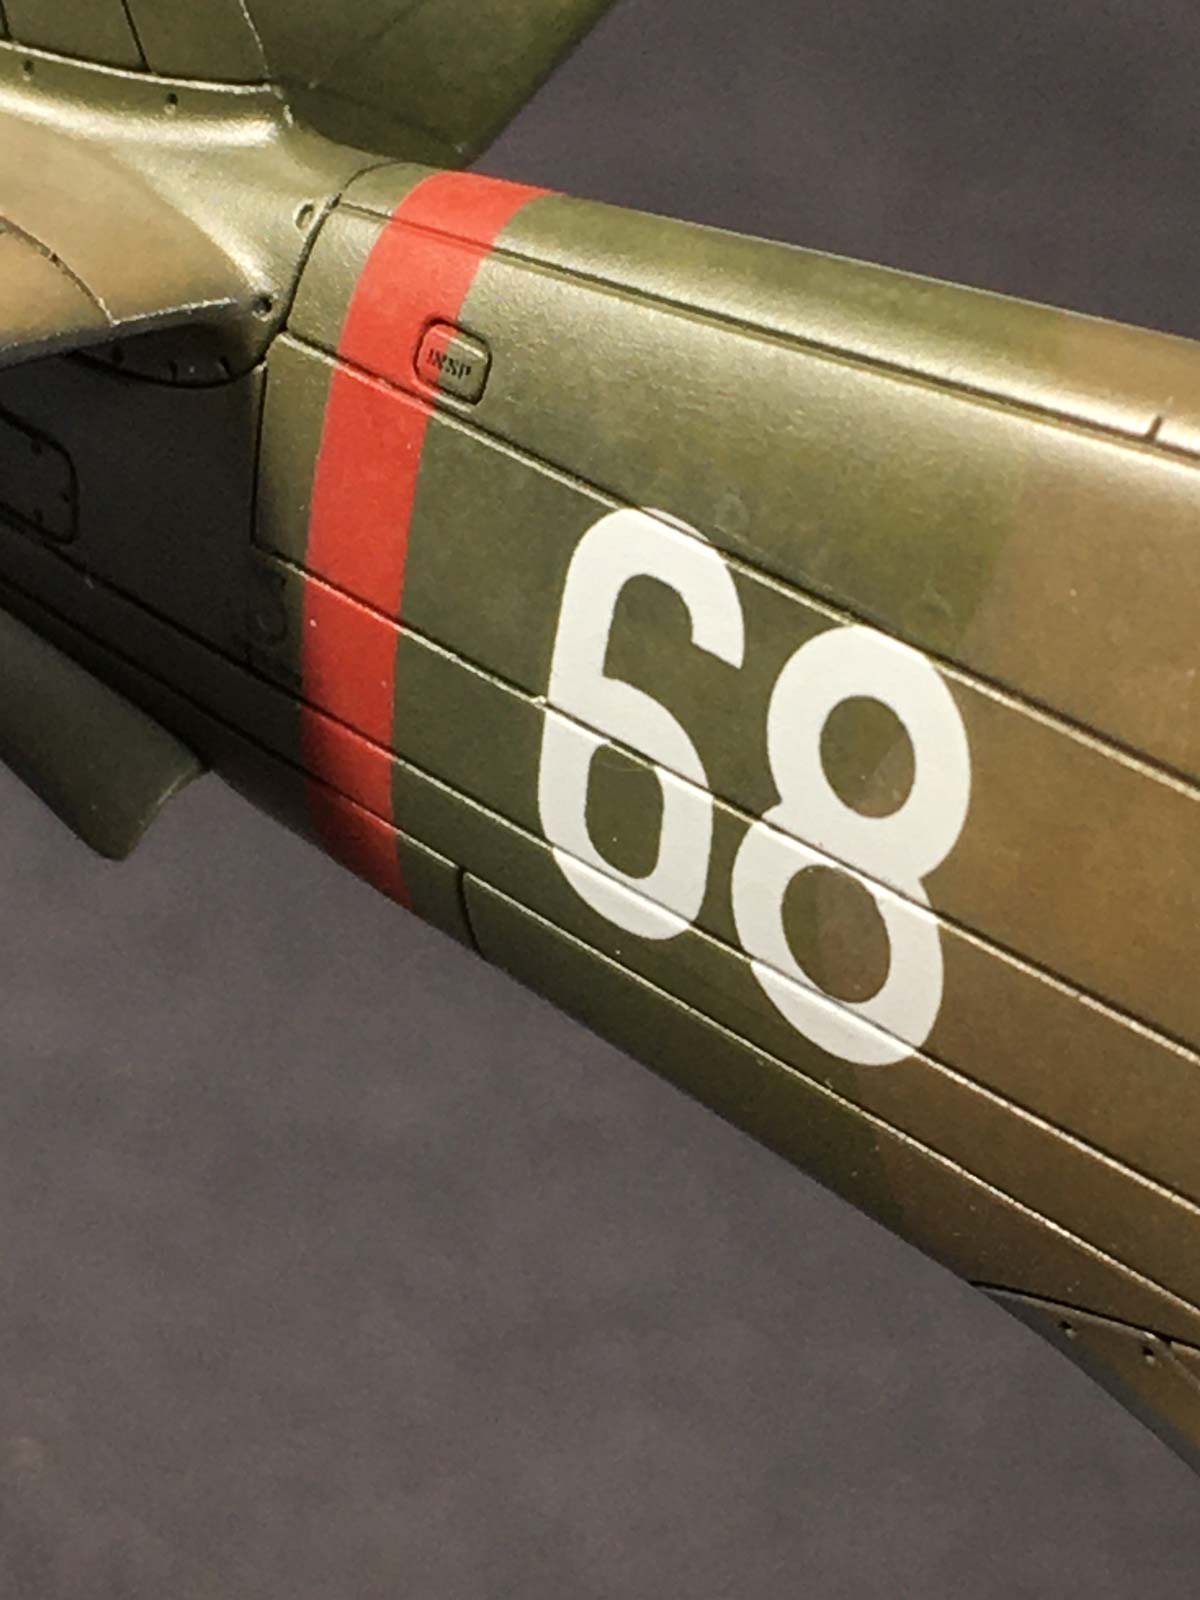
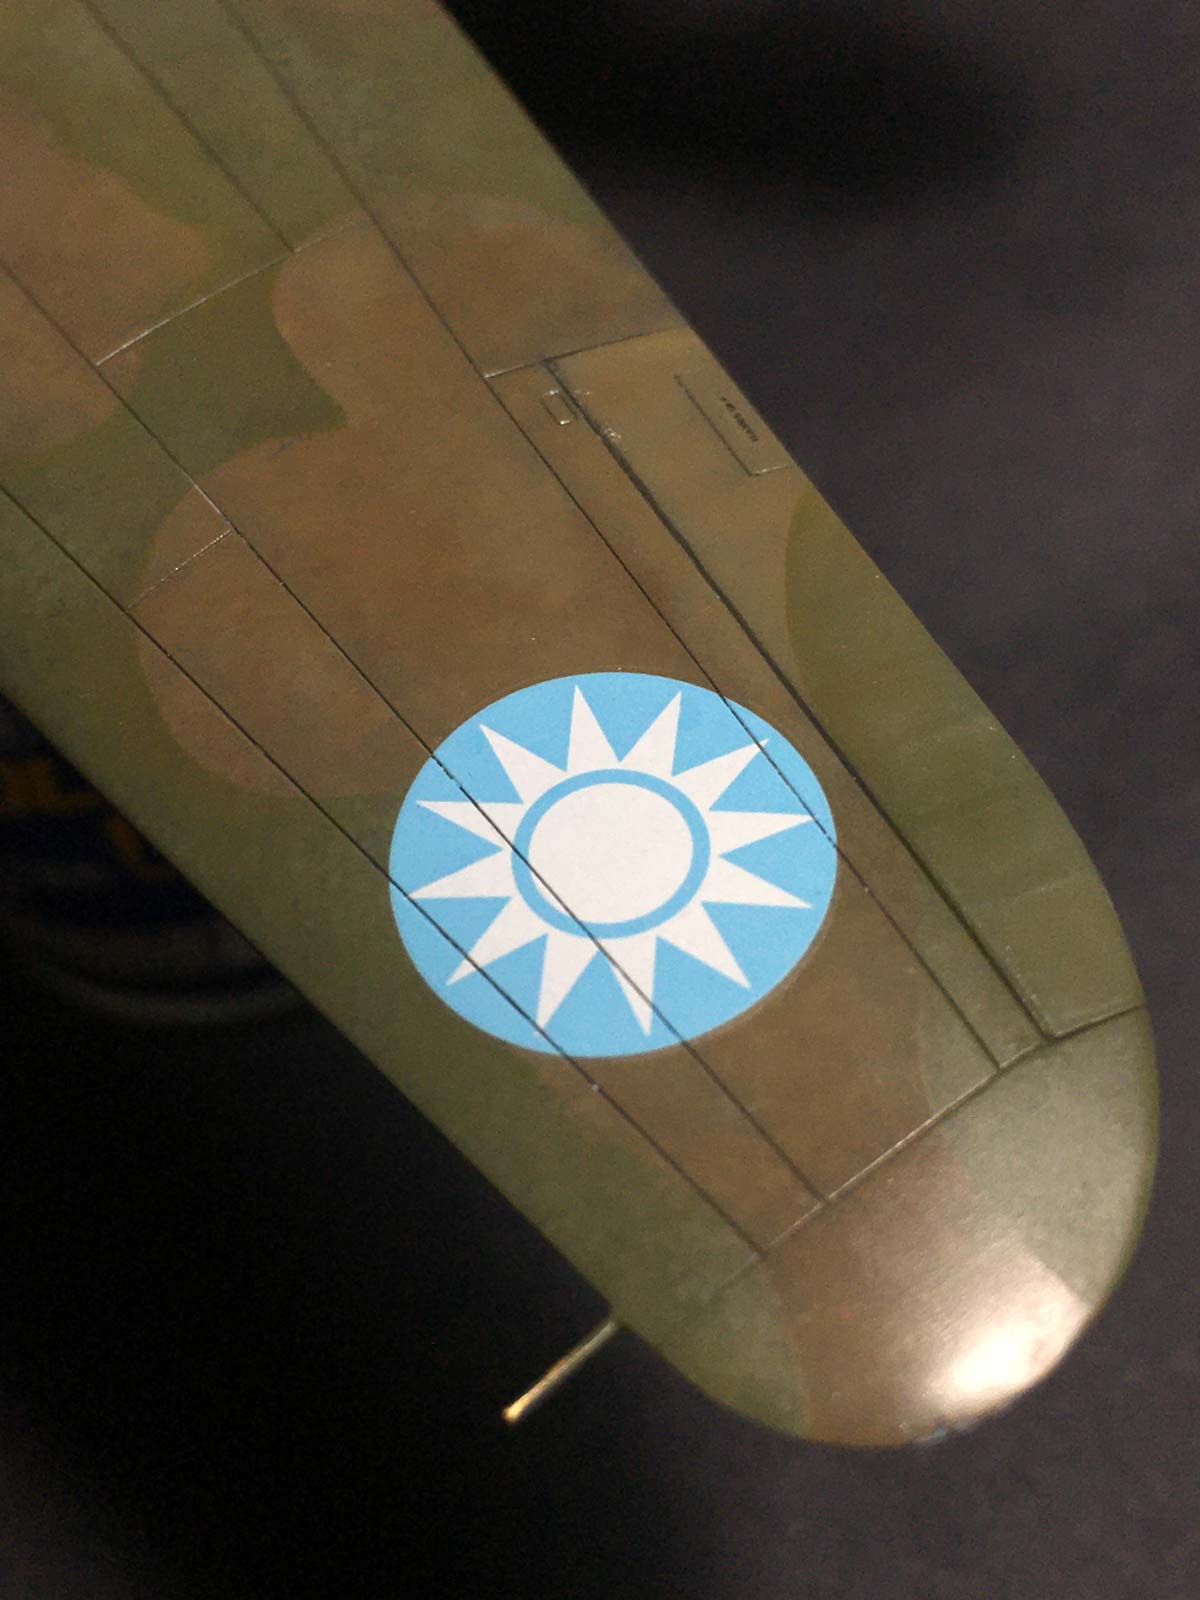
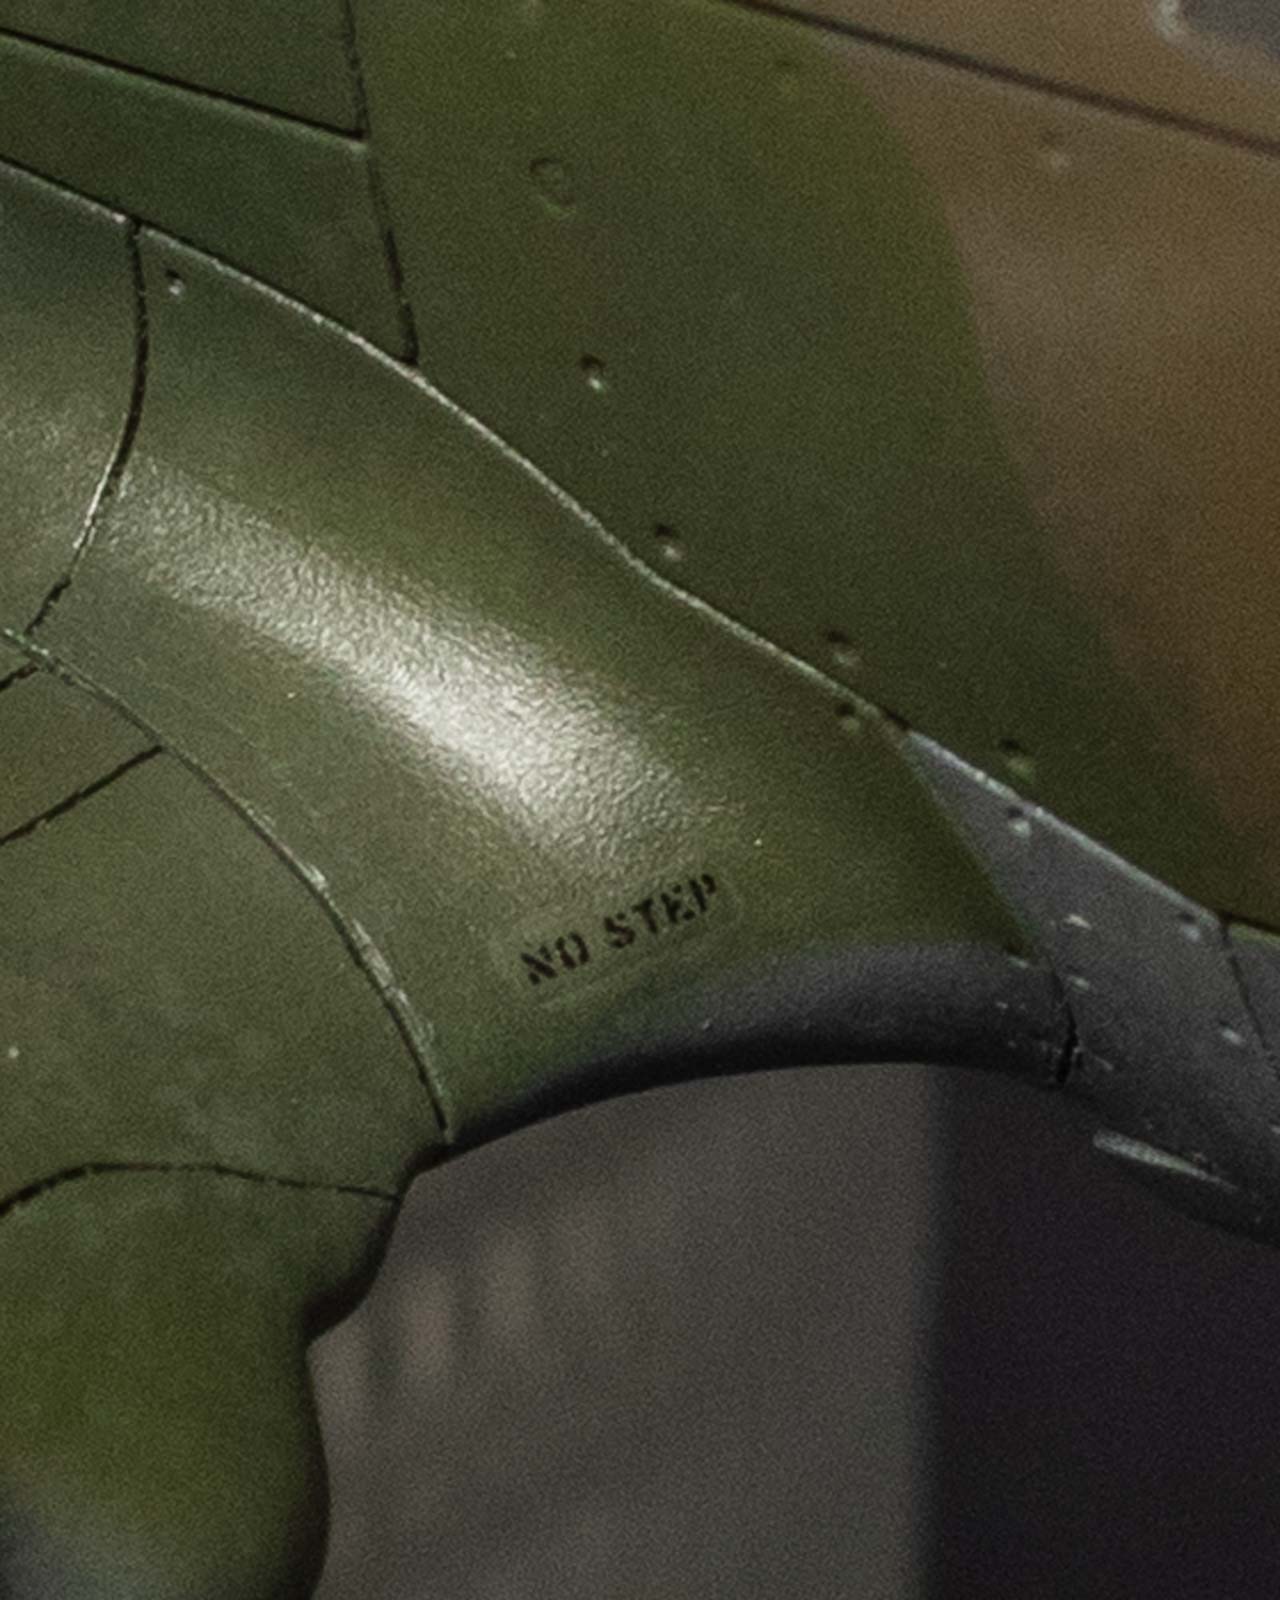
The decals supplied are definitely one of the high points of the kit. It doesn’t say as much on the sheet, but I recall reading these were printed by Cartograf, so should tell you everything you need to know. Thin, well-printed, and opaque, they certainly look on par with Cartograf. Even the stencils at 0.25mm high are legible! There’s have a moderate amount of film surrounding each decal, most of which can be trimmed away easily with sharp scissors or blade. One bit of errata, in the Hell’s Angel on the starboard side is facing the wrong direction. Conveniently for this commission, markings for pilot Charles Older’s No. 68 aircraft are included in the kit.
Using Mr. Mark Setter and Softer solutions the decals went down beautifully, slicing over the deep panel lines. I did almost burn through in a couple spots… this matches my experience with Gunze setting products being just on the cusp of being too hot for Cartograf decals.
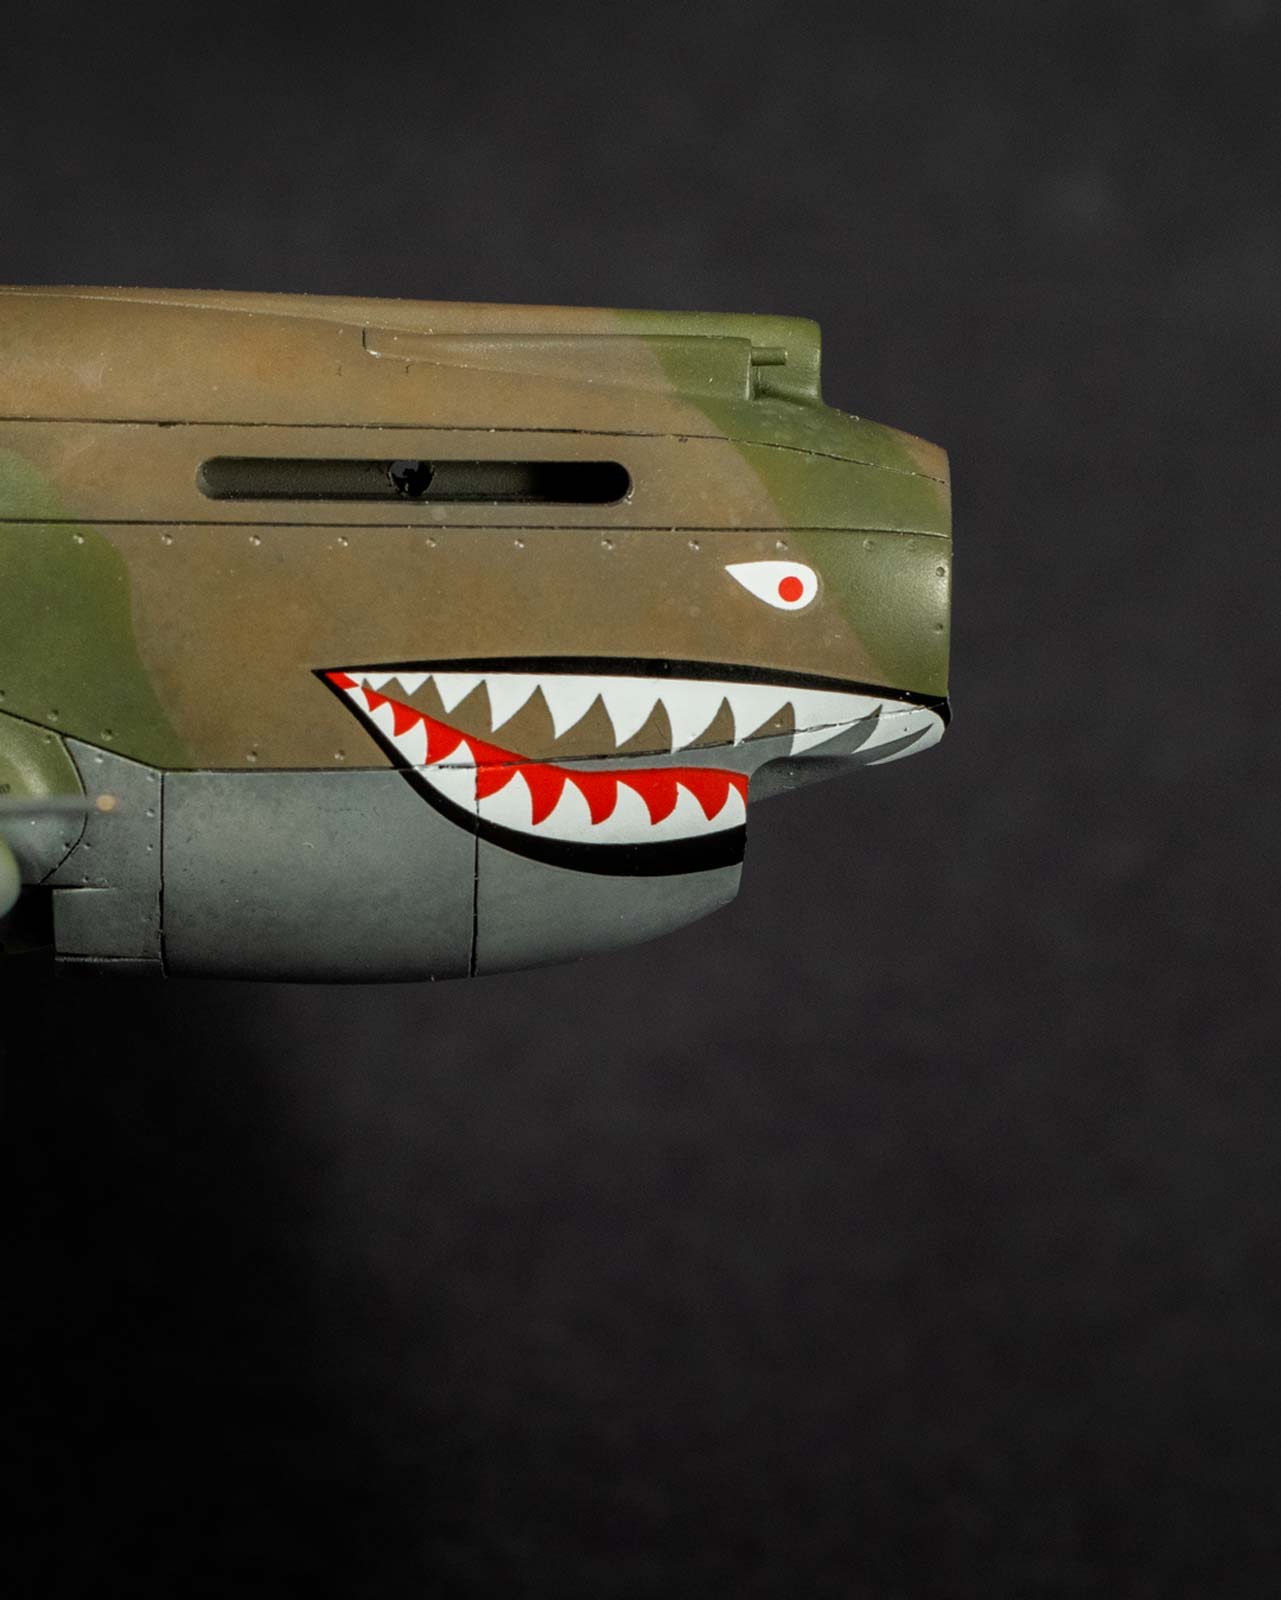
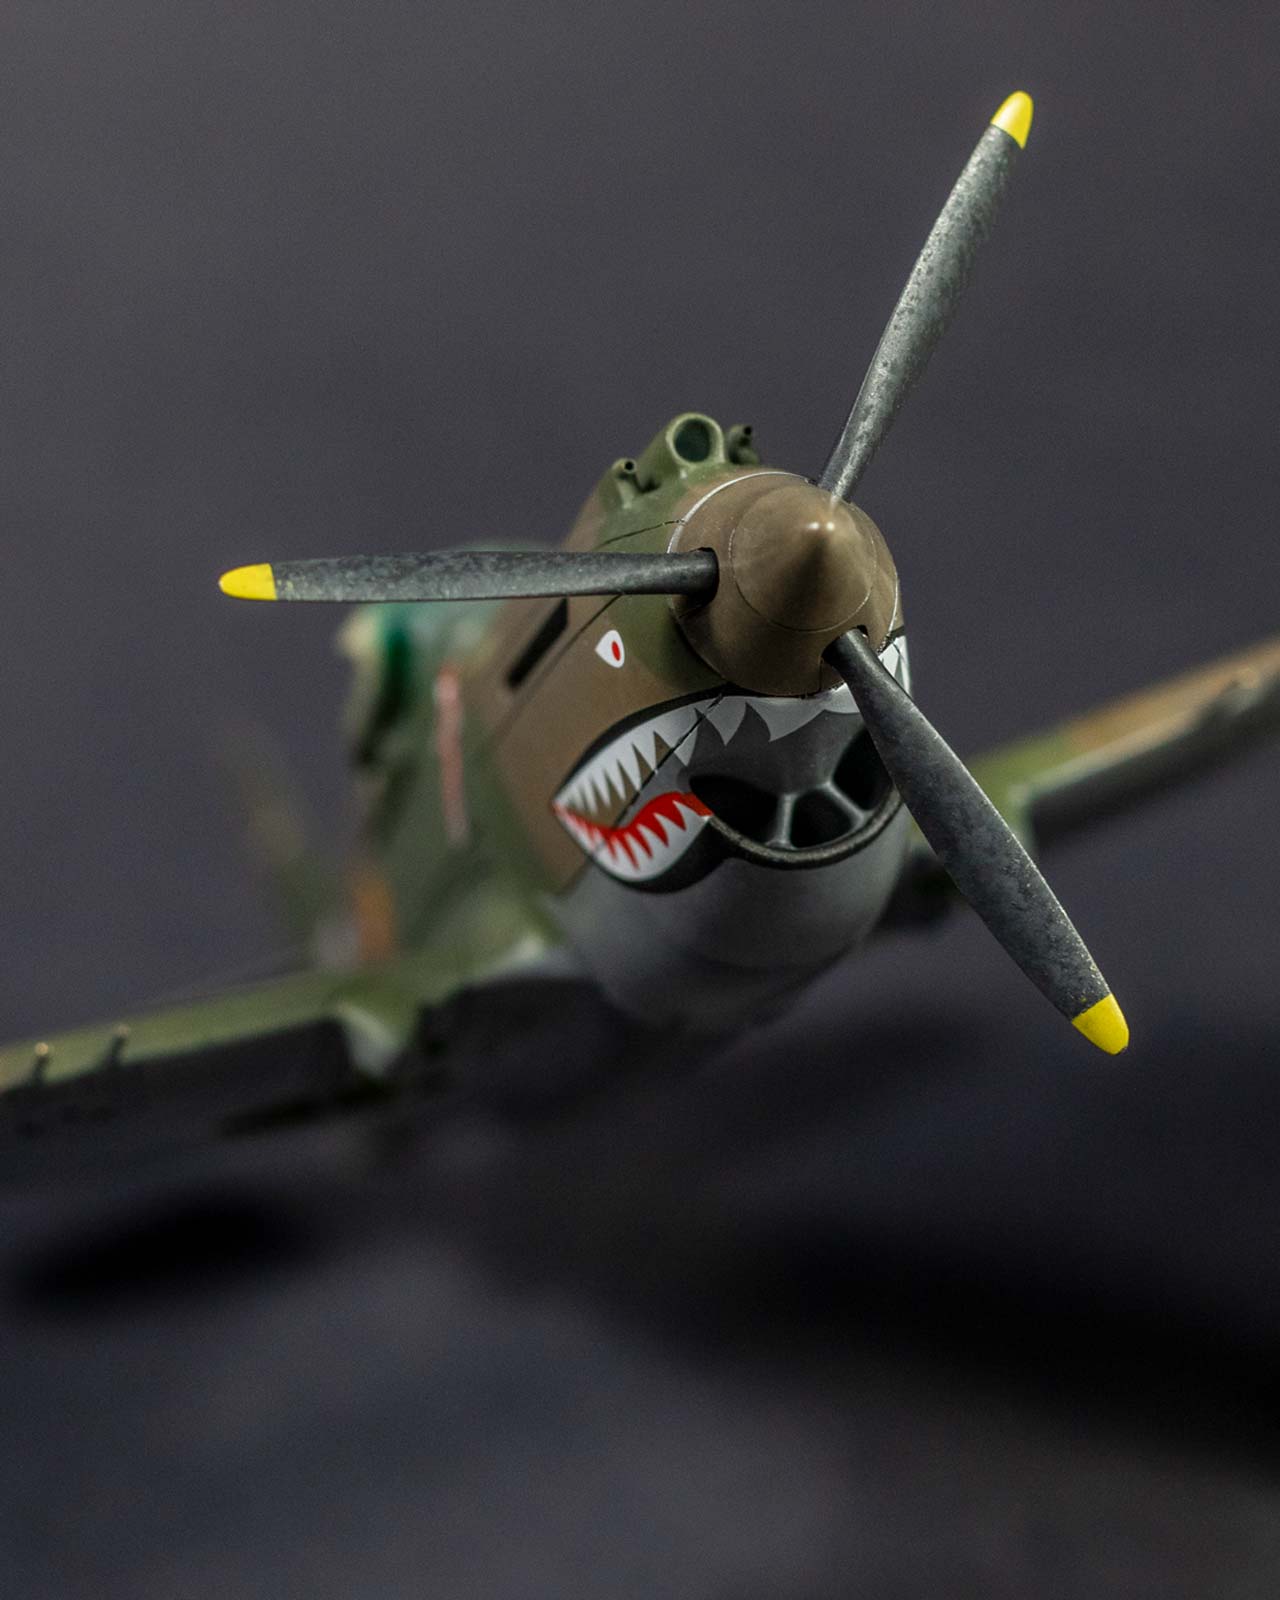
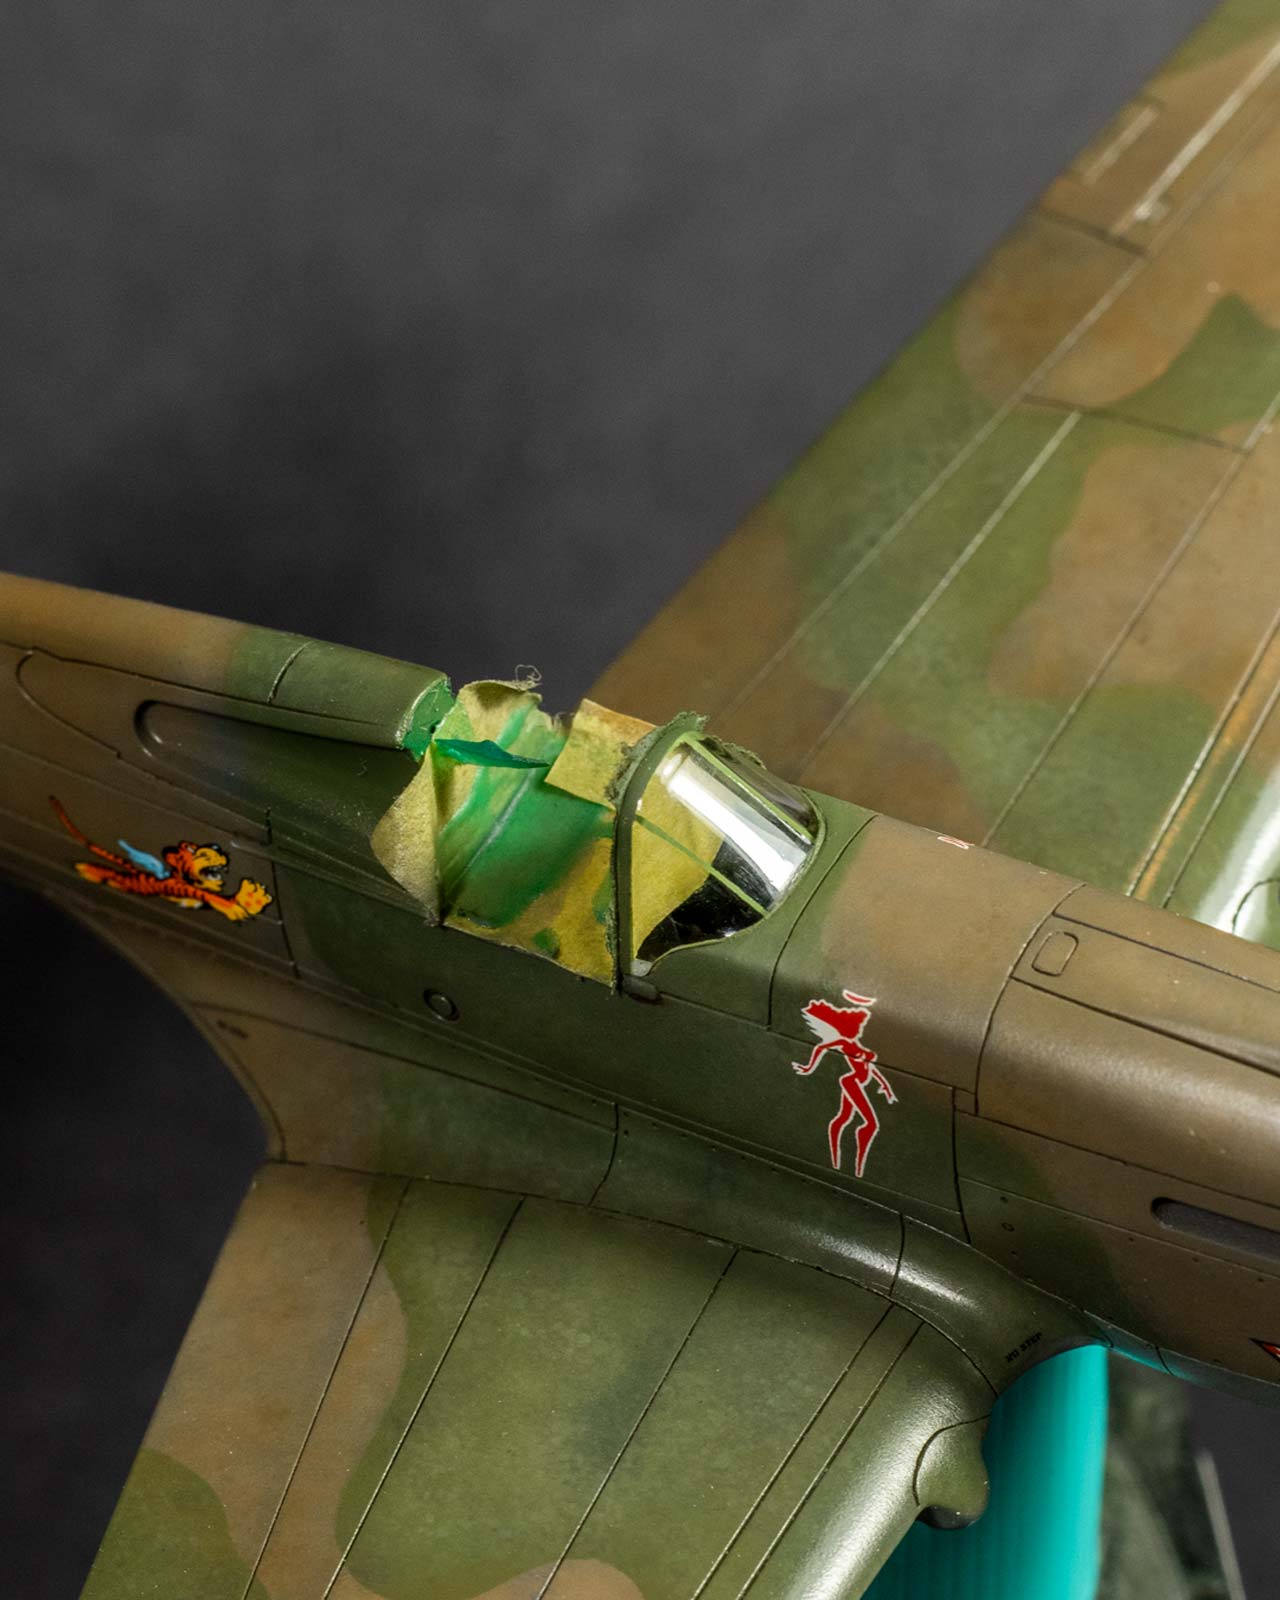
Zeroing in on a few specific details… most stencils are included, and you will need a sharp eye to see track of them — I was close to a couple being upside down; I opted to spray the red fuselage band, simply as it’s second nature for me to spray those types of markings, and the result is generally more realistic; the fit of the shark mouth is just off a bit, and as a result, the strip meant to pass along the lower lip of the intake was snipped off (it extended completely beyond). In my case, I discovered this in the middle of the application, so the strip was discarded and the strip painted with black after-the-fact. Forearmed with this info, one could cut the strip off ahead of time and apply it separately.
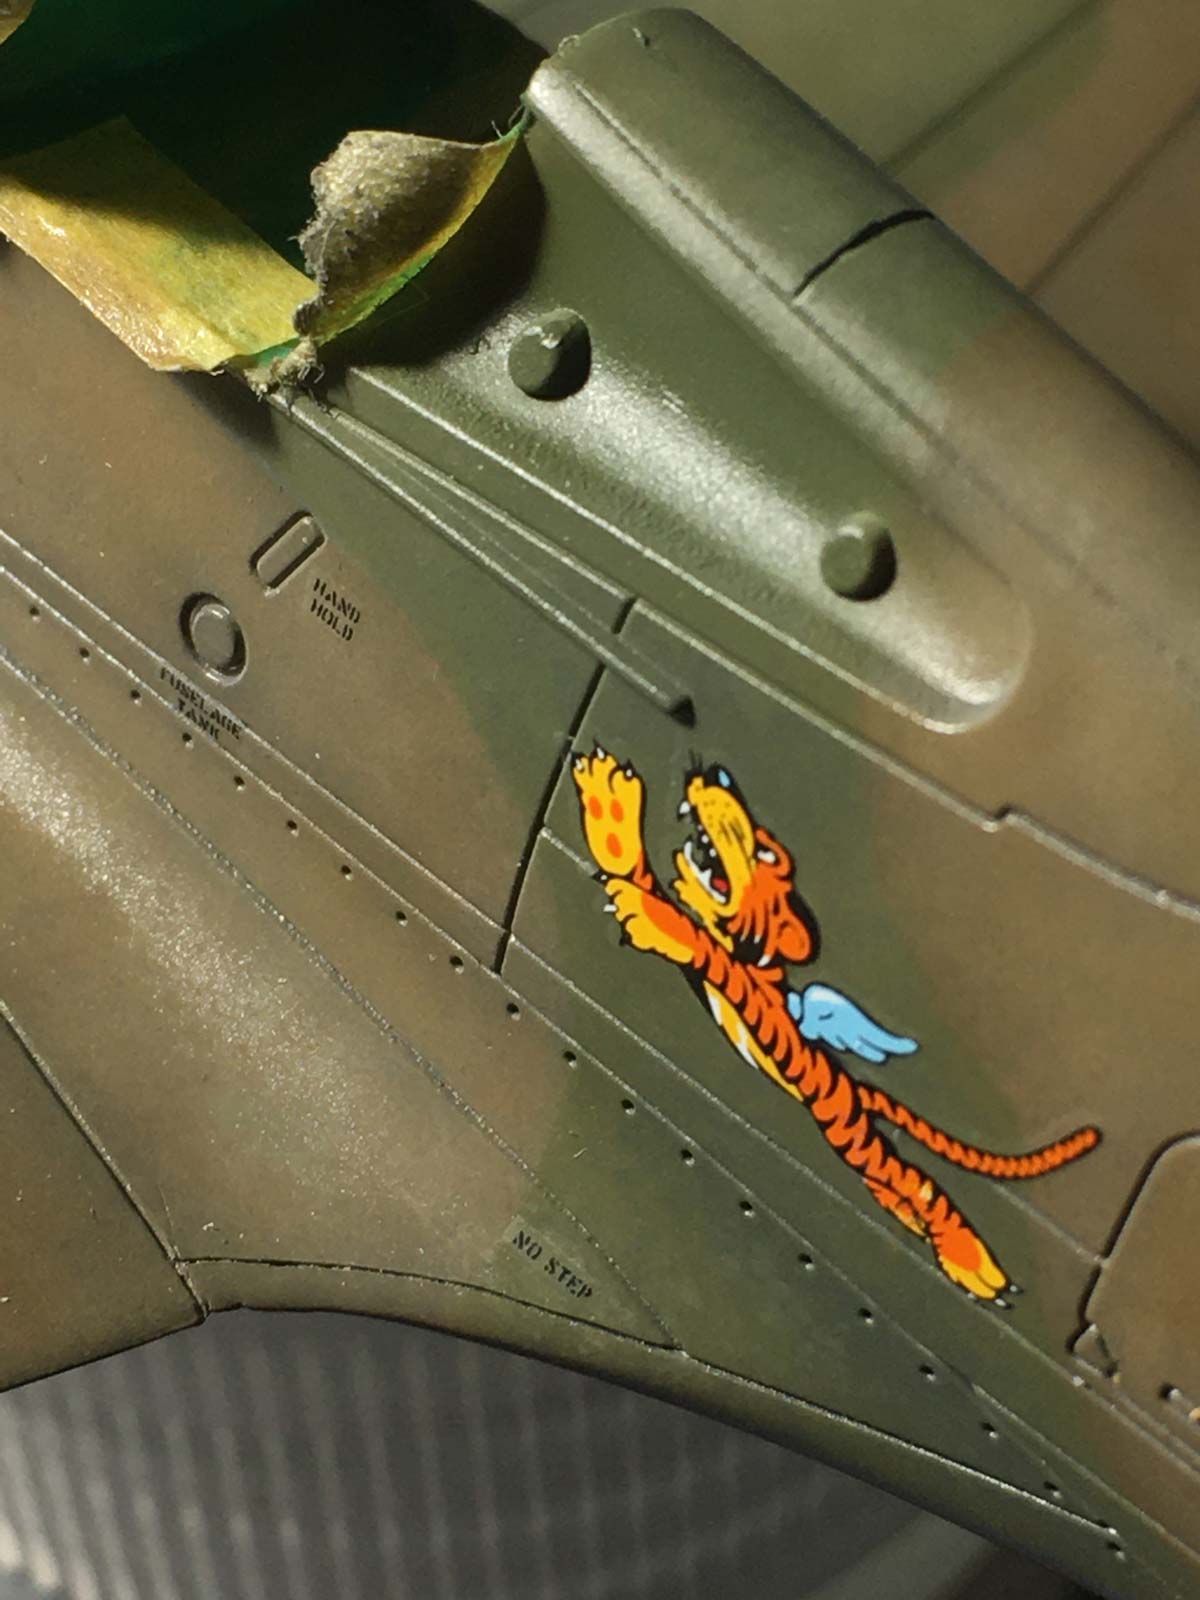
The final detail is the famous Flying Tiger logo. Designed by an illustrator at the Walt Disney Company, the motif was supplied as a vinyl appliqué. As such, I refrained from using any setting solution on it, or allowing it to conform to the panel line below, ensuring it did not look painted on.
Details
With 90% of the build finished, the remaining details were tackled starting with the prop. The blades were sprayed Tamiya Rubber Black, and mottled with a thin grey, while the hub received a similar underpainting to the airframe, followed by a coat of Dark Earth. Everything was then assembled, and and glued to the nose of the aircraft.
At the opposite end, extra definition was given to the rudder structure by masking and spraying thin highlights, followed by darker tones below to emphasize the shadow. Once dry, the camouflage colours were sprayed, just allowing the effect to show through.
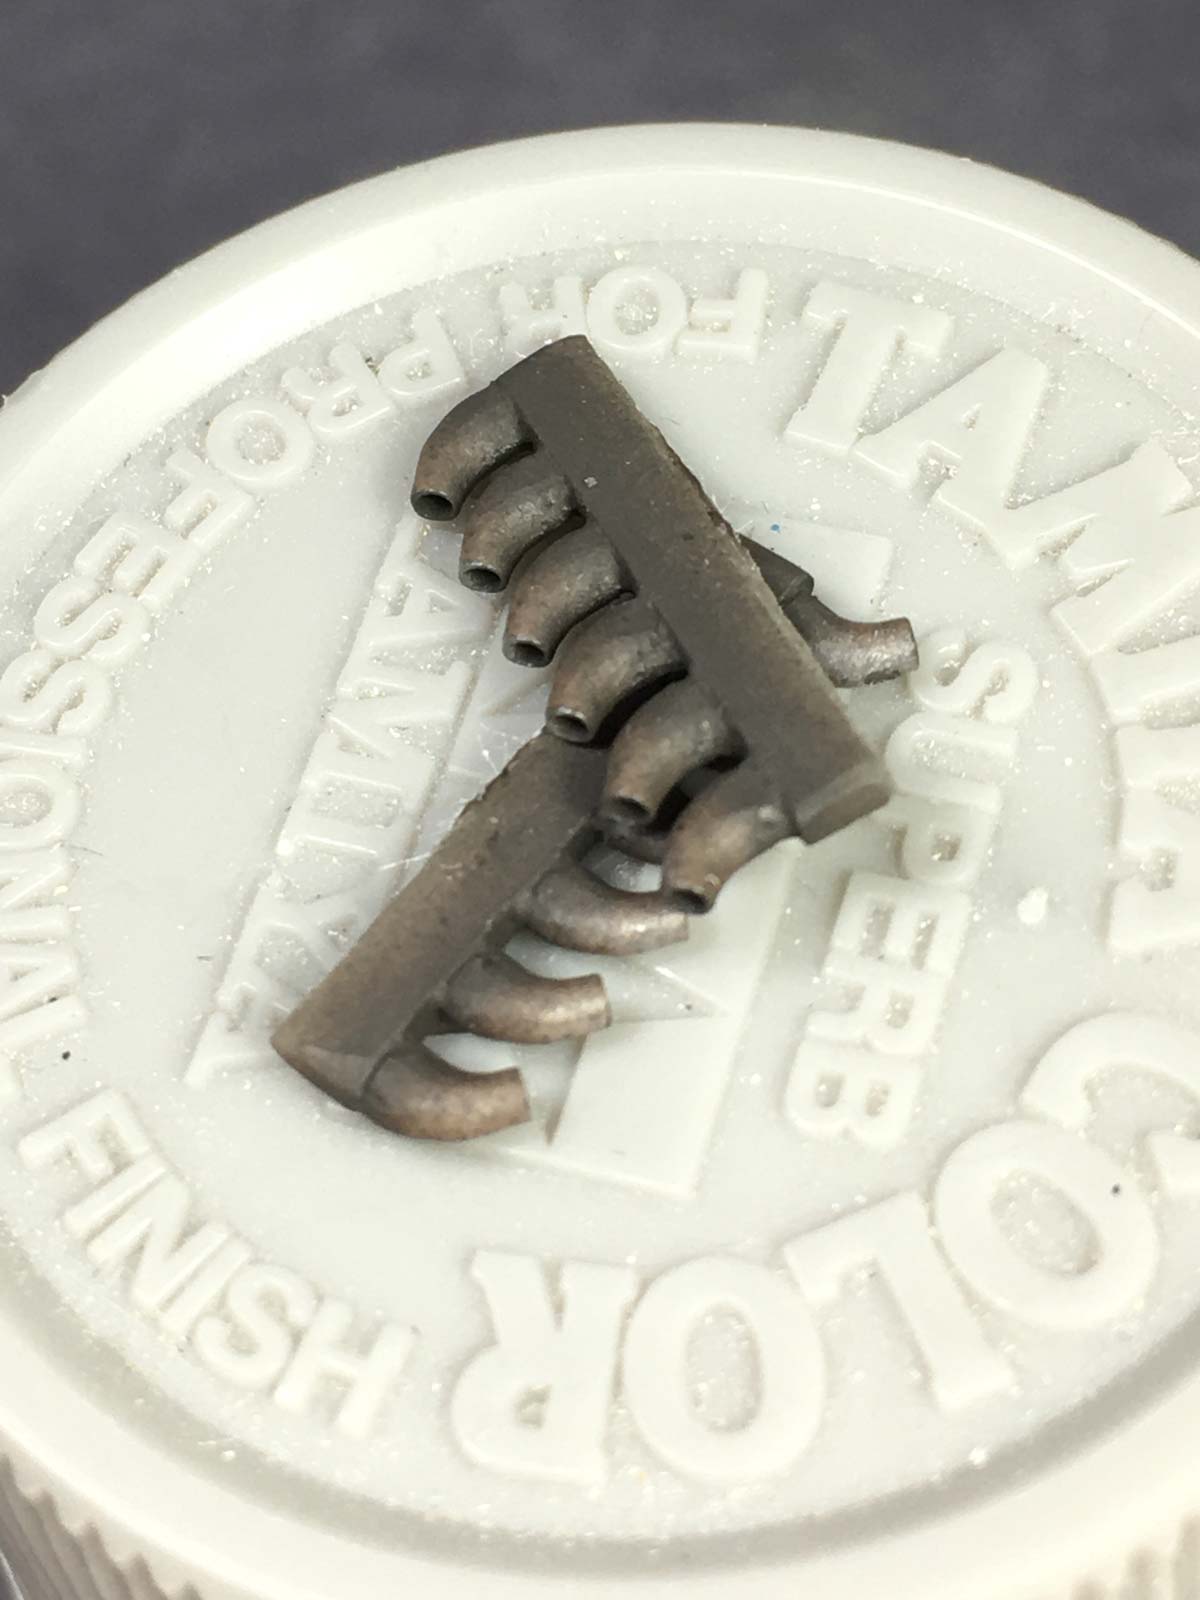
The Quickboost exhausts were next, first washed with isopropyl alcohol then primed with black Mr. Surfacer 1500. Thin browns, made up of mixes of Tamiya Rubber Black, Red Brown, Linoleum Brown, Flat Earth were successively sprayed from darkest to lightest, each coat increasingly constrained to the exhaust tips. Mixes of Tamiya clears and Smoke were then speckled on to give some visual texture. The final step was to rub the the ends and insides with smoke pigment.
The last little extra was a tiny bulb for the landing lamp, formed by mushrooming the end of clear stretched sprue next to a flame. This was clipped to size, inserted into a hole drilled in the recess, and the cover glued on, not forgetting to paint the lamp recess silver first!
final details
With a small overall parts count, final assembly is quick and straightforward.
The prop was glued in place, followed by the rudder, exhausts, and gear doors. The forward canopy was painted inside and out — this canopy features two interior framing rails that can only be painted from the inside — and glued in place with Tamiya Extra Thin. Supplied as a single piece, and not designed to be displayed open, the main canopy offered no practical way to be glued in place. To solve the issue, I drilled a small hole through the canopy top where the framing crosses, and glued in a small length of clear stretched sprue. Once dry, it was trimmed, sanded level with the surface, and re-painted. The canopy was then installed, glueing the clear rod into a corresponding hole in the fuselage. The result rides little high, but is relatively secure and the clear rod almost impossible to see from any angle.
The final additions were the landing gear, gear doors, and tail wheel — note the tailwheel doors need to be painted interior green while the canvas cover should be painted a canvas colour. The main wheels we’re painted a dark grey-black, decals applied for the tri-colour hubs, and a dark-brown pinwash pulled out the details. The finished model was sprayed with matte varnish and light exhaust stains sprayed along the fuselage.
With a little care and attention, Airfix’s little Hawk is both pleasant to build, and provides a decent representation of the iconic mount of the AVG. It would be an intriguing build to revisit this kit and ‘go to town’ using the wealth of detail parts available from CMK and others. Maybe, one day…
Find more fun scale model shenanigans on my Facebook, Twitter, and Instagram.
Like what you see? Learn something new?
If you’ve found this journal helpful, and would like to see more in the future, please consider making a small contribution through Buy Me a Coffee. Simple, safe and secure, it’s a great way to say thanks!