Posted on

Scale Aviation 155 Captions

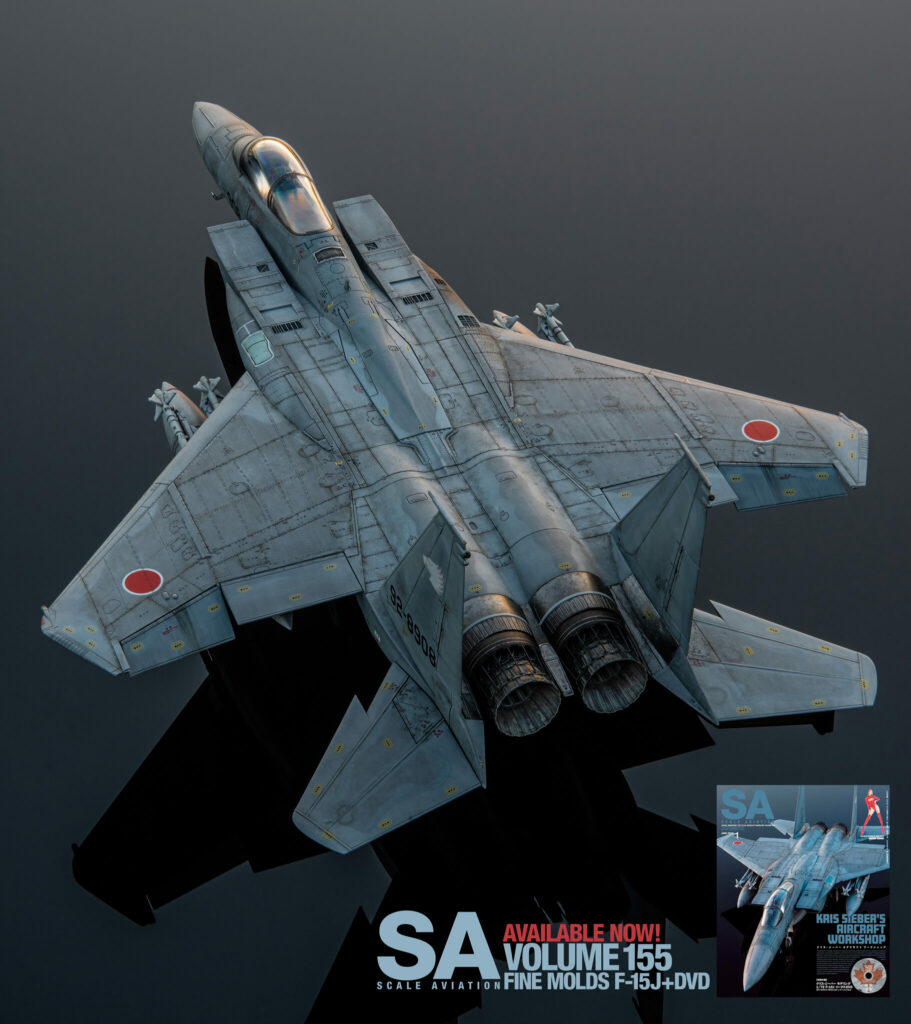
F-15J Eagle

Fine Mold’s F-15J is a detail-rich canvas, particularly for 1/72. Tackling the intricate work early, when enthusiasm is high, always pays dividends for me. Conveniently, the parts breakdown of the kit enables work on the rest of the aircraft to proceed in parallel, when a break is needed.

  1. 2.5mm holes drilled in existing cable run and electronic boxes; 0.2mm lead wire cut to length and secured with CA glue.

  2. Aires resin seat base-coated with dark grey Mr. Surfacer 1500; seat cushion airbrushed with Flat Earth (XF-52), then glazed with AK3G acrylics to bring out texture; details brush painted with acrylics; subtle details dry brushed with medium grey.

  3. Instrument panel airbrushed with Mr. Color 317 (FS36231), individual panels brush-painted with dark grey-black; details picked out with acrylics; IP decals cut individually or small clusters and applied; Greenstuff World UV resin applied to glass faces and screens.

  4. Dark grey oils were used to define recesses in the cockpit and avionics bay, while Abteilung 502 Cream Brown was used on the cockpit upper surfaces. Together, the finished cockpit has a pleasing complexity for the scale, and rewards the effort spent defining the details

  5. Reskit resin main wheels were sprayed Mr. Primer Surfacer 1200, followed by Mr. Surfacer 1500 White; a dark grey/brown oils wash defined details and Carbon Black ink defined the holes; acrylics were used to the cap and bolts, and brake discs on the back.

  6. Electrical cables and cable runs were added with copper wire and 0.3mm brass micro- tubing, secured with VMS black CA, with excess cleaned with VMS CA remover; glass faces of landing lights masked with VMS liquid mask, and the housing sprayed Gunze Super Metallic Chrome Silver prior to applying primer.

  7. Details were painted with acrylics following references and placards applied following references; Anyz chrome decals applied to the hydraulic cylinders; the landing gear was given a medium grey oil wash.

Prepping for base painting includes sanding the entire surface with Godhands 6000 and 8000 grit sanding sponges, then using poster putty to clean out the delicate panel lines, followed by degreasing the surface with IPA.

  1. While Fine Molds advises against applying primer to preserve the fine surface detail, I found a very thin coat of Mr. Surfacer 1500 could be applied without obscuring the detail. Once applied it was again lightly buffed with 8000 grit.

  2. Working in sections, start the layered ink mottling by lightly wetting the surface with Tamiya X-20A, applied with a flat brush.

  3. Liquitex Titanium White was coarsely applied, staying within the prepared surface to keep the ink in suspension.

  4. Using a deerfoot stippler, slightly moistened and brushed against a clean surface to remove loose fibres, the ink is lightly stippled as it dries until the desired tonal structure is achieved.

The finished effect is pleasingly organic, featuring a mix of hard and soft-edged tonality, while the inks being incredibly thin ensure surface details are preserved.

  1. Profile views were scaled to size and printed on card stock. Using a new scalpel blade, the camouflage pattern was cut out and the pieces tacked to the surface with thin ropes of poster putty, lining up the pattern with the panel lines.

  2. The patterns were pressed gently against the surface until a gap of roughy 1mm was left; the margin of the camouflage was sprayed with Light Ghost Grey (Mr. Color C308) thinned 80:20 with Mr. Levelling Thinner, applied to an opacity of approximately 60-70% coverage.

  3. The masks were removed, and the the Dark Ghost Grey (Mr. Color C307) sprayed freehand to the same 60-70% opacity. With the first application of mottling and base colours on, the surface features a nice subtle mottling. If the final intended finish was that of a well-maintained aircraft, this would be an ideal point at which to move onto recalling and panel line washes.

  4. While the inks and base colour have all been very tin applications, in preparation for the next round of mottling, the surfaces were lightly sanded with 8000 grit sanding sponges to control any surface texture build-up.

  5. Following the same process, the surface was lightly moistened with X-20A, then a dark grey ink mix (50:50 Carbon Black and Titanium White) applied.

  6. The ink was stippled until the desired effect is reached, then wiped away with a cotton swab lightly wetted with X-20A, moving in the direction of airflow, or gravity, as appropriate.

  7. The elements of the hinomarus were cut using a Dspiae circle cutter. The positive mask element was applied to establish proper positioning, then the surrounding mask applied. The same procedure was used when masking the red as well.

  8. Gloss white was applied first, followed by the Red Madder with a 5% of JASDF Dark Offshore Blue added to darken and desaturate the red slightly. The gloss finish was intentional as it would ensure the hinomaru wouldn’t be stained by later steps.

  9. Decals were sourced predominantly from a Platz set, with others from the Platz F-15J stencil set.

  10.  As the decals are quite thin, Microset and Microsol were used in their application; to speed the process and help them conform to surface details, a hairdryer was used frequently to soften and dry them.

Before/After
Here the dark grey ink wash had been stippled and wiped away; not only does the surface have much stronger contrast, the panel lines have already been defined without needing a panel wash; this will be followed by a light second application of the base colours to bring up their saturation

While most Japanese F-15s seem to benefit from superb care and clean airframes, my preference leans towards well-weathered aircraft, and the challenge of interpreting their application.

  1. The distinctive touch-up paint was the first task. To keep track of where paint was to be applied, I marked up a profile view in advance.

  2. Using an Iwata HP-B with a 0.2mm needle/nozzle, I airbrushed the touch-up paint freehand, following the marked-up profile and reference photos showing where additional areas had been painted.

  3. The finished touch-up paint showing the contrast against the darker tone of the layered ink mottling and base colours.

  4. Where touch-up paint has oversprayed the panel lines by the dark grey ink, thinned oil mixes (of Payne’s Grey, Shadow Brown, and Raw Umber) were used to restore them.

  5. Many of the touch-up applications show a slightly darker “bloom” around them. This was achieved by moistening the surface with X-20A, then applying small amounts of dark grey ink around the repainted area, allowing it to dissipate into the surrounding surface, while ensuring the touch-up area remains clean.

  6. Almost ll F-15Js feature a distinctive rosette pattern around the panel latches on the nose. Here, minute dots of dark brown/black oil were applied with a No.0 round brush, then blended lightly with a No.2 round brush, lightly wetted with odourless thinner.

  7. The outboard ailerons feature heavy staining. Much of this effect was imparted during the dark grey layer, shaving the ink directionally rather than stippling.

  8. The effect and build-up was further refined with dark grey oils, using the bulk of the deerfoot stippler hairs to streak, instead of stipple, in this case,
  1. The aft metallic panels were sprayed Gunze Super Fine Silver, followed by a mist coatof GX113 Clear Flat, then a mist coats of Liquitex Carbon Black inks. Small areas of bright silver were created by using X-20A to lift the ink, revealing the Super Fine Silver beneath.
  2. Panels with additional colour saturation were sprayed mist coats of Raw Umber and Burnt Umber inks.
  3. The tonal variation seen in the metallic panels was created by again using thinner on around brush to lift the ink, and this time re-distribute it in mottled patterns. These areas were then sprayed again and the mottling process repeated 2-3 times.
  4. Nozzles sprayed silver, then by NATO Black (XF-69, 90% opacity); Raw Umber ink for carbon fibre panels; varying blacks/dark grey acrylics for other details; highlight metal edges with graphite, add and paint rods; dark grey and black oils for detail wash and streaking on inside.

F-14D Tomcat

Captions for the F-14 article were provided by Scale Aviation, sourced from Super Detailing the F-14 Tomcat.

Lavochkin La-5

For this winter La-5 , I wanted to keep most of the whitewash intact. At the same time, I wanted to avoid a monochromatic finish through the chipping through to the green base camp, along with the build up of reddish dust of European earth. Also, This project used no working references, instead being a test of my weathering interpretations, with the results measured against photos only once finished.

  1. Over a loosely applied base coat of Mr. Color lacquer, chipping fluid and Tamiya acrylics were sprayed. High-wear areas were chipped with an old brush and airbrush needle, while 6000 grit abrasive was used to represent abrasion.
  2. Oils mapping was used to increase saturation of the greens, and with faded white, to blend and soften the edges of the chipping. The metal panel is Super Fine Silver, stained with Raw and Burnt Umber oils to represent heat staining.
  3. Abteilung 502 Dust, Light Mud, and Earth oils were addled in diffuse layers to represent dust accumulation along the lower fuselage. The metal was further layered with oils, pin addition to exhaust staining and speckling with grey/black oils.
  4. The same earth-tone oils were used to build up dust accumulation on the underside, concentrated through the central section were it was kicked up by the prop and wheels, followed by streaking with Raw Umber and dark grey oils.
  5. The aerial mounts were made from fine copper wire wrapped around an acupuncture needle. Another short length of wire was twisted into a small loop, the tag ends inserted through the spring, and each glued to the masts.

Seafire Mk.46

Of all the pre-painting techniques, airbrush is likely the most versatile. I can spray a range of tonal patterns from dense and complex to soft and diffuse. At the same time I can introduce a wide range of colour variation from panel to panel, for maximum variety and control of my effects.

  1. Vertical and low-to-no-traffic surfaces tend to see less tonal variety, so a soft diffuse pattern is more  appropriate here. Over Mr. Surfacer 1500 Black, I sprayed a loose, random pattern with a light grey.
  2. On horizontal surfaces, such as wings, the combination of traffic and environment can impart a complex series of effects. Here, I’ll spray almost millimetre by millimetre, varying the intensity panel by panel. Consistent highlighting of specific edges can also suggest a stressed skin effect.
  3. Camoflage colours — Extra Dark Sea Grey (C333) and Dark Slate Grey (C38 + C40 mix) — are applied highly thinned to ensure total control of coverage, and preservation of the mottling beneath.
  4. Oil mapping with a variety of greys, greens and browns from Abteilung 502 is used to highlight specific panels and add weathering effects. The left wing is well underway, and shows the difference to the untouched right wing.

Hellcat Mk.II

Rivet decals are a great solution to the challenge of presenting positive rivets in 1/72 subjects. The silver-toned decals apply easily, and once the carrier film is removed, provide a subtle and realistic effect once painted over — especially once lightly abraded — restoring a distinctive surface feature to this aircraft.

  1. Riveting set 721010 is comprises about two dozen decals designed specifically for the Eduard kit, which it fits almost perfectly, plus a few single strips for specific areas.
  2. Once the surface was pre-painted — doing so in advance avoids build-up obscuring the thin inks — each section of decal was applied, lining it up with the appropriate panel lines before decal softeners were applied to ensure good adhesion.
  3. Once completely dry, the carrier film was carefully removed. The film tends to draw down to the surface on its own, so it’s important to leave a small tab proud of the surface to facilitate it’s removal.
Posted on

My first book! Super Detailing the F-14 Tomcat

NEWS

My first book!
Super Detailing the F-14 Tomcat

I’m ecstatic to announce my first book, ‘Super Detailing the F-14 Tomcat’, published by Dai Nippon Kaiga out of Japan.

The catalyst for this publication is an article I produced for Scale Aviation magazine No. 145, in which I provided my approach to super-detailing high-value areas of Tamiya’s 1/48 F-14D Tomcat. It was later proposed that I finish the kit, and carry the theme forward into a book. And, well, here it is.

Important to note, while the focus of this book is the Tomcat, most of techniques and approaches used are equally well-suited to most aircraft from WWII onwards.

‘Super Detailing the F-14 Tomcat’ is a full-colour, 128-page, A4-softcover book chronicling my efforts to enhance many of the detail-rich areas available on Tamiya’s F-14D Tomcat, including the cockpit tub, ejection seats, main and nose landing gear legs, main and nose gear wells, intakes, exhaust nozzles, and various airframe details. Also featured is a new technique I developed for achieving a realistic base patina for modern US Navy aircraft, and a brief look at some complementary weathering techniques (a deep dive into weathering would likely need it’s own book!)

In addition to hundreds of work-in-progress photos, the book lists many of the tools and techniques I employed, information about Tomcat kits and products, along with 4 mini-profiles of other kits I’ve made in the past few years.

Content is presented in both English and Japanese, with all English written either by an English-speaking editor or by myself (as opposed to machine-generated translation), and the book is bound in conventional western format.

Release date is August 2, 2023.

At a Glance

  • 128 pages
  • Full colour
  • A4 softcover format
  • English/Japanese captioned throughout
  • Western (left-side) binding
Posted on

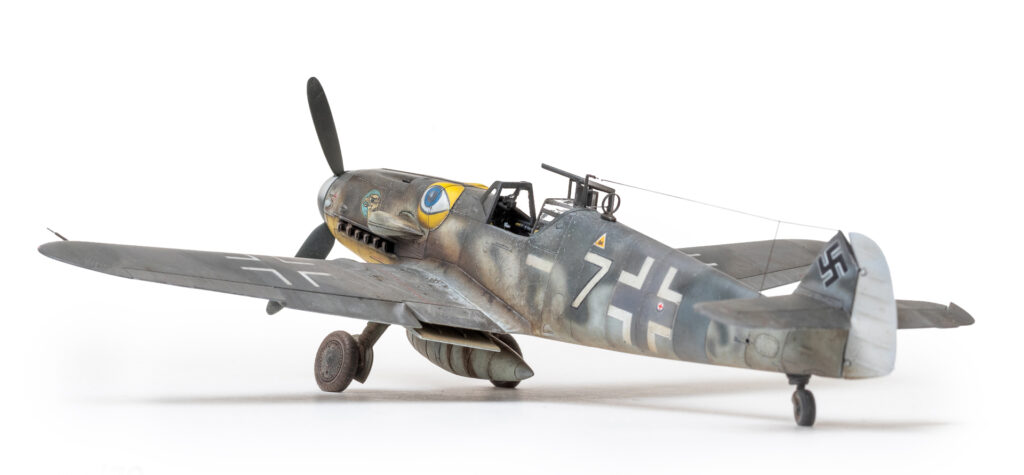
Tamiya Bf109G-6

Messerschmitt Bf109G-6

Tamiya
1/72
Includes: Master Model brass cannon and pitot tube, Quickboost exhausts

I bought this kit as my first aircraft build on returning to the hobby a couple years back. I figured a Tamiya kit would be perfect for both remembering forgotten skills, and trying out techniques that had become popular in the decade that I was away… And in that regard it certainly didn’t disappoint. 

All that said, it does make writing a build diary all the more challenging when the build has been picked up and put down multiple times, and even placed on hold entirely while I hacked away on a “lesser” kit (the Special Hobby Seafire Mk. 46) when I felt I wasn’t doing the 109 justice. So fair warning if it’s disjointed in parts. 

Carrying on…

Dry-fitting

No photos from the dry-fit phase, though do I remember these details well enough. Being Tamiya, fit is great. Being new-tool Tamiya, human intervention will only ruin lead to ruin.

Being used to giving mating surfaces a light swipe with a sanding stick, doing so here without first checking the fit meant that I created the slightest gaps that, otherwise, would have been perfect.

The fit of the wing to fuselage being s precise, when I build my next one, I’m keen to try painting and weathering the wing and fuselage separately, bringing them together once full finished.

Gallery

Gallery

Cockpit

The cockpit is nicely detailed for the scale, though the finished result strikes me as being a bit ‘chunky’ overall. I opted to add a few details, in the form of copper wire and short lengths of brass rod, along with photo etch straps on the rudder pedals.

Once assembled, the cockpit was sprayed in AK Real Color RLM 66, lightened with a bit of light grey. Colour details were picked out by brush following references, with depth being added through a pin wash of Raw Umber and Payne’s Grey, while edges, scratches, and wear were done with a light grey oil paint. The final step was to add some earth tone pigments around the cockpit floor.

The one let-down from Tamiya in this area was the out-of-register decal for the instrument panel. This will end up being one of several “regrets” I’ll come to have with  aspects of the fit not matching with the final finish.

Airframe

As mentioned at the outset, the airframe comes together perfectly, with any glitches in fit being my fault for old habits in pre-emptively giving every mating surface a quick swipe with a sanding stick. Moulding is crisp, panel lines are delicate and sharp, however, in contrast to what we’re seeing form some other manufacturers in 1/72, inclusion of rivets is restrained.

Airframe

Moulding is crisp, panel lines are delicate and sharp, however, in contrast to what we’re seeing form some other manufacturers in 1/72, inclusion of rivets is restrained.

As mentioned at the outset, the airframe comes together perfectly, with any glitches in fit being my fault for old habits in pre-emptively giving every mating surface a quick swipe with a sanding stick. The one seam that really needs any attention is the aft joint between the lower wing and fuselage, and even this is minimal.

I opted to make slight alterations to the airframe The flaps were cut and dropped to add a little visual interest, while  the rudder was also given a slight offset. The wheel wells were sprayed RLM 02, and the zippered shrouds sprayed in a natural leather colour. The wing radiator interior likewise received a coat of RLM 02, while the radiators themselves employed a trompe l’ceil effect to represent the grilles. After a coat of Alclad Flat Aluminum, fine mesh from Tameo was held against the radiator face, and Tamiya Rubber Black sprayed through. The effect when seen through a 1.5mm gap is sufficiently convincing. Subtle silver chipping was added to raised detail in the wheel wells, before both they and the radiators shrouds were weathered with Raw Umber, Dark Mud, and Earth oil paints.

Navigation lights were molded in on the wing tips, so these were cut away and replaced with shaped off-cuts of clear sprue. The lights on the 1:1 aircraft are coloured bulbs within car shrouds. Once the inside faces of the clear sprue are finished, a small hole being drilled along the inside face and filled with red and green Tamiya before being glued in place.